| Audience | Marketers, platform admins |
| Prerequisites |
Templates are the layouts the agent builds messages on top of. Import your existing email HTML and save finished messages back to the library for reuse.
Overview
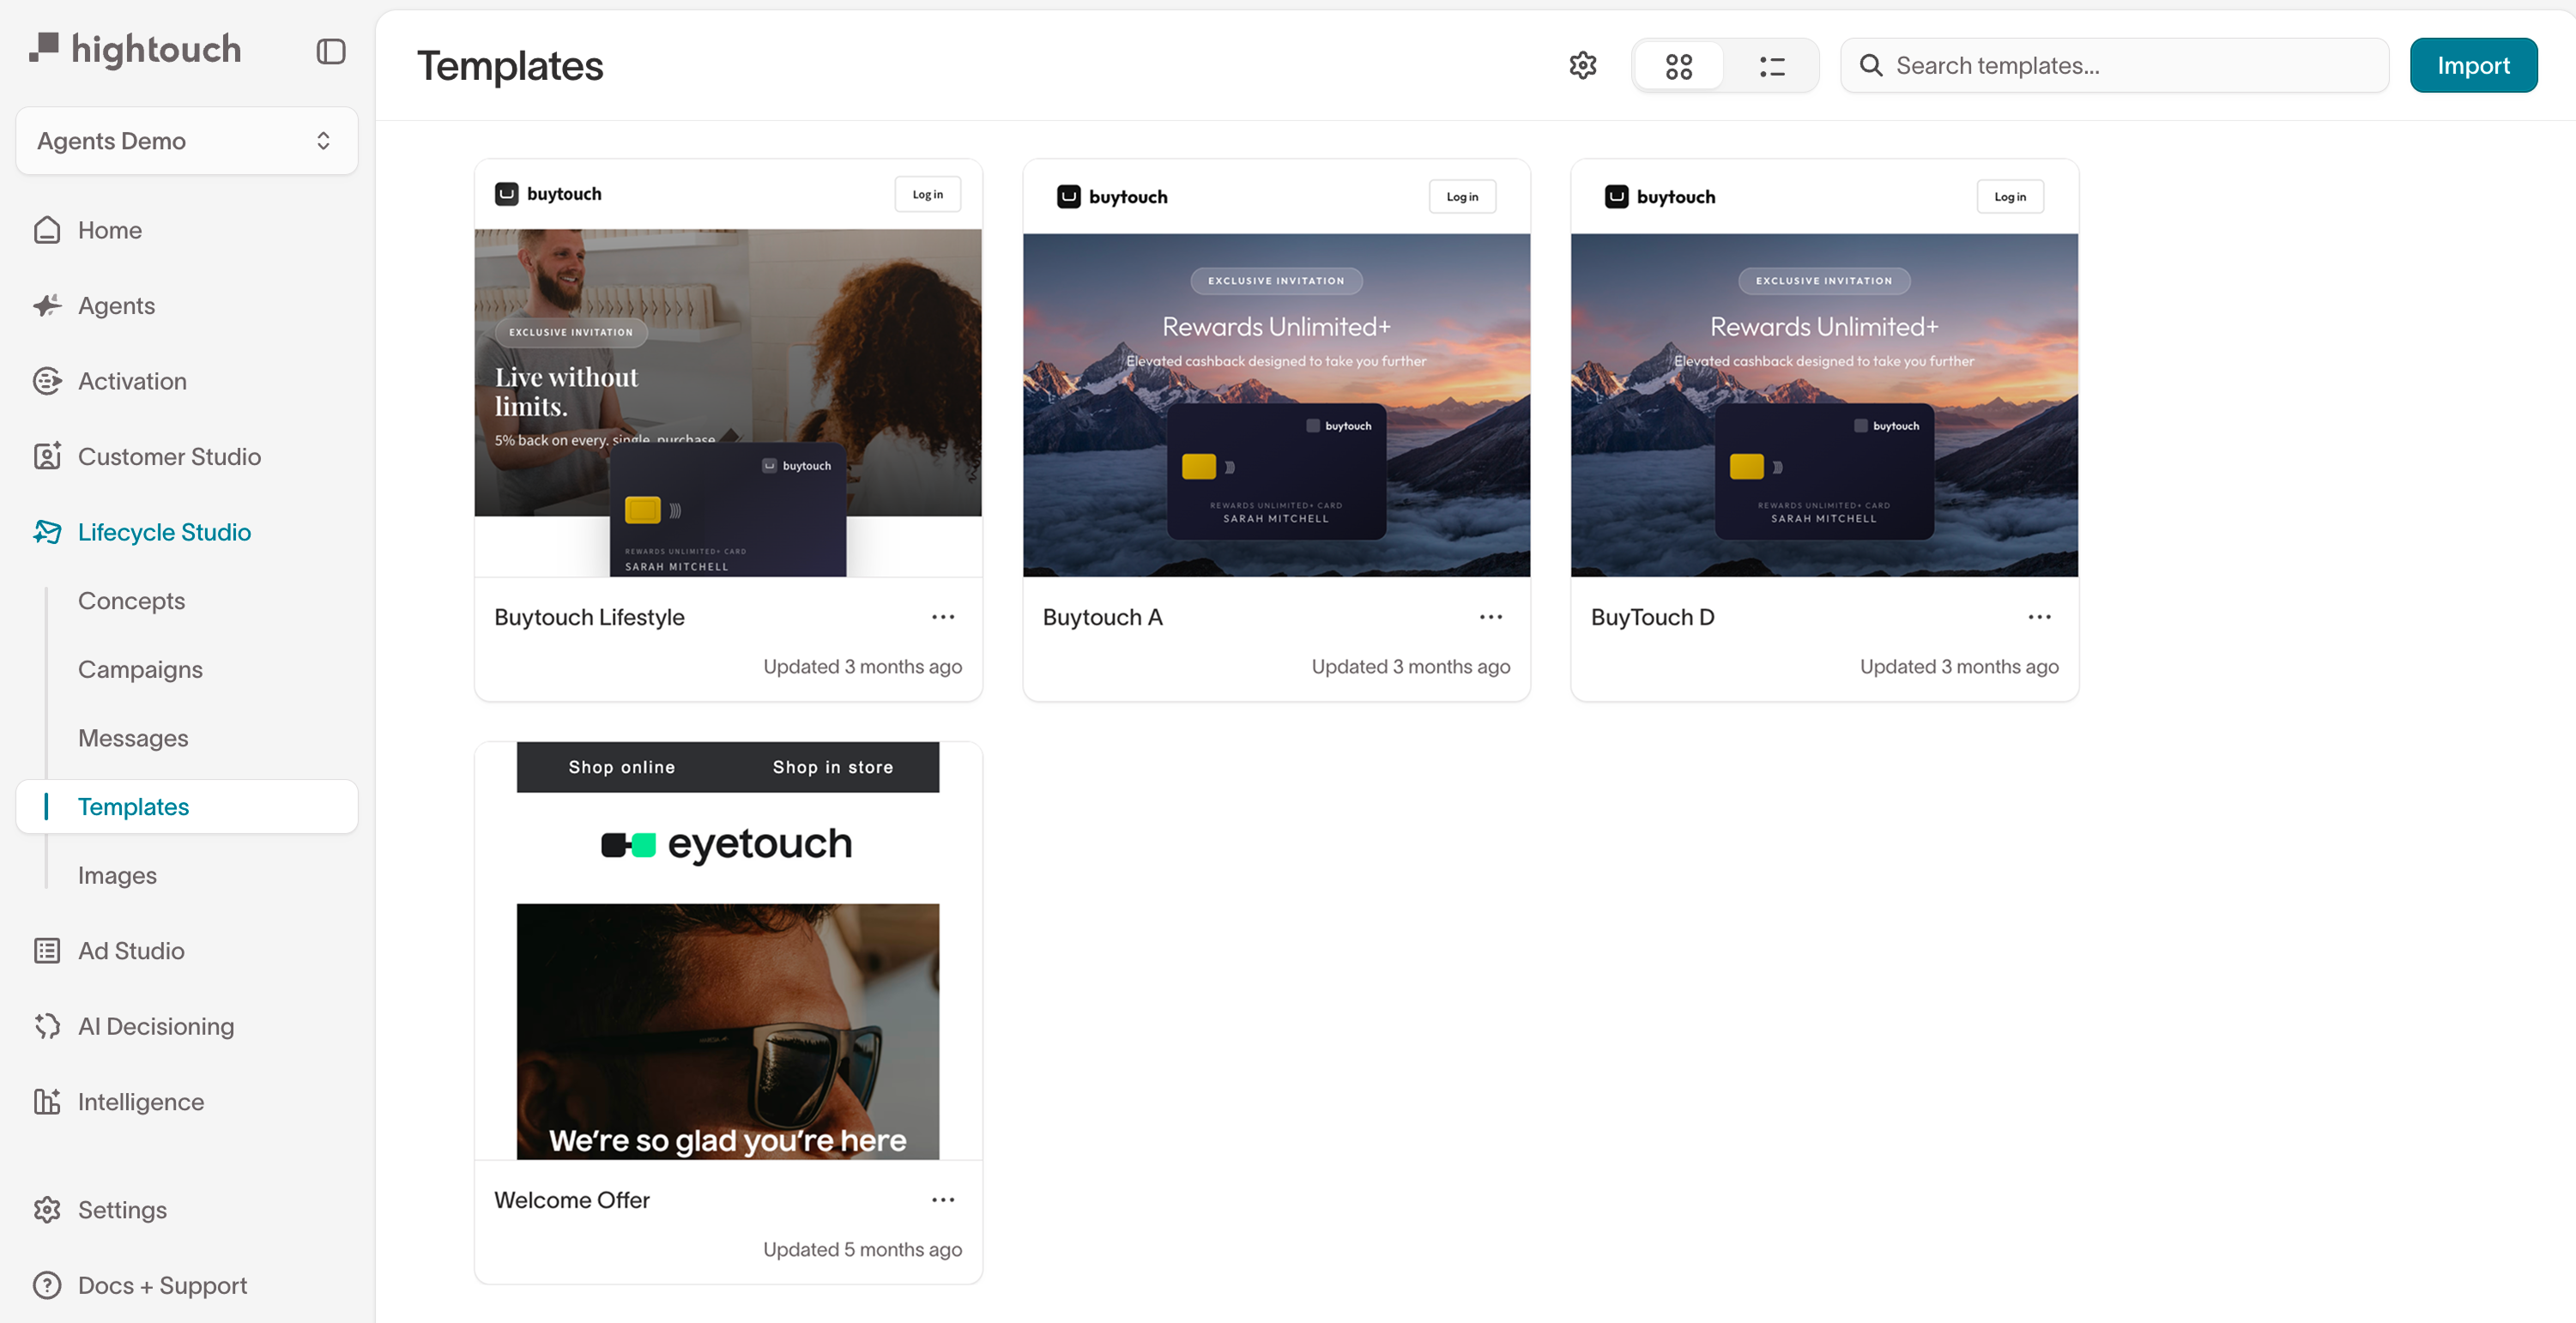
Templates provide the layout and structural foundation for generated messages. When the agent creates an email, whether from a message or a campaign, it builds the content on top of a template from this library.
Templates are different from brand guidelines. Brand guidelines (configured in Context Hub) control tone, voice, and visual rules. Templates control the structural layout: header placement, section order, CTA positioning, and responsive behavior.
Import templates
Go to Lifecycle Studio → Templates and select Import template. You can import from three sources:
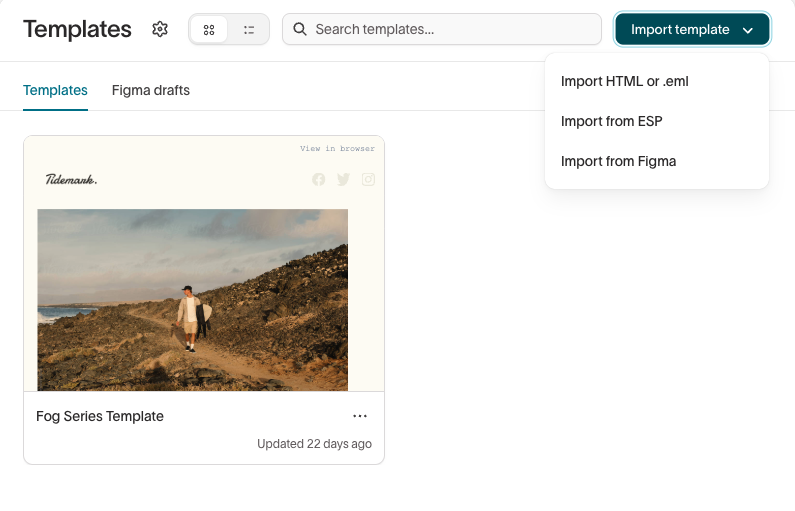
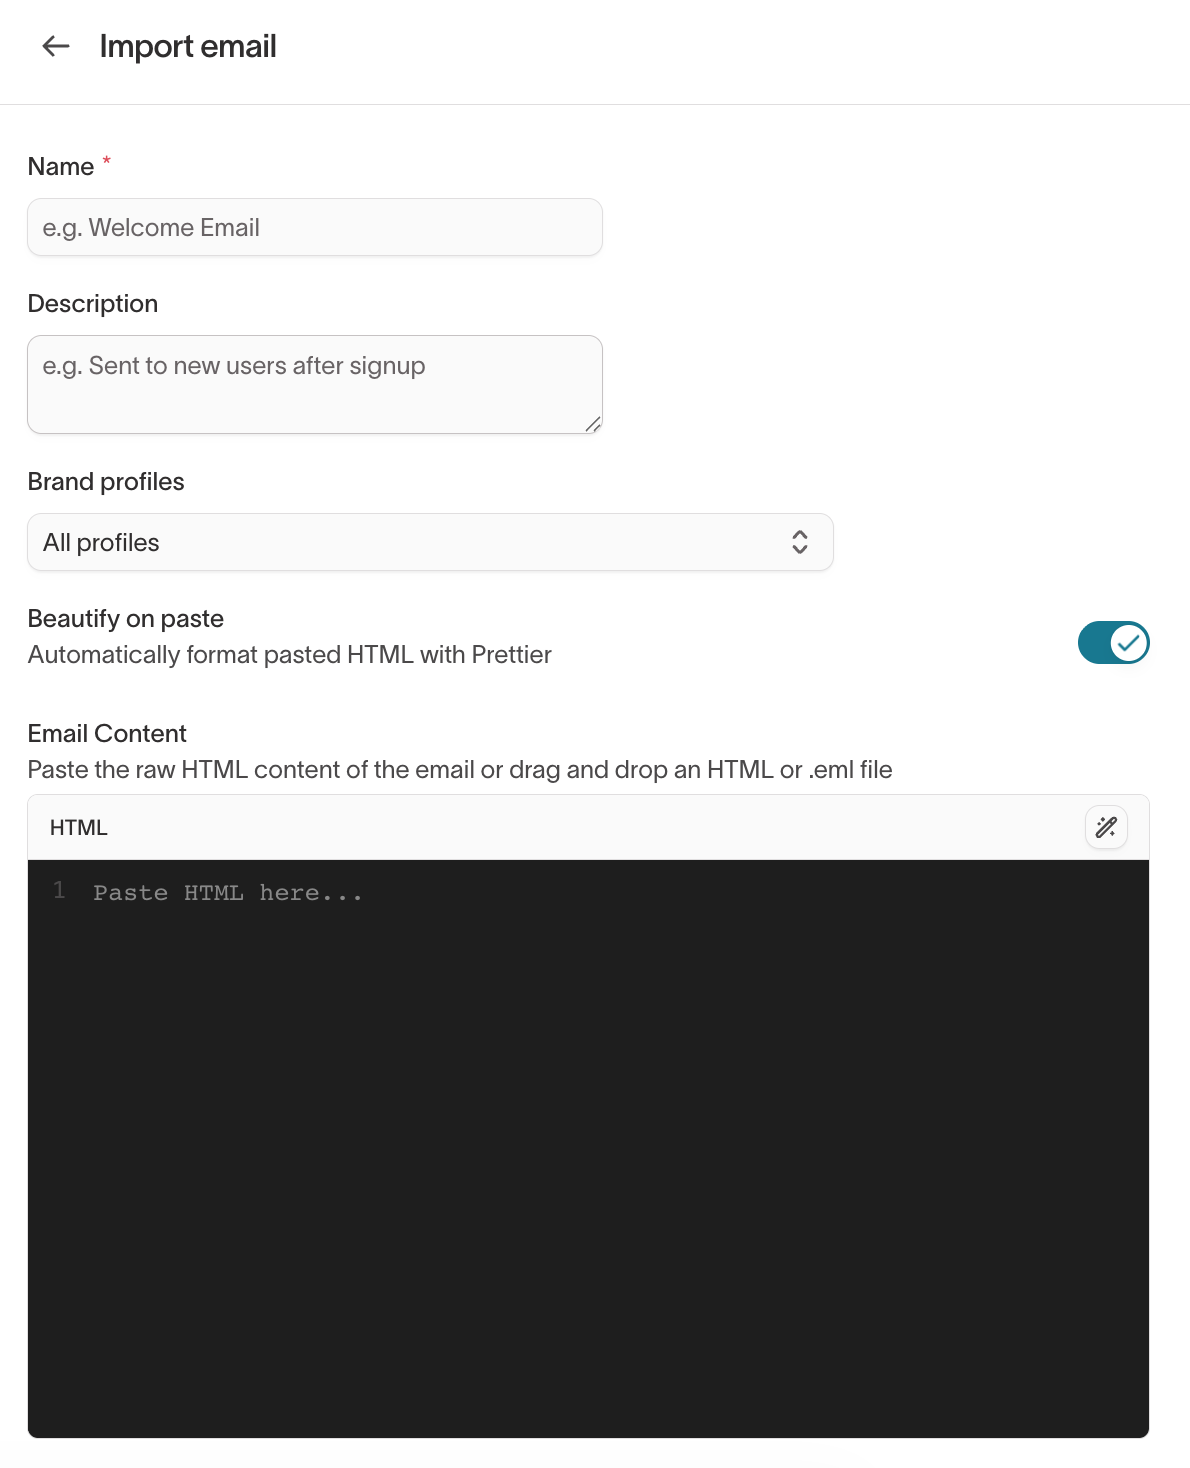
- Import HTML or .eml — Paste raw HTML or drag and drop an HTML or .eml file. Give the template a name and description, assign it to one or more brand profiles, and optionally enable Beautify on paste to auto-format the HTML.
- Import from ESP — Pull existing templates directly from a connected email service provider. This option requires a provider connection configured in Context Hub. See Import from ESP.
- Import from Figma — Import a Figma frame as an editable draft you can promote to a template or component. This requires a Figma connection in Context Hub. See Import from Figma.
Import a range of template styles that cover your main campaign types: promotional, transactional, editorial, and notification. The agent selects templates based on the campaign context and message content, so a varied library produces more varied output.
Import from ESP
Import existing email templates from a connected email service provider (ESP) into your library. This requires an ESP connection. Set one up in Context Hub first.
- Go to Lifecycle Studio → Templates and select Import template → Import from ESP.
- Choose an email provider. If you don't have one connected, select Connect your ESP to add a destination first.
- Find the connected destination and select View Templates.
- In the Browse Email Templates dialog, search for the templates you want and select one or more. Select a row to preview its subject line, preheader, tags, and HTML.
- Optionally assign the templates to one or more brand profiles, then select Import.
Import from Figma
Design teams often build email layouts in Figma before they exist as HTML. The Figma import recreates a frame as an editable email draft. It rebuilds the layout and separates the design into editable layers for images, backgrounds, text, and copy, so you can adjust the result in the email editor instead of rebuilding it by hand. You then promote the draft to a template or a reusable component.
Imported designs land in the Figma drafts tab on the Templates page. Preview a draft, refine it in the editor if you need to, then promote it into your library.
Connect Figma
Before your first import, connect Figma in Context Hub. You need a Figma personal access token from a user with a Figma Dev or Full seat.
- In Figma, create a personal access token.
- In Hightouch, go to Context Hub → Connections → Digital Asset Managers and select Figma Designs.
- Enter your personal access token and select Save token, then use Test connection to confirm it works.
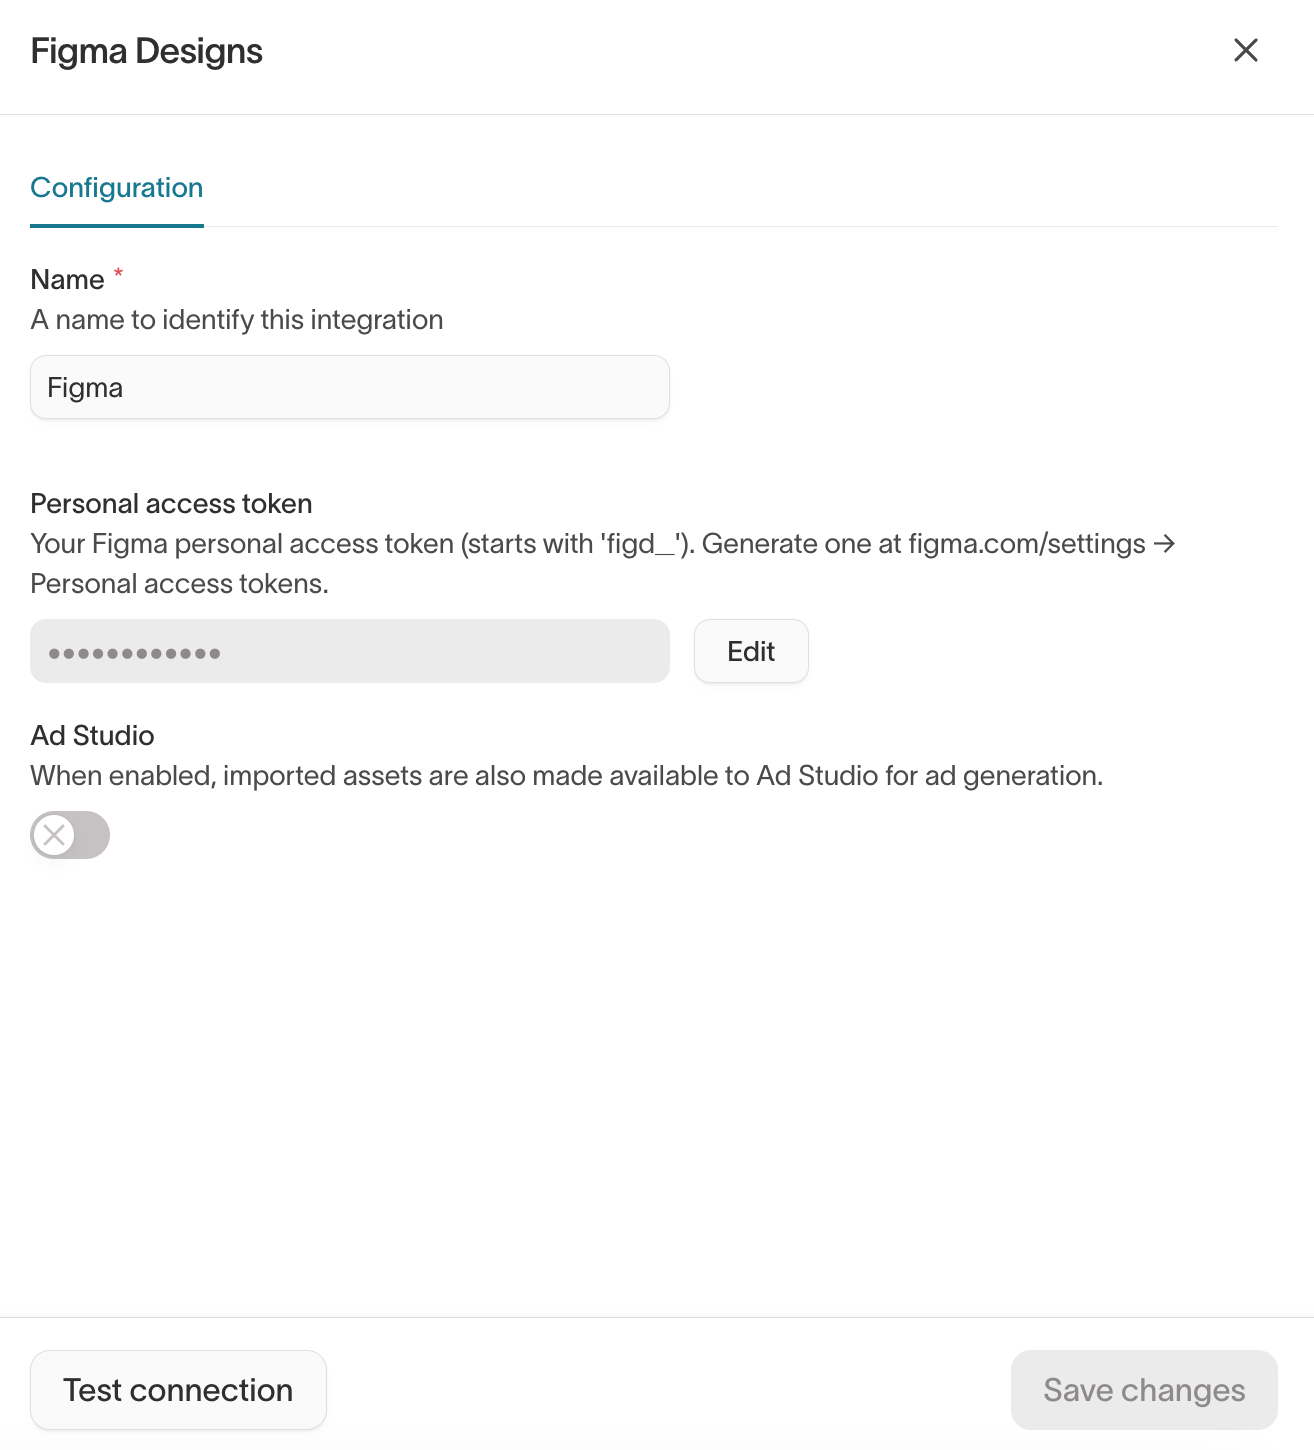
The Figma connection lives alongside your other digital asset managers in Context Hub.
Import a frame
- Go to Lifecycle Studio → Templates and select Import template → Import from Figma.
- Enter a Template name.
- Paste the Figma frame URL for the design you want to import.
- To import a two-frame responsive design, also paste a Mobile frame URL. This is optional.
- Select Start import.
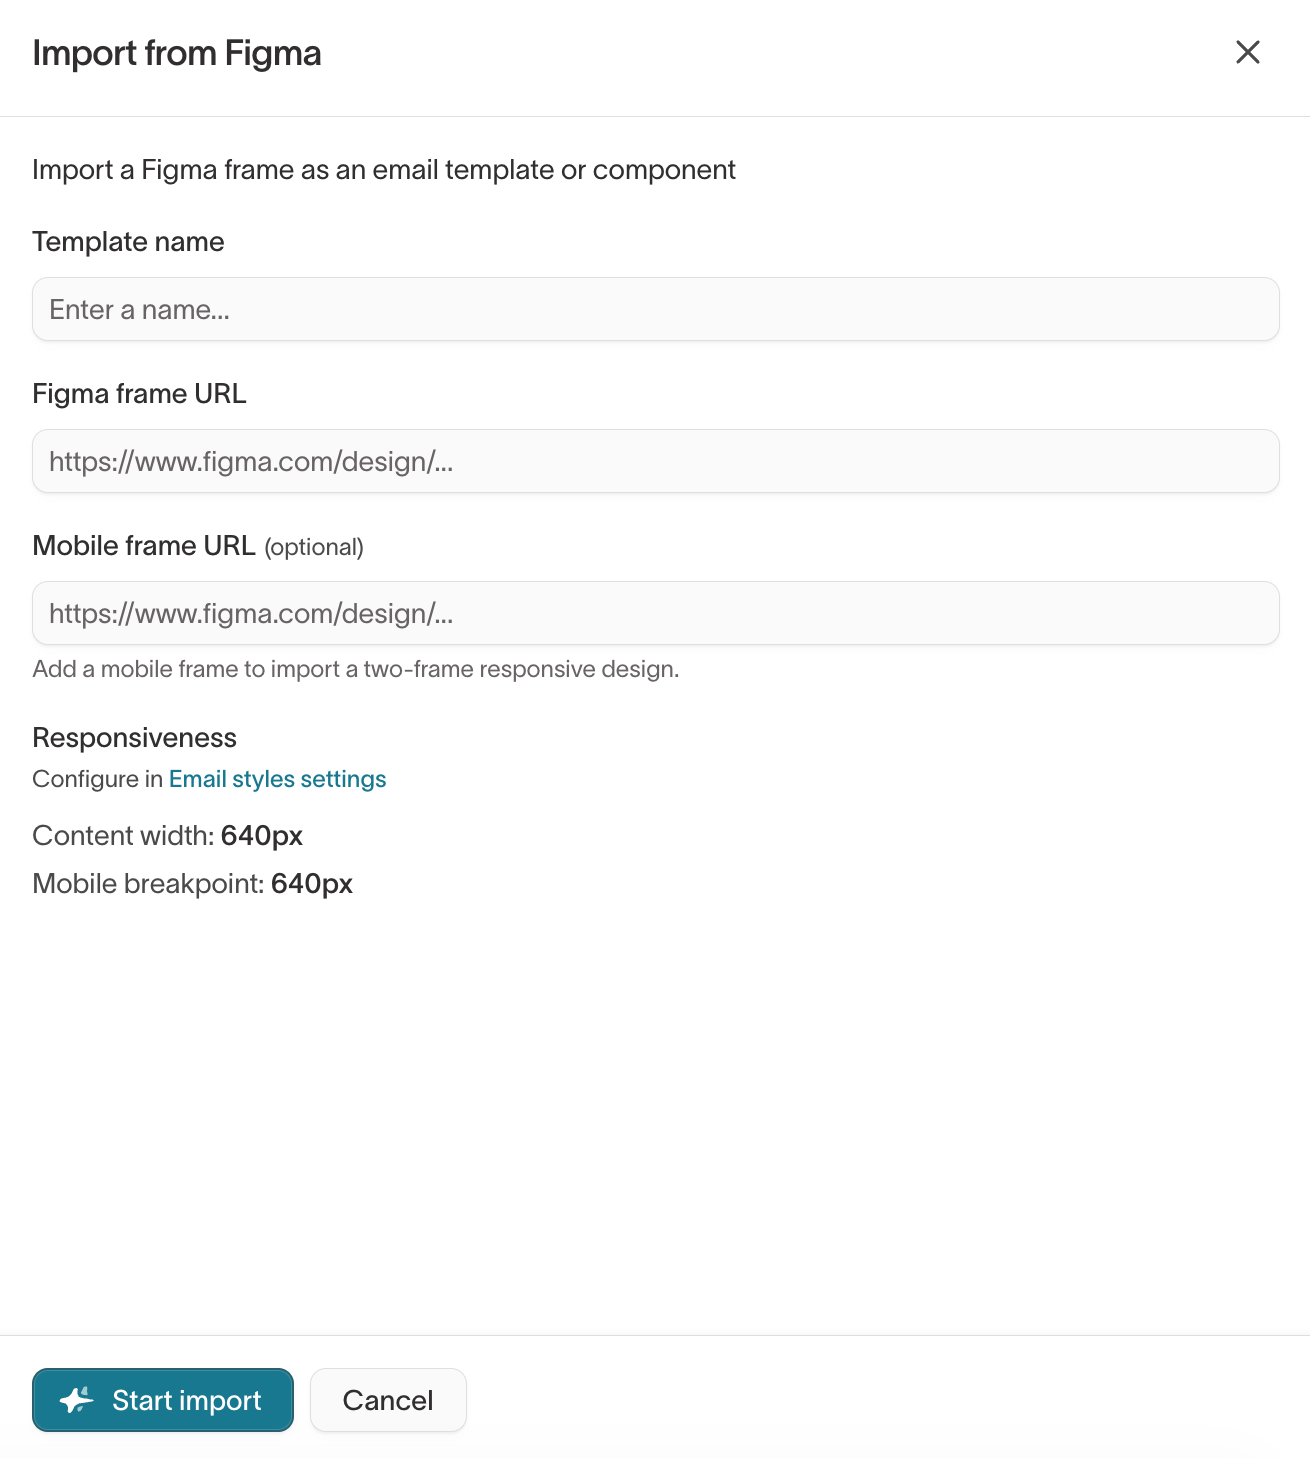
The import runs in the background and appears in the Figma drafts tab. Open a draft to preview it, and select Edit to refine it in the email editor, where you can adjust any layer, copy, or color, or iterate with the agent chat. When the draft is ready, select Promote → Promote to template or Promote to component to move it into your library.
Recommended Figma design practices
Import quality depends on how the source file is built. For the best results, structure your Figma file so the agent can interpret it cleanly:
- Use auto layout for structured sections.
- Name layers clearly so the agent can identify each element.
- Apply tokens for text and color.
Files that are missing these elements still import, but you're more likely to need manual edits afterward to match the original design.
Review the best practice analysis
When you import or edit a template, Lifecycle Studio checks its HTML against a set of email best practices and fixes issues that affect how the email renders across clients. The checks cover compatibility (such as Outlook), mobile responsiveness, CSS patterns, dark mode, accessibility, and structure.
Open a template and select View best practice analysis to see a before-and-after comparison of what the agent changed and why.
You control which rules apply in Context Hub under Best Practices. Turn off any rules that don't fit your templates.
Control which templates the agent uses
Each template has an Enabled for Agents toggle. Turn it on to let the agent choose that template when generating messages, or off to keep a template in your library without using it for generation. Use this to curate the layouts the agent draws from, so one-off or seasonal templates stay out of everyday generation.
Save a message as a template
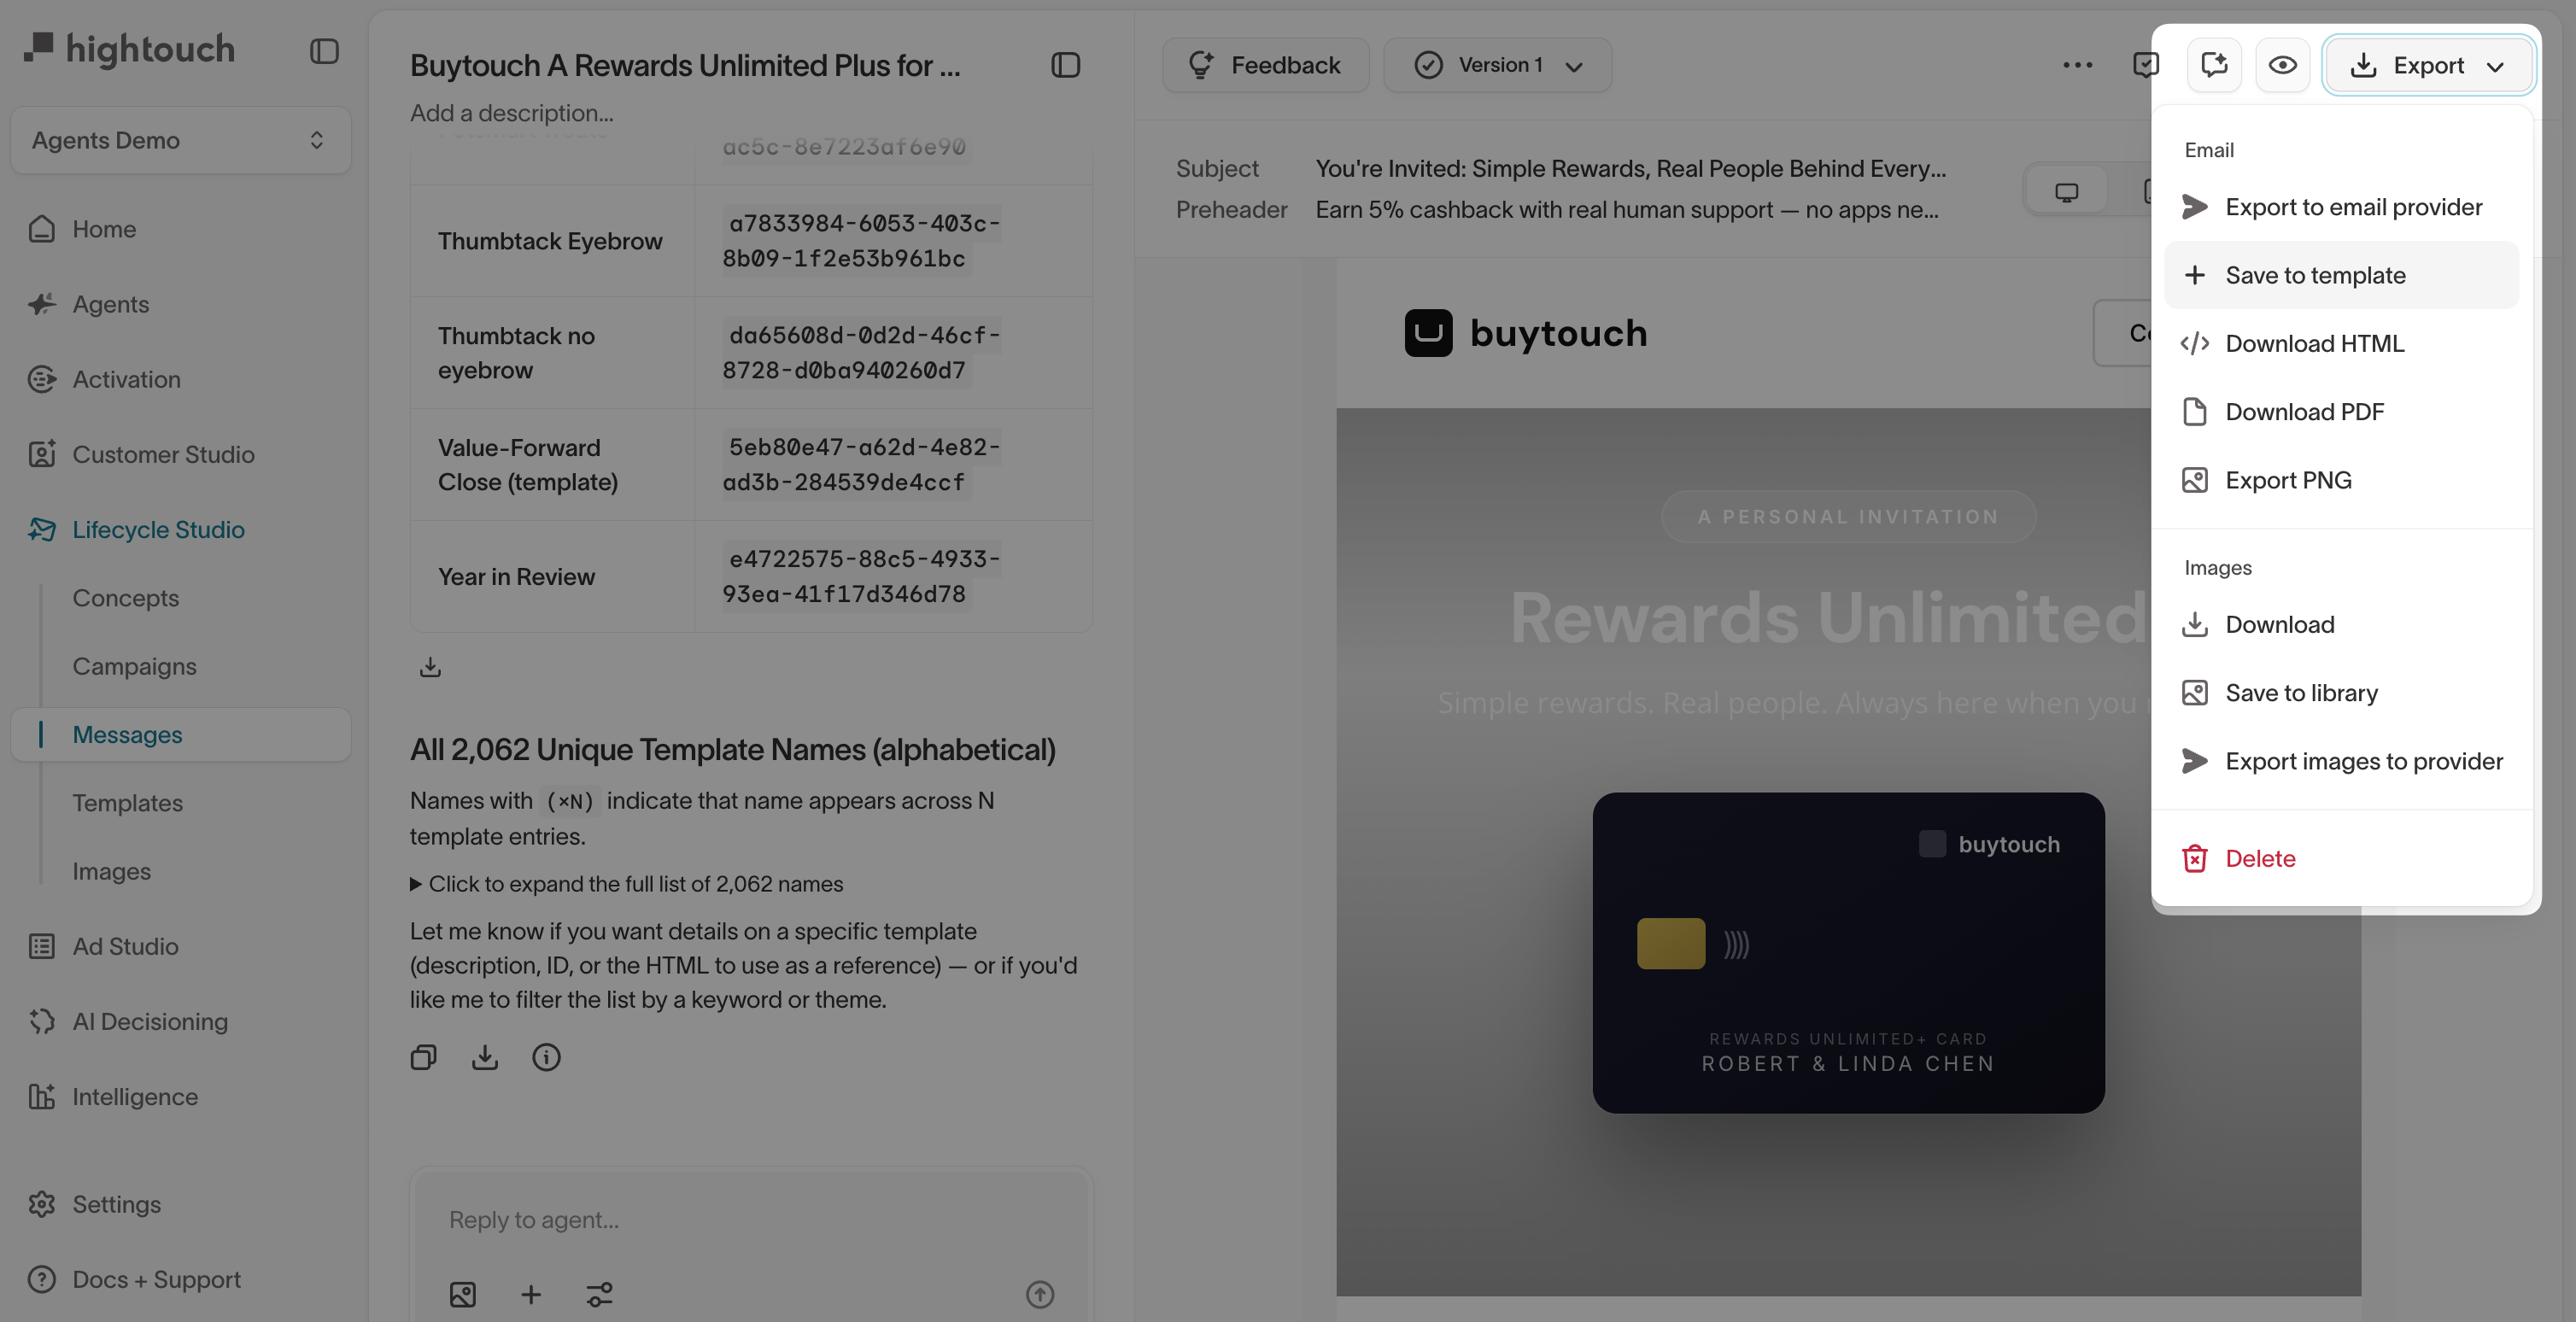
You can save any finished message back to the template library from the message editor. This is useful when you want to reuse a generated layout in future messages.
To save a message as a template:
- Open the message in the editor.
- Select the Export dropdown and select Save to template.
- Enter a name for the new template.