Connect to any internal system, third-party API, or other web service.
Overview
We designed the HTTP Request destination to be as flexible as possible. We want our customers to build their own integrations with third-party APIs, internal tools, and other services not yet supported in our growing catalog of 250+ native destinations.
This destination empowers you to integrate Hightouch with almost any API without writing code. Using our visual interface, you can exercise granular control over HTTP endpoints, request payloads, rate limits, concurrency limits, error handling, and more.
Under the hood, the HTTP Request destination leverages Hightouch's powerful sync engine, so you continue to benefit from the security and observability features available in all our native destinations.
This article provides a technical overview of how the HTTP Request destination works. Skip to the guided tutorial showing how to create a custom integration with Algolia's REST API if you want to follow along with an example.
It's strictly prohibited to use the HTTP request destination to replicate functionality already supported by a native destination.
Setup
Hightouch queries your data source and monitors the query results for added rows, changed rows, and/or removed rows. When configuring the HTTP Request destination, you specify which of these events should trigger an HTTP request. For each trigger, you then specify an endpoint, payload, and other parameters.
To help Hightouch play nicely with other services, you can also specify constraints such as rate limits, concurrency limits, and error handling logic. You can configure all this in the Hightouch app—no code required.

Let's walk through the process to see how it works.
Create a new destination
Go to the Destinations overview page and click the Add destination button. Select HTTP Request and click Continue.
Next, the UI prompts you to enter a base URL, HTTP headers, and certificate. Only the base URL is required.
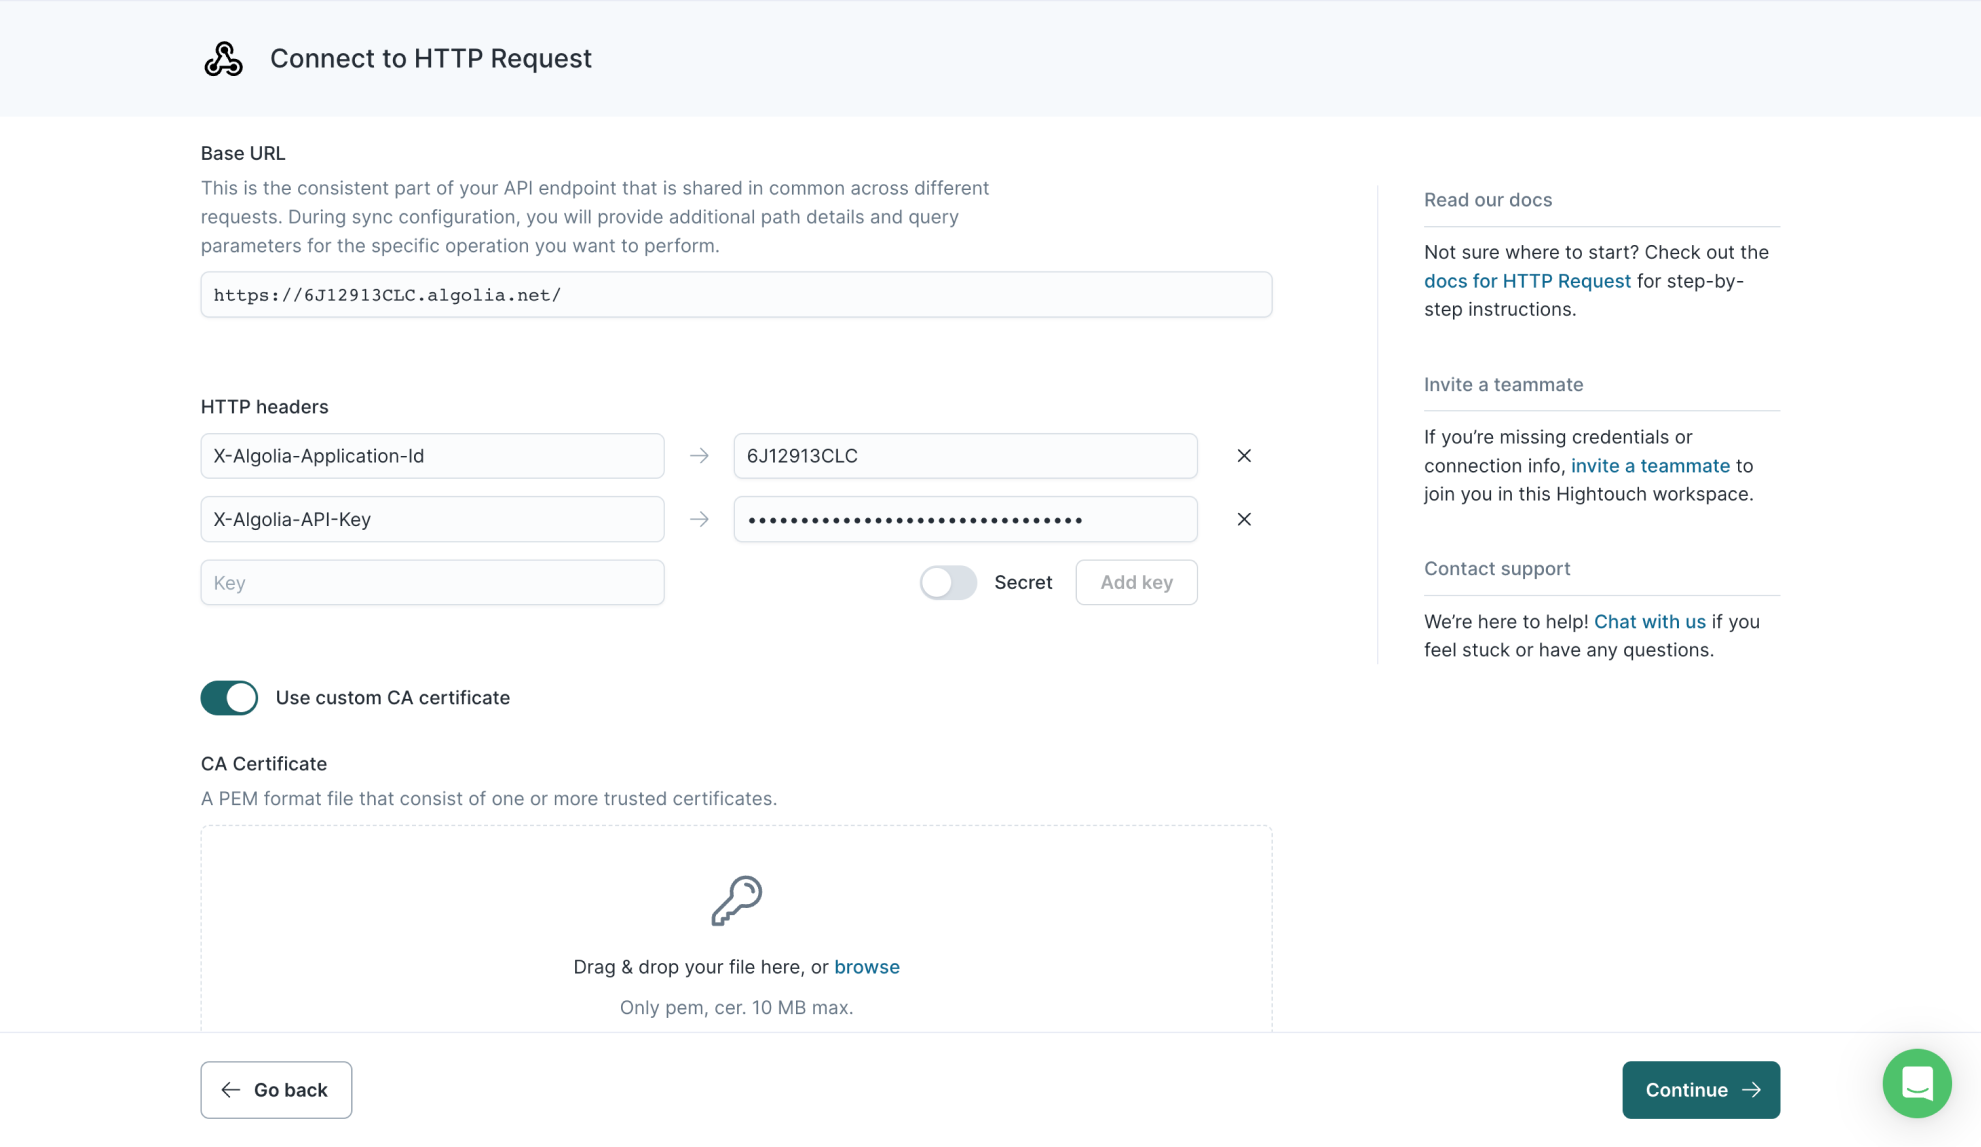
You'll configure specific endpoints, payloads, rate limits, and other logic during your sync configuration.
That means you can create one HTTP destination per service and multiple sync configurations for different endpoints you want to make requests to.
Add base URL
The base URL is the static part of the API endpoint you plan on making requests to.
For example, if you plan on using the Algolia REST API, the base URL would be https://{Application-ID}-dsn.algolia.net.
During sync configuration, you provide additional path details and query parameters for the specific operations you want to perform.
Add HTTP headers
You can optionally provide headers to include in each outbound HTTP request. These headers often include access tokens used for authentication.
To enter a header, enter its key name in the input. If you want a header property to be obscured in the UI and encrypted in storage, select the Secret checkbox. Click Add key, then enter the key's value in the input that appears to the right. Repeat this for as many headers as you want to add.

If you need to fetch a new token during each sync, consider using OAuth for authentication. You can also consider using one of our serverless function destinations, for example, AWS Lambda.
Add certificates
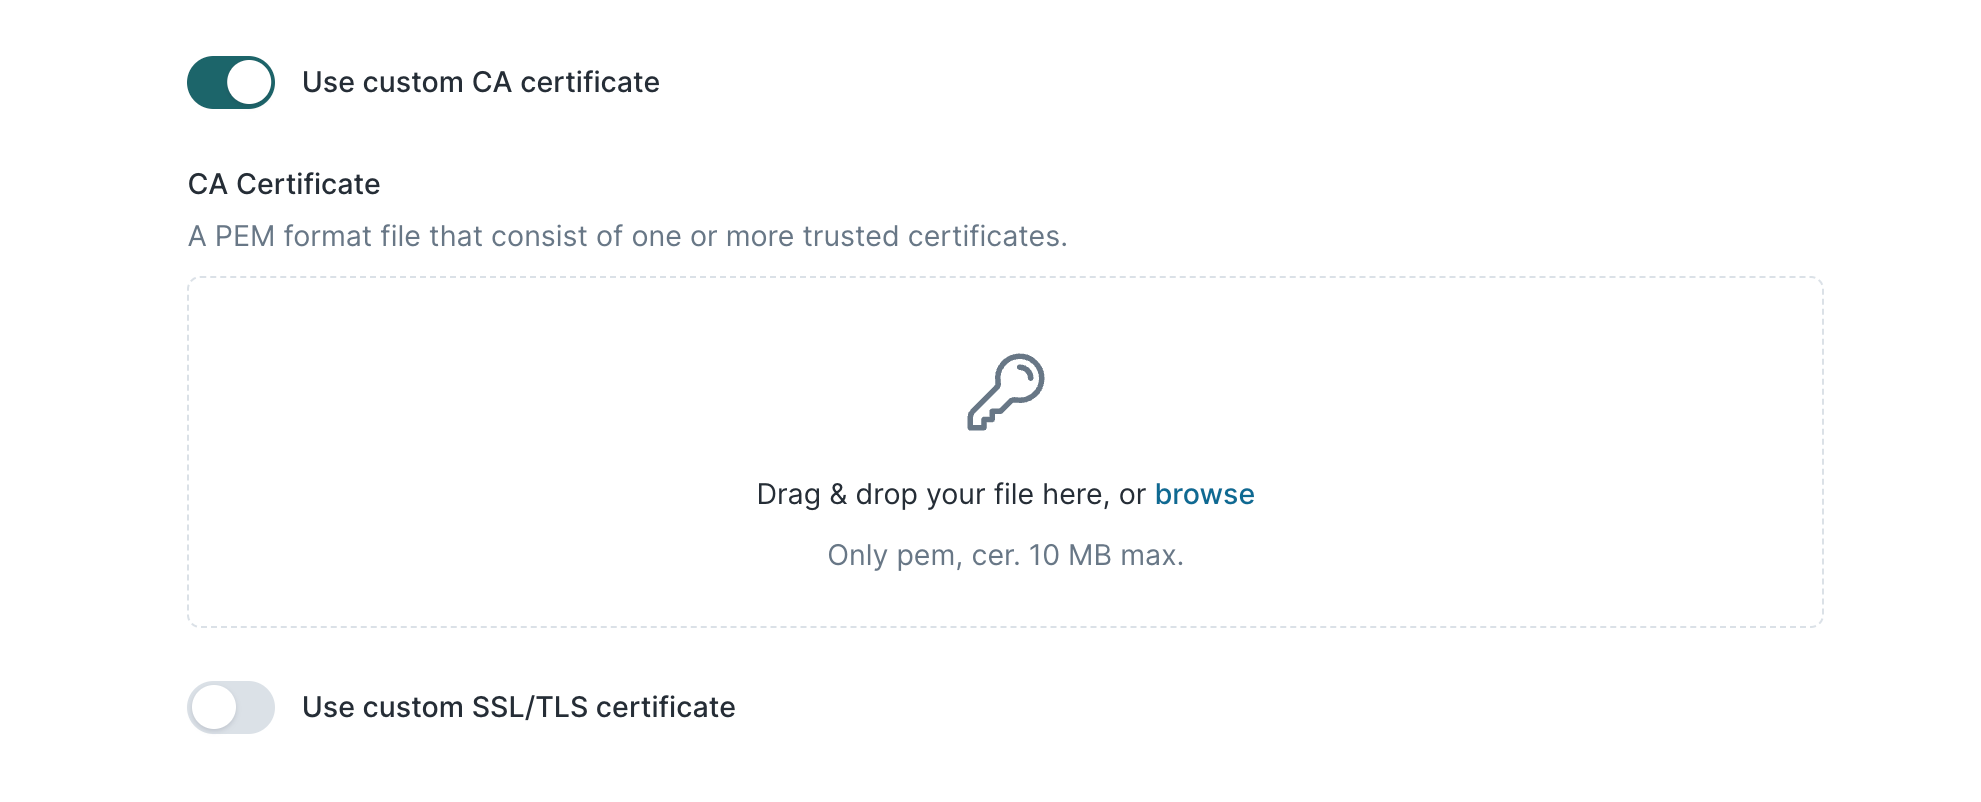
You can optionally add a custom CA, SSL, or TLS certificate. Enable the relevant toggle and upload your certificate files. Certificates can have a maximum size of 10 MB.
OAuth
We also support OAuth authentication. OAuth implementations can vary between providers, so we recommend using a tool like Postman to test the token refresh process end-to-end. Once you've confirmed that you're able to fetch access tokens and authorize requests using Postman, you can copy your Postman configuration into Hightouch verbatim.
Hightouch supports the following grant types:
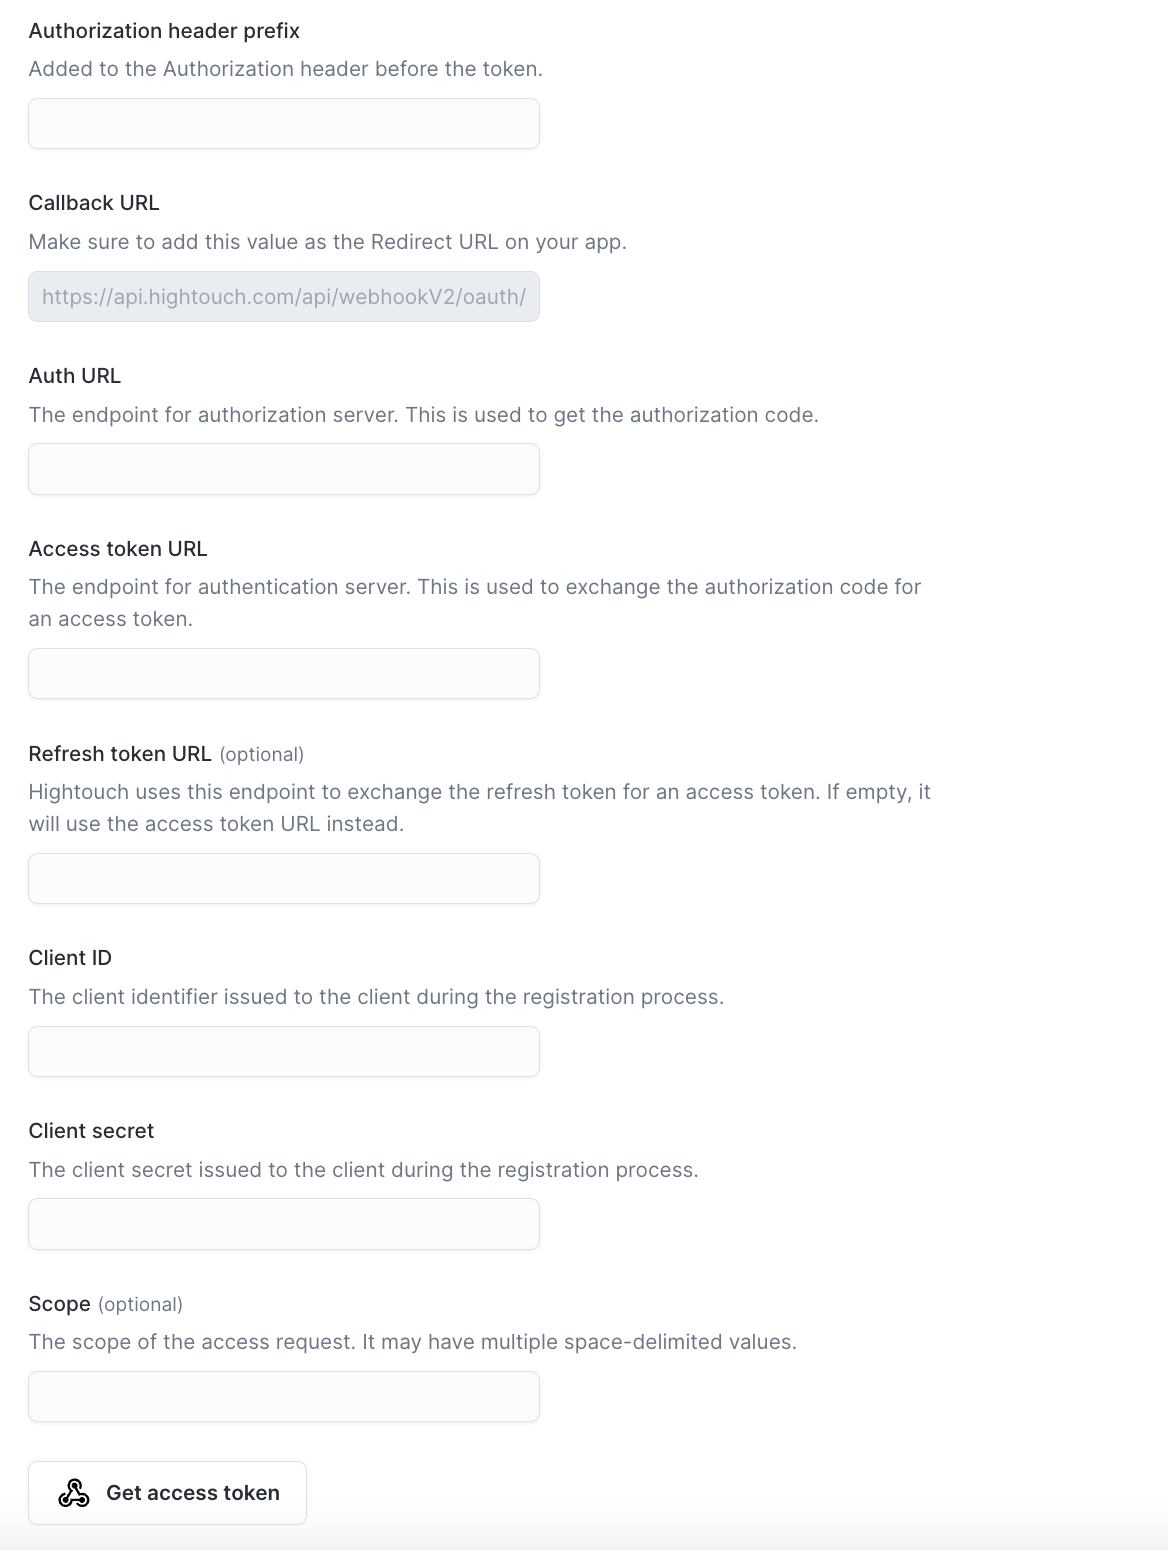
When setting up OAuth, you'll need to provide the following information:
-
Authorization header prefix (optional): Specify the prefix for the Authorization header (for example, "Bearer").
-
Auth URL: Required for authorization code grant type. The URL used to get the authorization code.
-
Access token URL: The URL used to get an access token.
-
Refresh token URL (optional): If different from
Access token URL, provide theRefresh token URL. -
Client ID: The client identifier issued during the registration process.
-
Client Secret: The client secret issued during the registration process.
-
Scopes (optional): If your OAuth provider requires specific scopes.
-
Client authentication: Choose to include the credentials as a header or in the request body.
To complete the OAuth setup, make sure to add the following Callback URL to your OAuth app: https://api.hightouch.com/api/webhookV2/oauth/callback.
Advanced configurations
During the OAuth flow, multiple requests are made to retrieve or refresh access tokens. Configure the following options to include additional headers, URL parameters, or values in the request body.
-
Authorization request URL parameters: URL parameters sent in the Auth URL for the authorization code grant type.
-
Token request: Additional parameters and values sent with the request to the Access token URL.
-
Refresh request: Additional parameters and values sent with the refresh token request to the Refresh token URL or Access token URL if no refresh URL is provided.
Sync configuration
Once you've created your HTTP Request destination and have a model to pull data from, you can set up your sync configuration to begin syncing data. Go to the Syncs overview page and click the Add sync button to begin. Then, select the relevant model and the HTTP Request destination you previously set up.
Choose request triggers
In this first step, you tell Hightouch when to trigger HTTP requests. You then configure each trigger separately. This lets your integration have different behaviors depending on whether a row is added, changed, and/or removed. Most APIs use different endpoints and HTTP methods for creating, updating, and deleting resources.
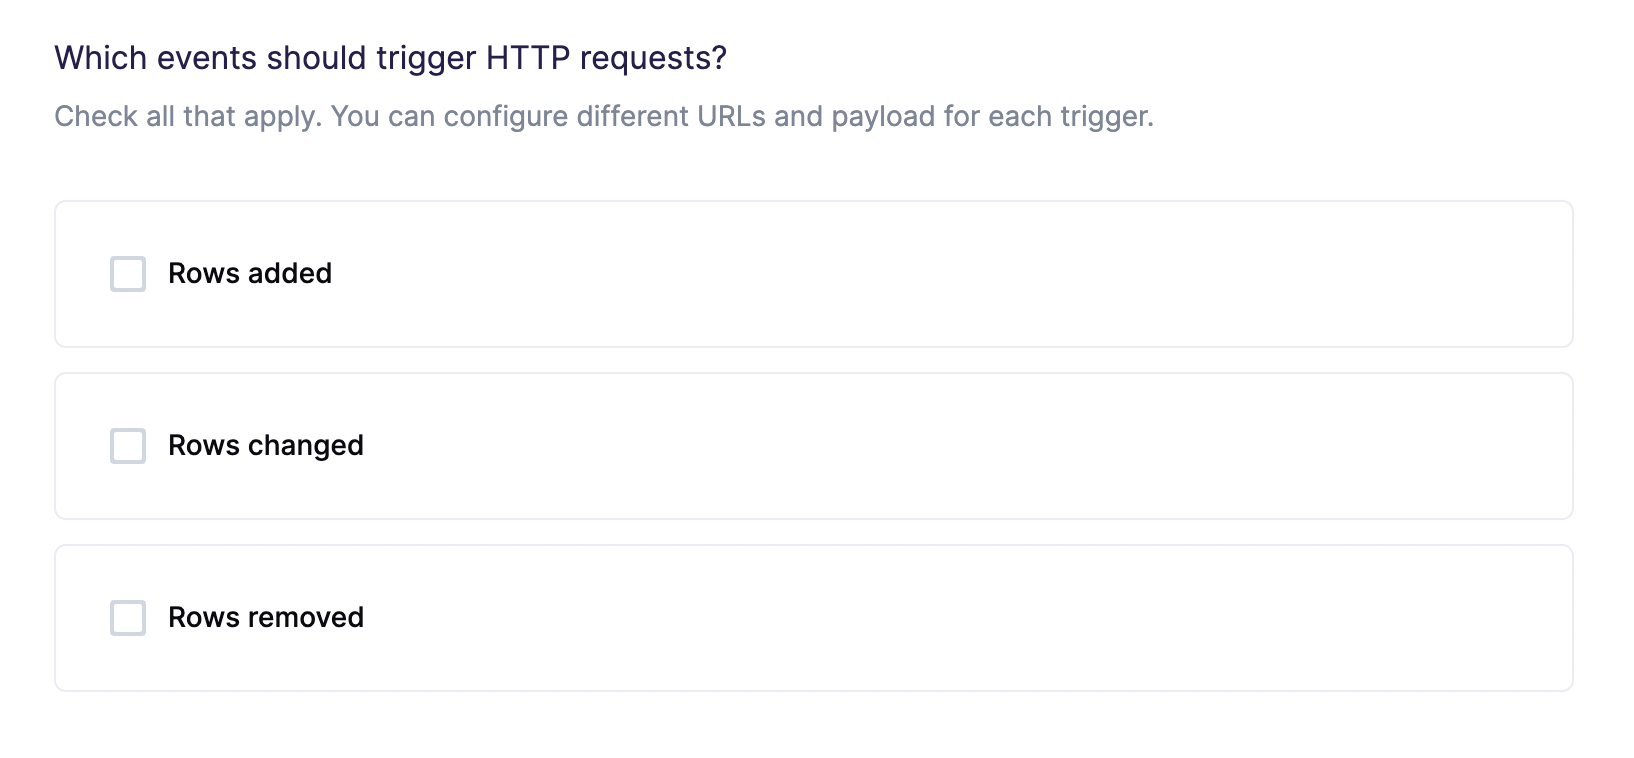
For example, suppose you're syncing customer data to an email marketing tool. You might want to create a contact when a row is added, update an existing contact when a row changes, and delete an existing contact when a row is removed. Having separate configuration for each trigger offers the flexibility required to support this use case.
The number of operations displayed on the run details page only counts the operations for the request triggers you configured. For example, if you only configured the Rows added trigger, the run details page doesn't display information related to changed or removed rows.
Batch configuration
You can send a single row or batch of multiple rows in each HTTP request.
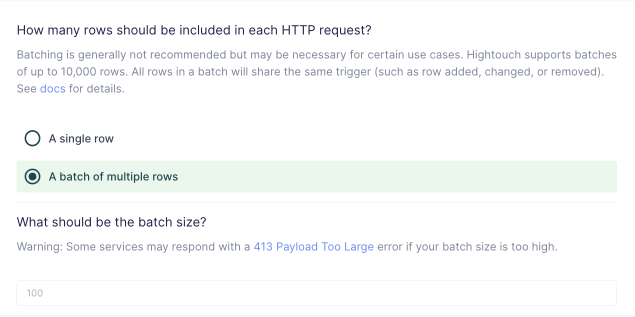
To enable batching, select A batch of multiple rows in your sync configuration. The default batch size is 100, but you can enter a different value if needed.
When using the JSON editor, make sure to correctly configure your payload for batch requests.
Specify webhook endpoint
In this step, you tell Hightouch how to send HTTP requests to your internal system, third-party API, or other web service.
Hightouch supports GET, POST, PUT, PATCH, and DELETE requests to any endpoint.

When specifying the endpoint URL, you may either provide a static URL or a dynamic, templated URL. Recall that you provided the base URL in the initial destination setup, so you only need to provide the specific endpoint path.
If you provide a static URL, Hightouch uses that URL for all HTTP requests triggered by the sync. For example, Stripe's REST API uses a single, static URL for creating new customer objects: POST https://api.stripe.com/v1/customers.
If you provide a dynamic URL, Hightouch generates a different URL for each HTTP request by incorporating data from your model. For example, Stripe's REST API requires you to reference an ID when deleting specific objects. You could incorporate the objectID into the URL template like this: DELETE https://api.stripe.com/v1/customers/{{customer_id}}.
Hightouch uses the Liquid templating language to generate dynamic content.
How to use Liquid templates
The Liquid templating language supports variable injection, control flow, iteration, filters, and more. Details are available in the Liquid docs.
To insert a value from your model, use {{row.column_name}}, where column_name references any column in your model. For example, {{row.first_name}} or {{row.email_address}}.
To change the output of a Liquid object, you can append a filter with a single pipe (|):
{{ row.column_name | filter }}.
For example, let's say the value of the first_name column in a row is "Alice". The Liquid template {{ row.first_name | upcase }} would generate {{ "Alice" | upcase }} → ALICE.
You can also chain multiple filters together like this: {{ row.product_id | remove: "0" | prepend: "SKU_"}} → {{ "000123" | remove: "0" | prepend: "SKU_"}} → SKU_123.
Customize request payload
In this step, you tell Hightouch how to build the request payload using data from your model. Hightouch supports JSON and XML payloads, as well as URL encoded forms. You can also send an empty body, if needed.

Most modern web APIs use JSON payloads. This destination offers three methods of composing a JSON request body:
Use JSON editor
With the JSON editor, you can compose any JSON object using the Liquid template language. This is particularly useful for complex payloads containing nested objects and arrays, which can sometimes be difficult to model entirely in SQL.
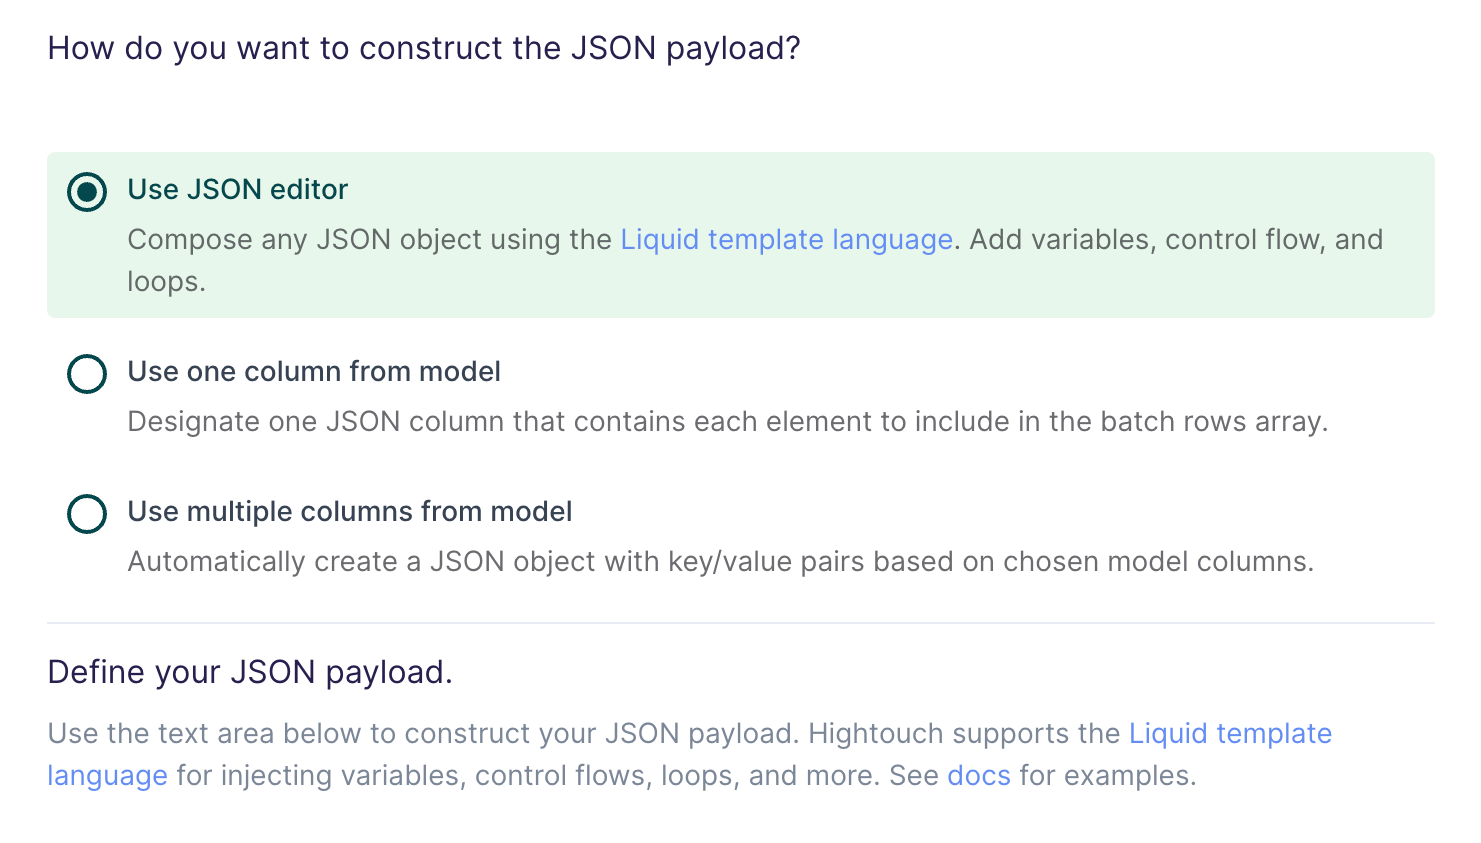
Suppose your data model looks like this:
full_name | age | email_address | phone_number |
|---|---|---|---|
| John Doe | 30 | john@example.com | +14158675309 |
And you want your HTTP request to have a payload like this:
{
"name": "John Doe",
"age": 30,
"contact_info": [
{
"type": "email",
"value": "john@example.com"
},
{
"type": "phone",
"value": "+14158675309"
}
]
}
The Liquid template you enter under Define JSON payload should look like this:
{
  "name": "{{row.full_name}}",
  "age": {{row.age}},
  "contact_info": [
    {
      "type": "email",
      "value": "{{row.email_address}}"
    },
    {
      "type": "phone",
      "value": "{{row.phone_number}}"
    }
  ]
}
You can also use advanced Liquid features to incorporate control flow and loops into your dynamic payloads.
When injecting strings into your JSON request body, be sure to surround the Liquid tag in double quotes.
Batching with the JSON editor
When batching is enabled, the context is changed from a single record (row) to multiple records (rows).
With multiple rows, you likely want to use loops to build your payload.
Suppose your data model looks like this:
full_name | age | email_address | phone_number |
|---|---|---|---|
| John Doe | 30 | john@example.com | +14158675309 |
| Jane Doe | 29 | jane@example.com | +14158674319 |
And you want your HTTP request to have a payload like this:
{
  "users": [
    {
      "name": "John Doe",
      "age": 30,
      "contact_info": [
        {
          "type": "email",
          "value": "john@example.com"
        },
        {
          "type": "phone",
          "value": "+14158675309"
        }
      ]
    },
    {
      "name": "Jane Doe",
      "age": 29,
      "contact_info": [
        {
          "type": "email",
          "value": "jane@example.com"
        },
        {
          "type": "phone",
          "value": "+14158674319"
        }
      ]
    }
  ]
}
The Liquid template you enter under Define JSON payload should look like this:
{
  "users": [
    {% for row in rows %}
      {
        "name": "{{row.full_name}}",
        "age": {{row.age}},
        "contact_info": [
          {
            "type": "email",
            "value": "{{row.email_address}}"
          },
          {
            "type": "phone",
            "value": "{{row.phone_number}}"
          }
        ]
      },
    {% endfor %}
  ]
}
Don't worry about unnecessary trailing commas when evaluating loops in your payload template. Hightouch automatically strips trailing commas to conform with the JSON specification.
Using Hightouch metadata inside a Liquid template
In addition to using the {{row.column_name}} syntax to access row-level data, you can also tap into metadata about your Hightouch syncs and models.
This metadata is provided via the context variable. The following table lists the available metadata options.
| Variable | Description | Example |
|---|---|---|
{{context.model_id}} | The ID of the model (or audience) associated with the sync | 12345 |
{{context.model_name}} | The name of the model (or audience) associated with the sync | "VIP Customers" |
{{context.sync_id}} | The ID of the sync | 67890 |
{{context.sync_run_id}} | The ID of the sync run during which the request is made | 1234567890 |
Use one column from model
If you're already storing JSON data in your source, or if you have the ability to construct a JSON object using SQL, you can select one column in your model that already contains the full request payload.
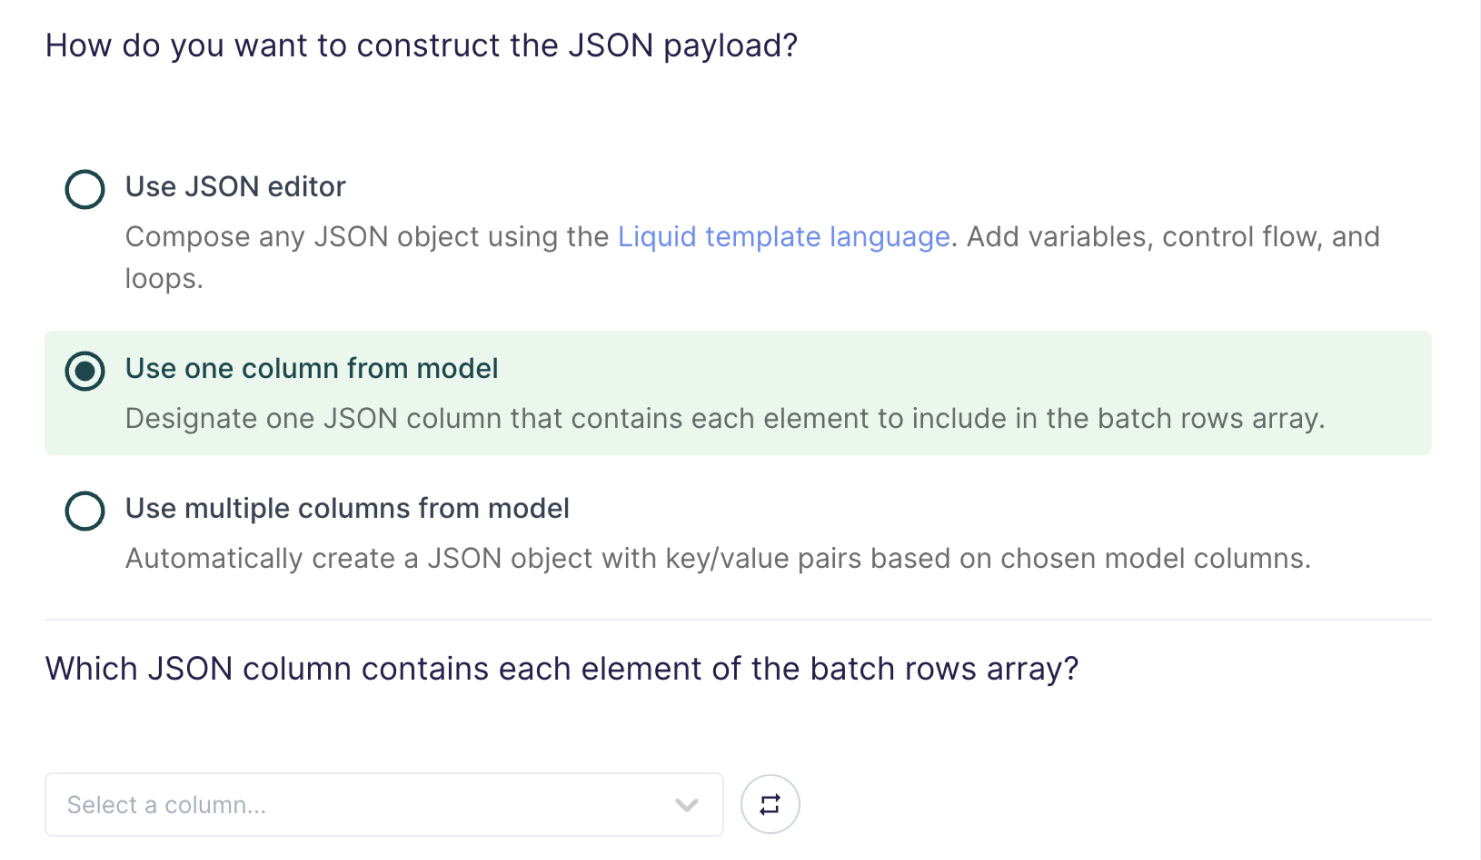
This setting is commonly used when syncing web events that have already been collected and stored as JSON objects in your database.
Batching with one column from model
When batching is enabled, the payload is an array where each element is a row value from the selected column. For example, if you select a column that includes a JSON object as each row value, the batch payload would be an array of those JSON objects.
Use multiple columns from model
For the simplest use cases, Hightouch can construct a JSON object with key/value pairs based on multiple columns in your model.
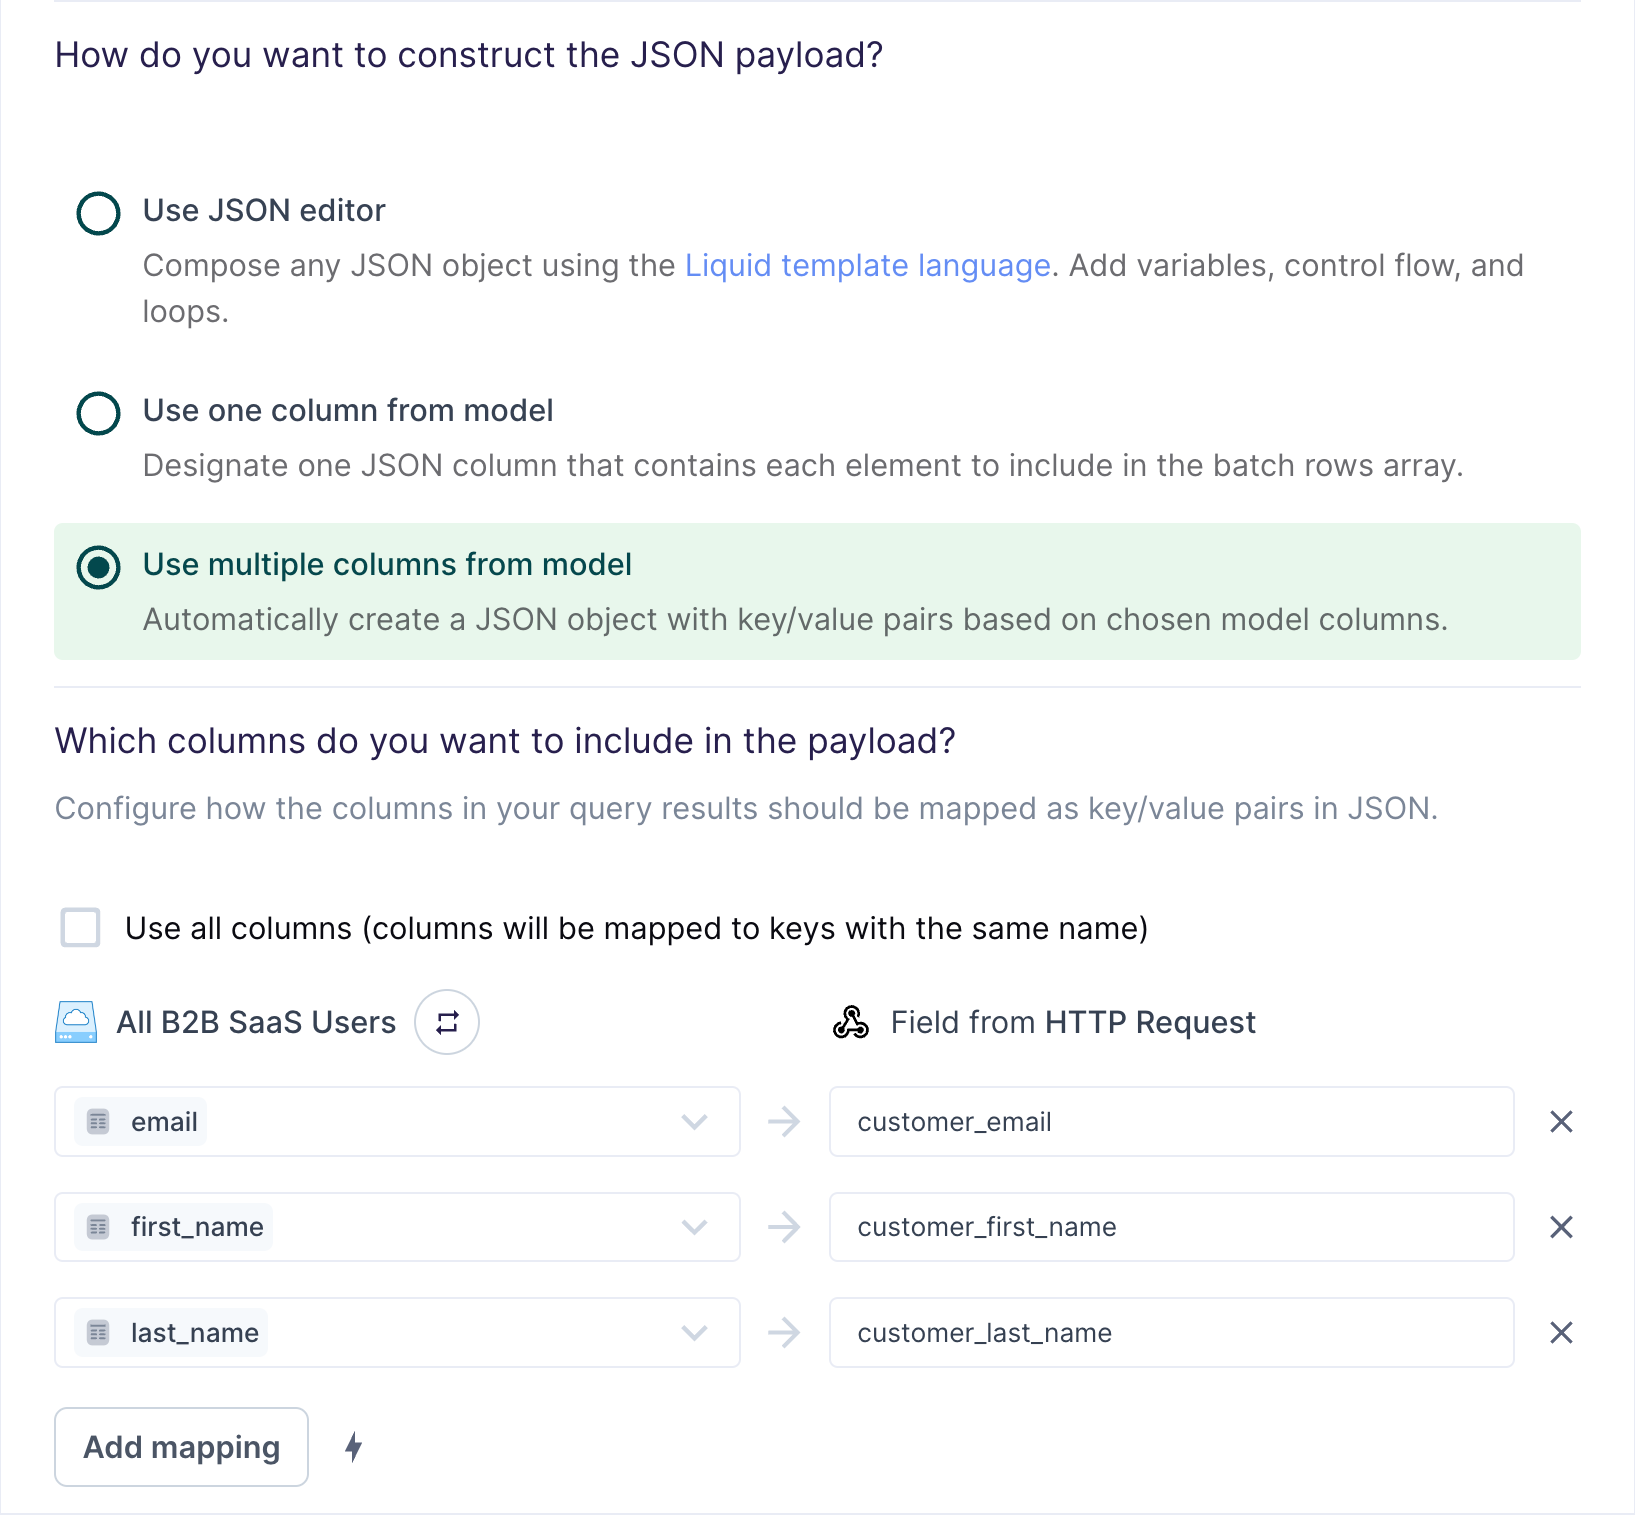
Suppose your model looks like this:
email | first_name | last_name |
|---|---|---|
alice.doe@example.com | Alice | Doe |
bob.doe@example.com | Bob | Doe |
carol.doe@example.com | Carol | Doe |
The field mapping in the preceding screenshot would generate the following payload for the first row:
{
  "customer_first_name": "Alice",
  "customer_last_name": "Doe",
  "customer_email": "alice.doe@example.com"
}
You can use the field mapper to rename fields. For
example, you can map first_name to customer_first_name. The field mapper
offers additional capabilities, such as inline
mapping to create objects and arrays.
Batching with multiple columns from model
When batching is enabled, the payload is sent as an array.
Suppose your model looks like this:
email | first_name | last_name |
|---|---|---|
alice.doe@example.com | Alice | Doe |
bob.doe@example.com | Bob | Doe |
carol.doe@example.com | Carol | Doe |
The field mapping in the preceding screenshot would generate the following payload for the first batch:
[
  {
    "customer_first_name": "Alice",
    "customer_last_name": "Doe",
    "customer_email": "alice.doe@example.com"
  },
  {
    "customer_first_name": "Bob",
    "customer_last_name": "Doe",
    "customer_email": "bob.doe@example.com"
  },
  {
    "customer_first_name": "Alice",
    "customer_last_name": "Doe",
    "customer_email": "carol.doe@example.com"
  }
]
Configure rate limiting and concurrency
In this step, you configure rate limits and concurrency. In other words, you tell Hightouch how to avoid overwhelming your HTTP endpoint with requests.
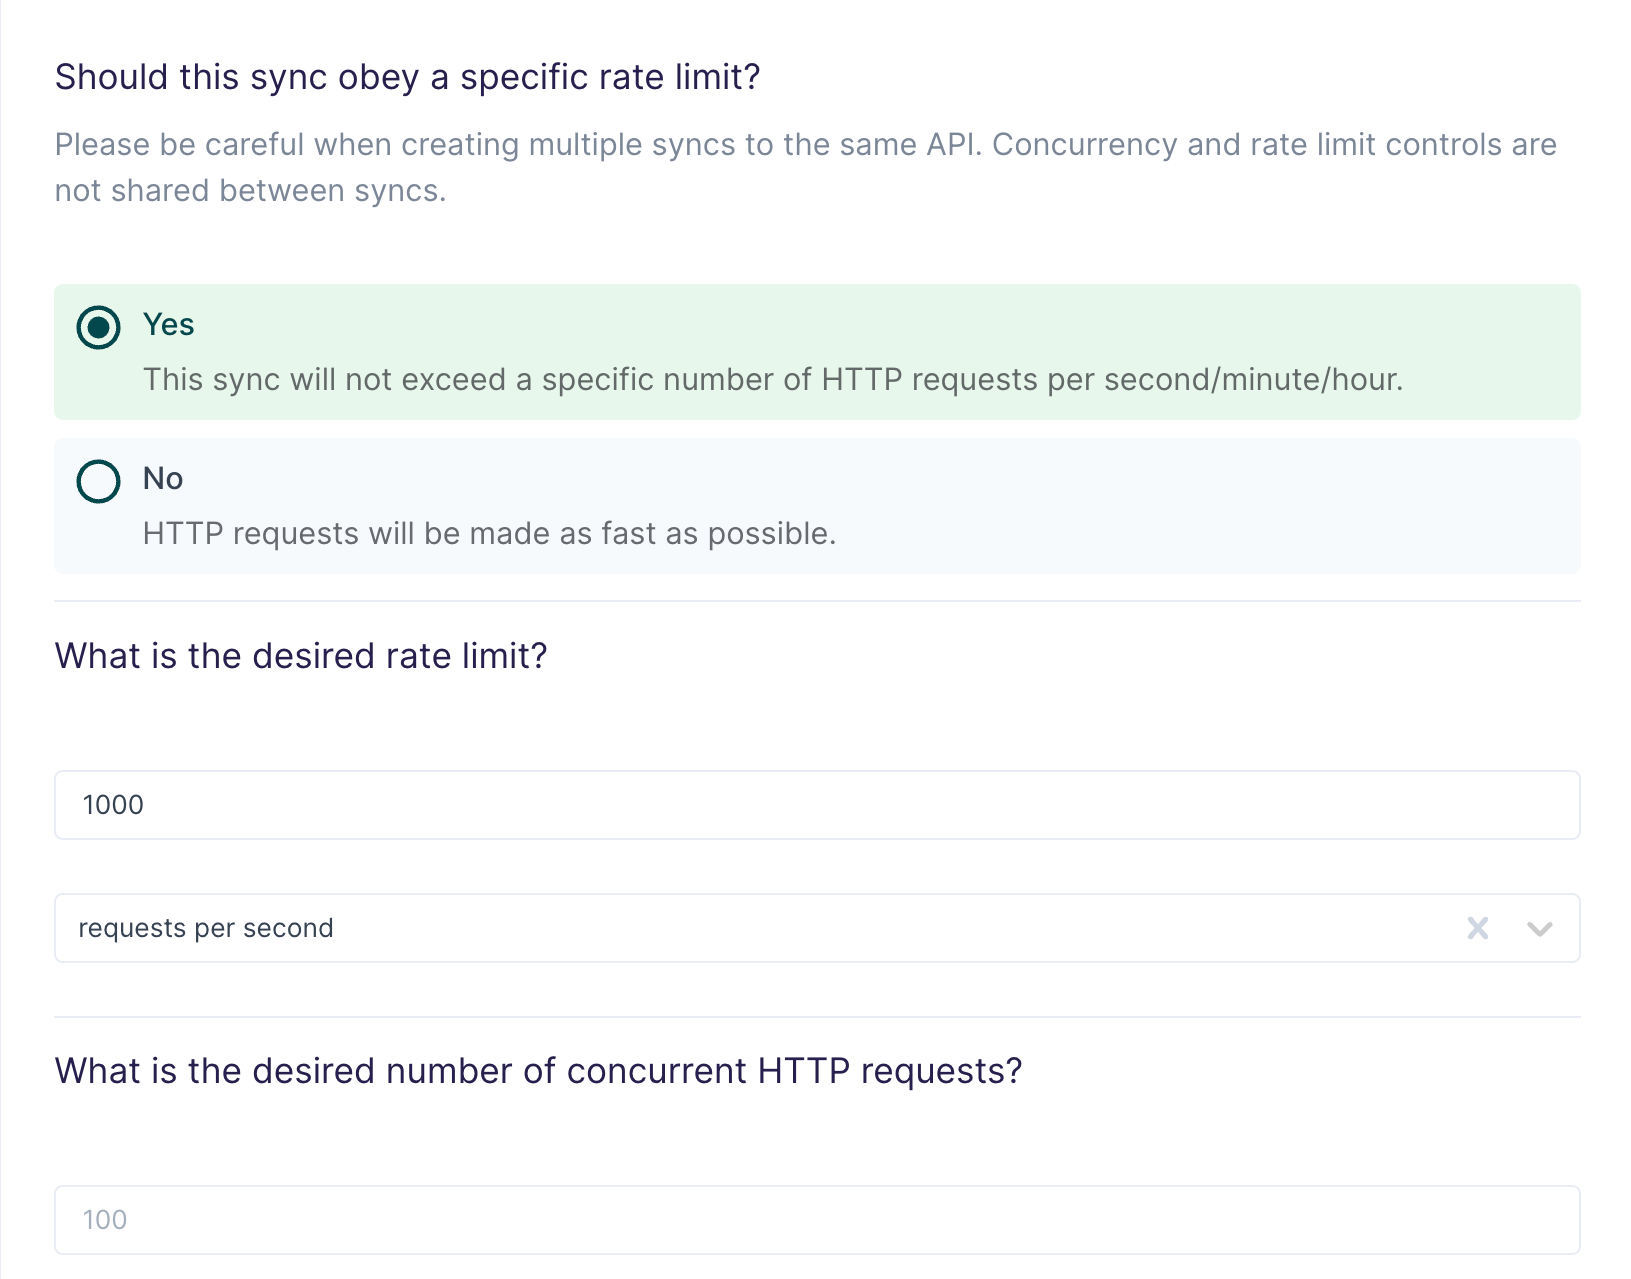
Most modern web APIs enforce rate limits, which set a maximum allowed number of requests per second, minute, or hour. Occasionally, APIs may also have concurrency limits, which set a maximum allowed number of requests that can be processed simultaneously.
Hightouch defaults to 1000 requests per second or 100 concurrent requests, whichever limit is reached first. You can override these defaults to meet the requirements of your web service. Keep in mind that rate limits and concurrency limits both affect sync speed.
To ensure that Hightouch never exceeds your chosen limits, we apply a small offset to the values provided in the sync configuration form.
Hightouch waits out the entire rate limit when a sync finishes, to make sure the next run has the full number of requests and doesn't violate the rate limit configuration. For example, if you set the rate limit window to Requests per hour, a sync run waits one full hour before triggering a new run. If you want to avoid this behavior, you can set the window to Requests per second or Requests per minute.
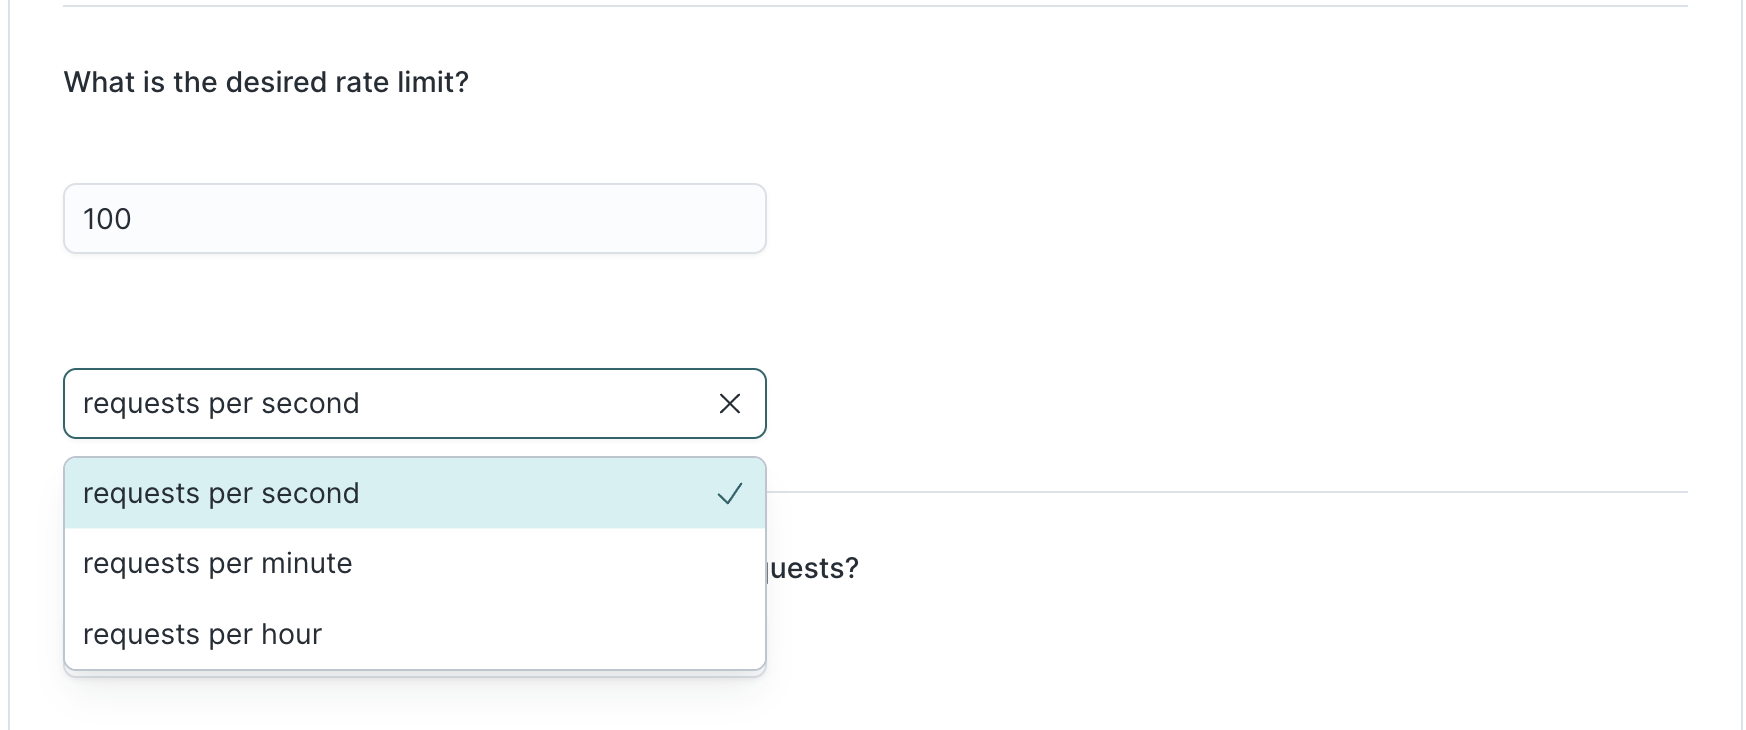
Concurrency and rate limit controls aren't shared between syncs and don't persist across sync runs.
Configure error handling
In this step, you tell Hightouch how to handle errors, such as HTTP request timeouts and error responses.
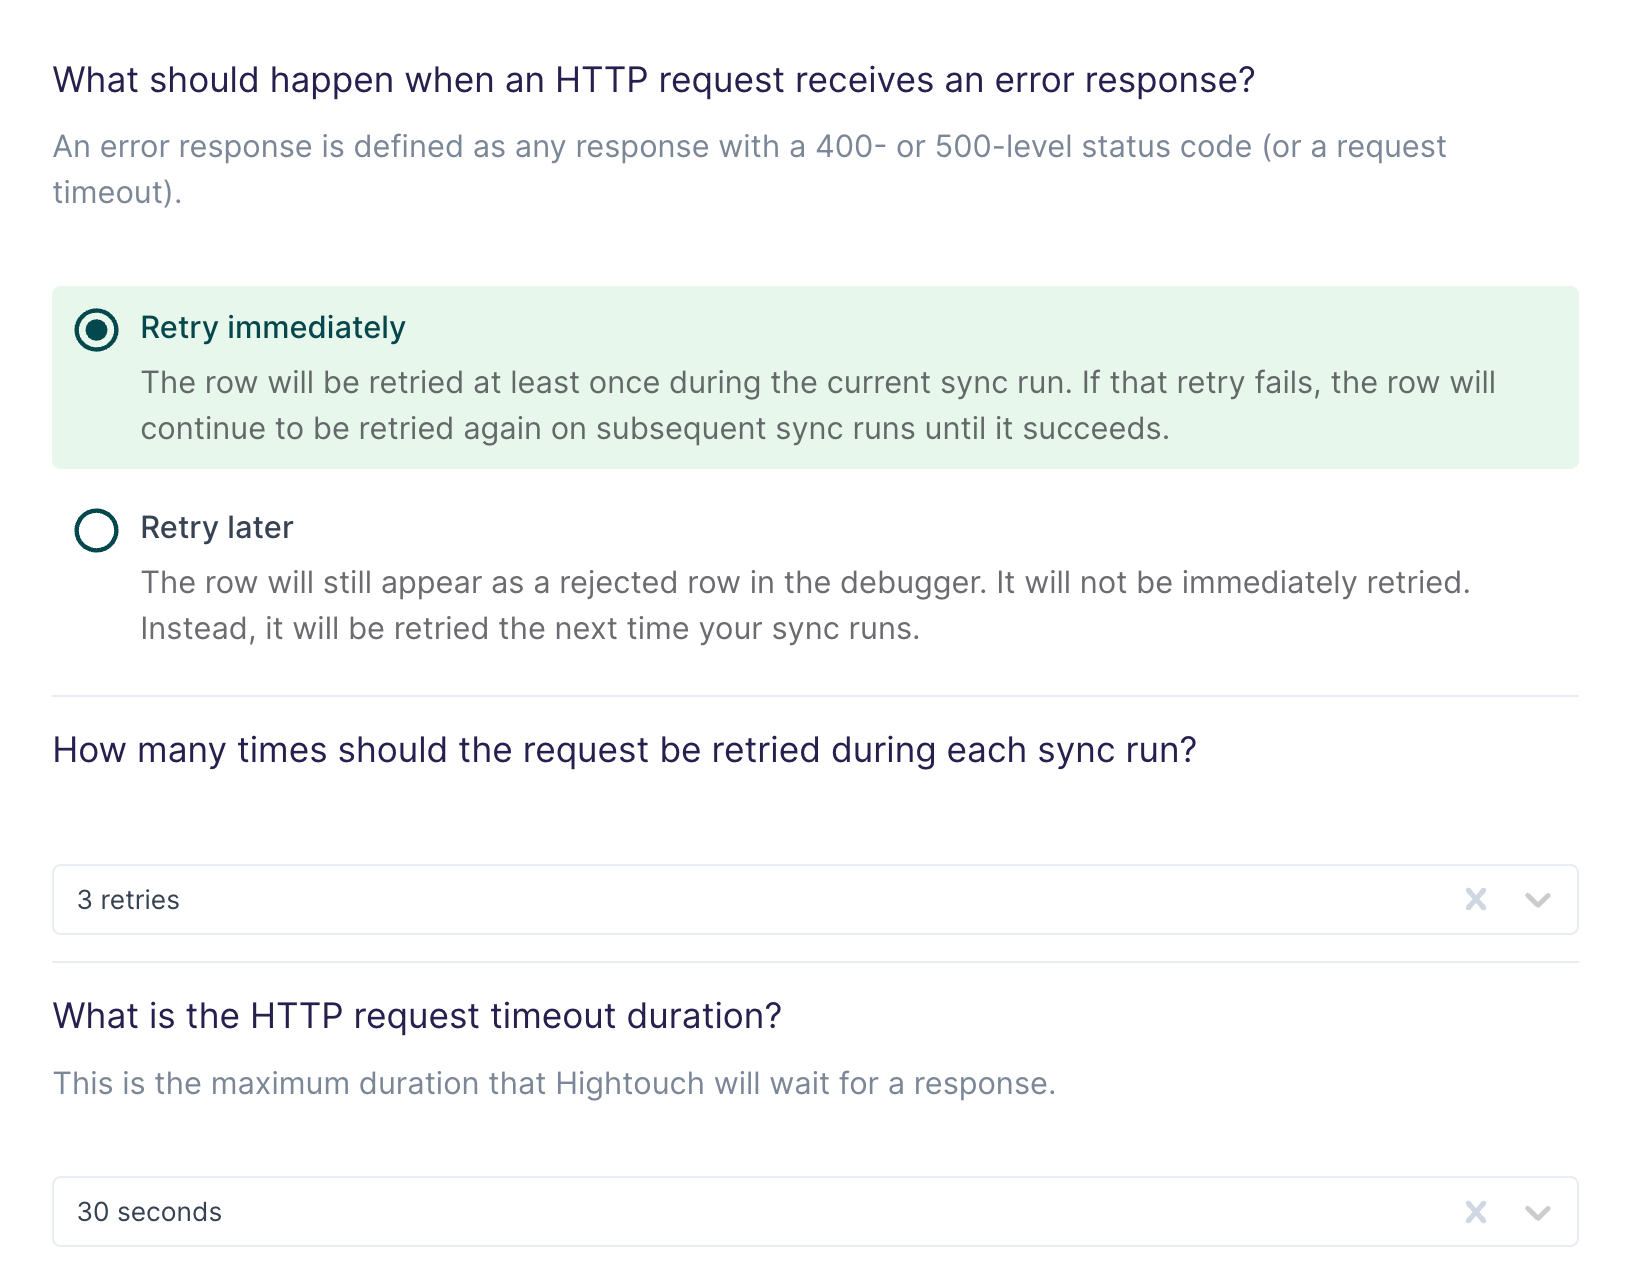
These errors will be retried indefinitely until they succeed. You have a choice between retrying immediately or waiting until the next sync run. If you elect to retry immediately, you can specify how many retries should be attempted during the sync run. If all of these retries fail, the request will be retried during subsequent sync runs until it succeeds. Setting up alerts for row and sync errors is always recommended.
Any HTTP response with a 400- or 500-level status code is considered an error.
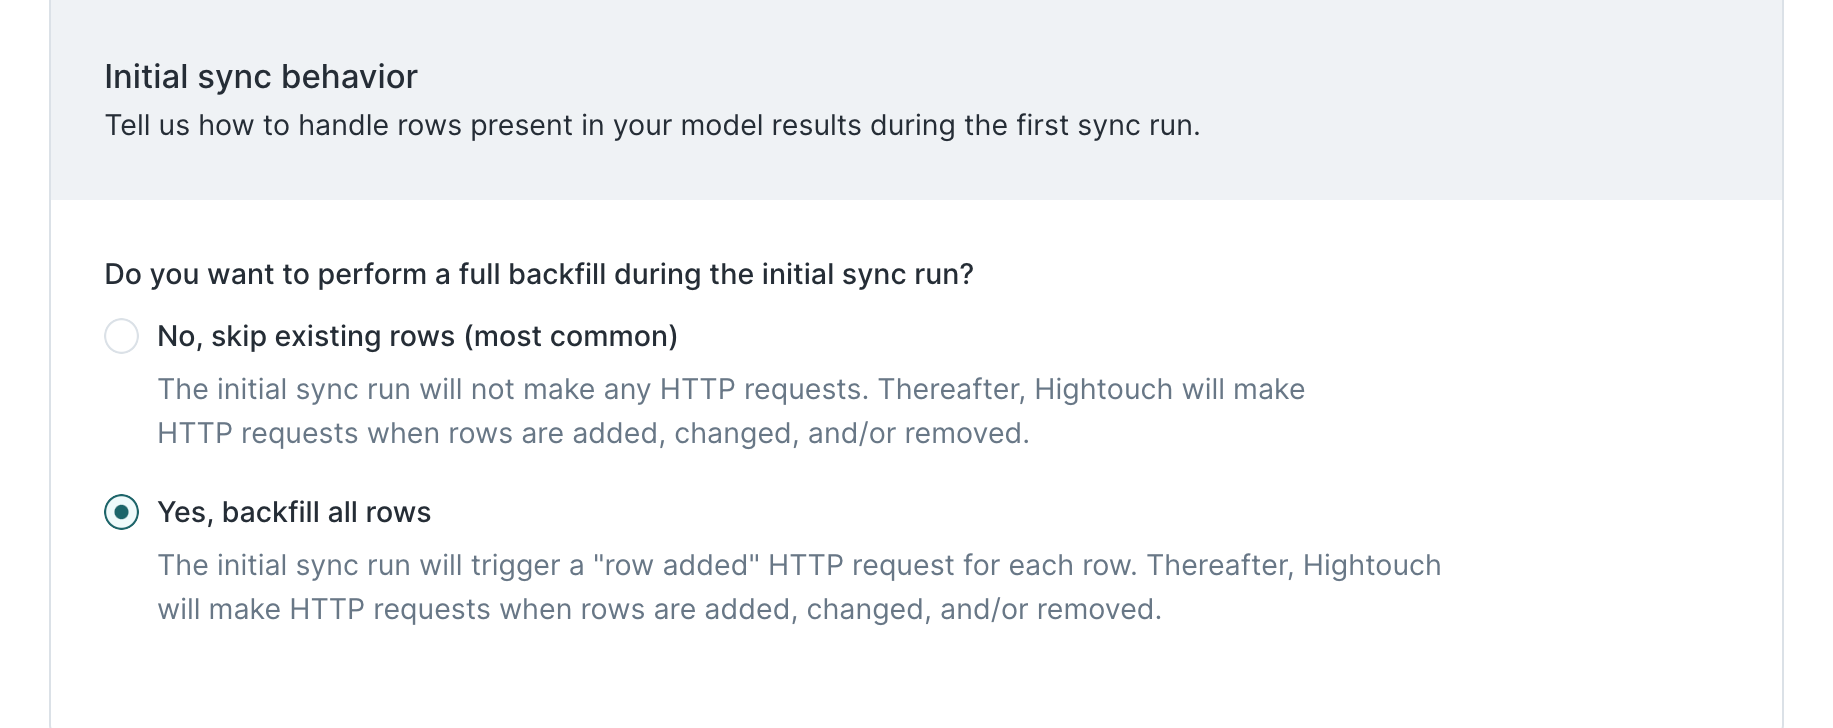
Configure initial sync behavior
In this step, you tell Hightouch how to handle rows present in your model results during the first sync run.
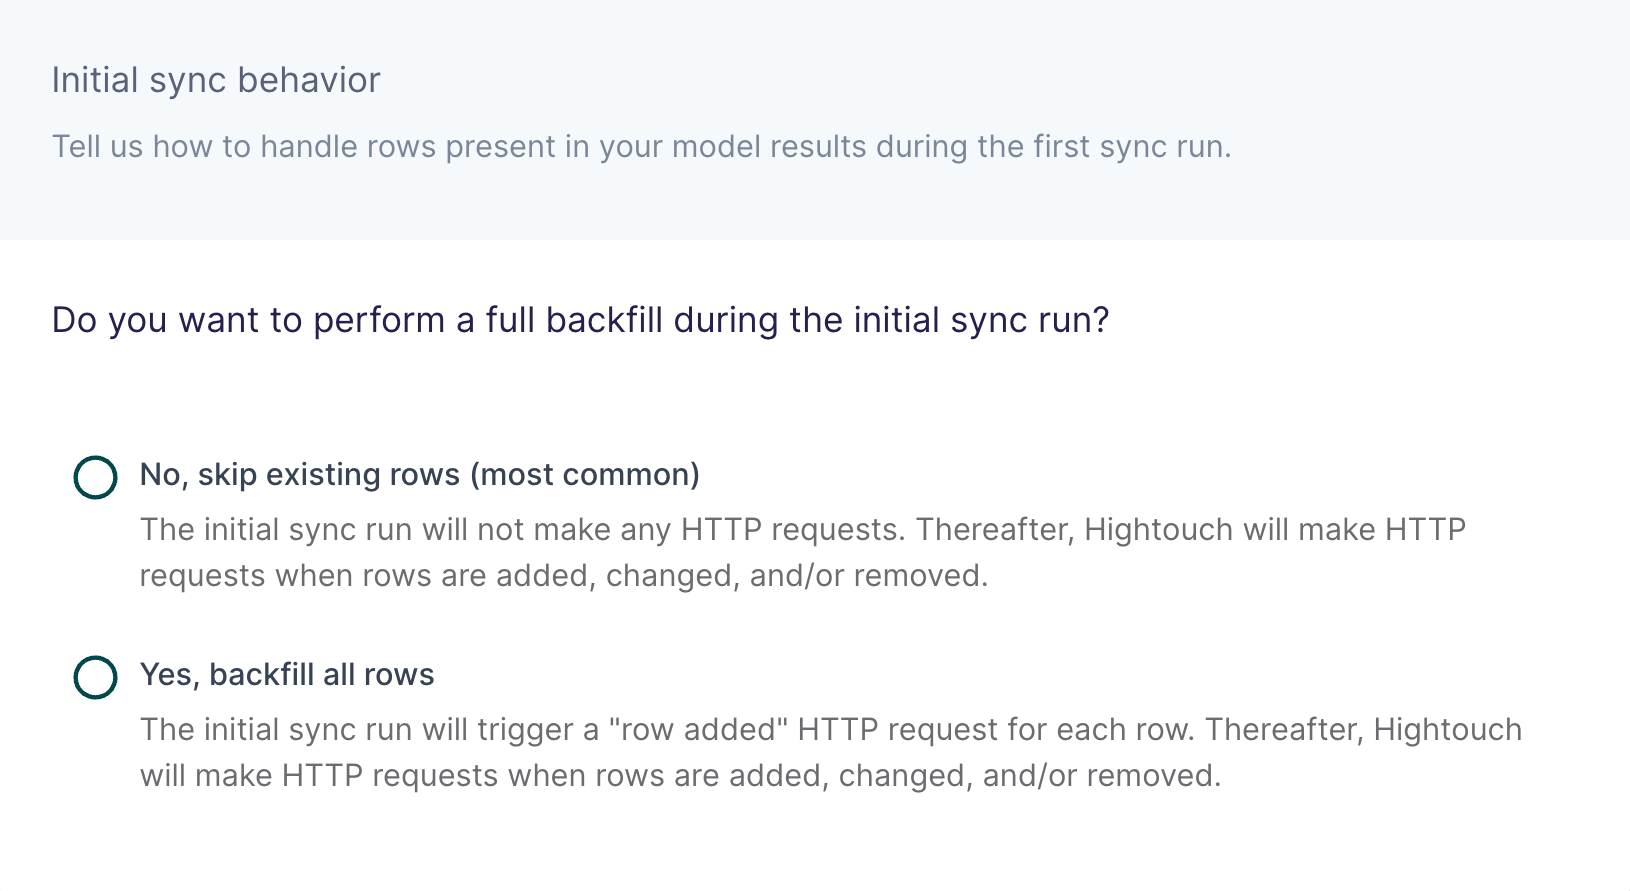
Certain workflows, such as hydrating a CRM for the first time, may require performing a backfill of all rows during the initial sync. For other use cases, such as sending product notifications, you may want to skip existing rows and only make HTTP requests for future data changes.
Limitations
This destination can't perform complex operations that involve lookups or multiple requests chained together.
If you need to perform such complex operations, consider using one of our serverless function destinations: AWS Lambda, Google Cloud Functions, or Azure Functions. You could also build your own integration using our Embedded Destination framework.
Tutorial
This guided tutorial uses the HTTP Request destination to integrate Hightouch with Algolia's REST API. Specifically, it gives instructions for how to sync synonyms in a search index for each row added to a data model.
Hightouch provides an Algolia integration that allows you to index records and events, but not synonyms, rules, or other Algolia objects.
Destination configuration
First, we go to the Destinations overview page and click the Add destination button. Then, we select HTTP Request and click Continue. Next, the UI prompts us to enter a base URL, HTTP headers, and certificate.
Algolia's Search API has the same host URL for searching, adding objects, and adding settings like synonyms.
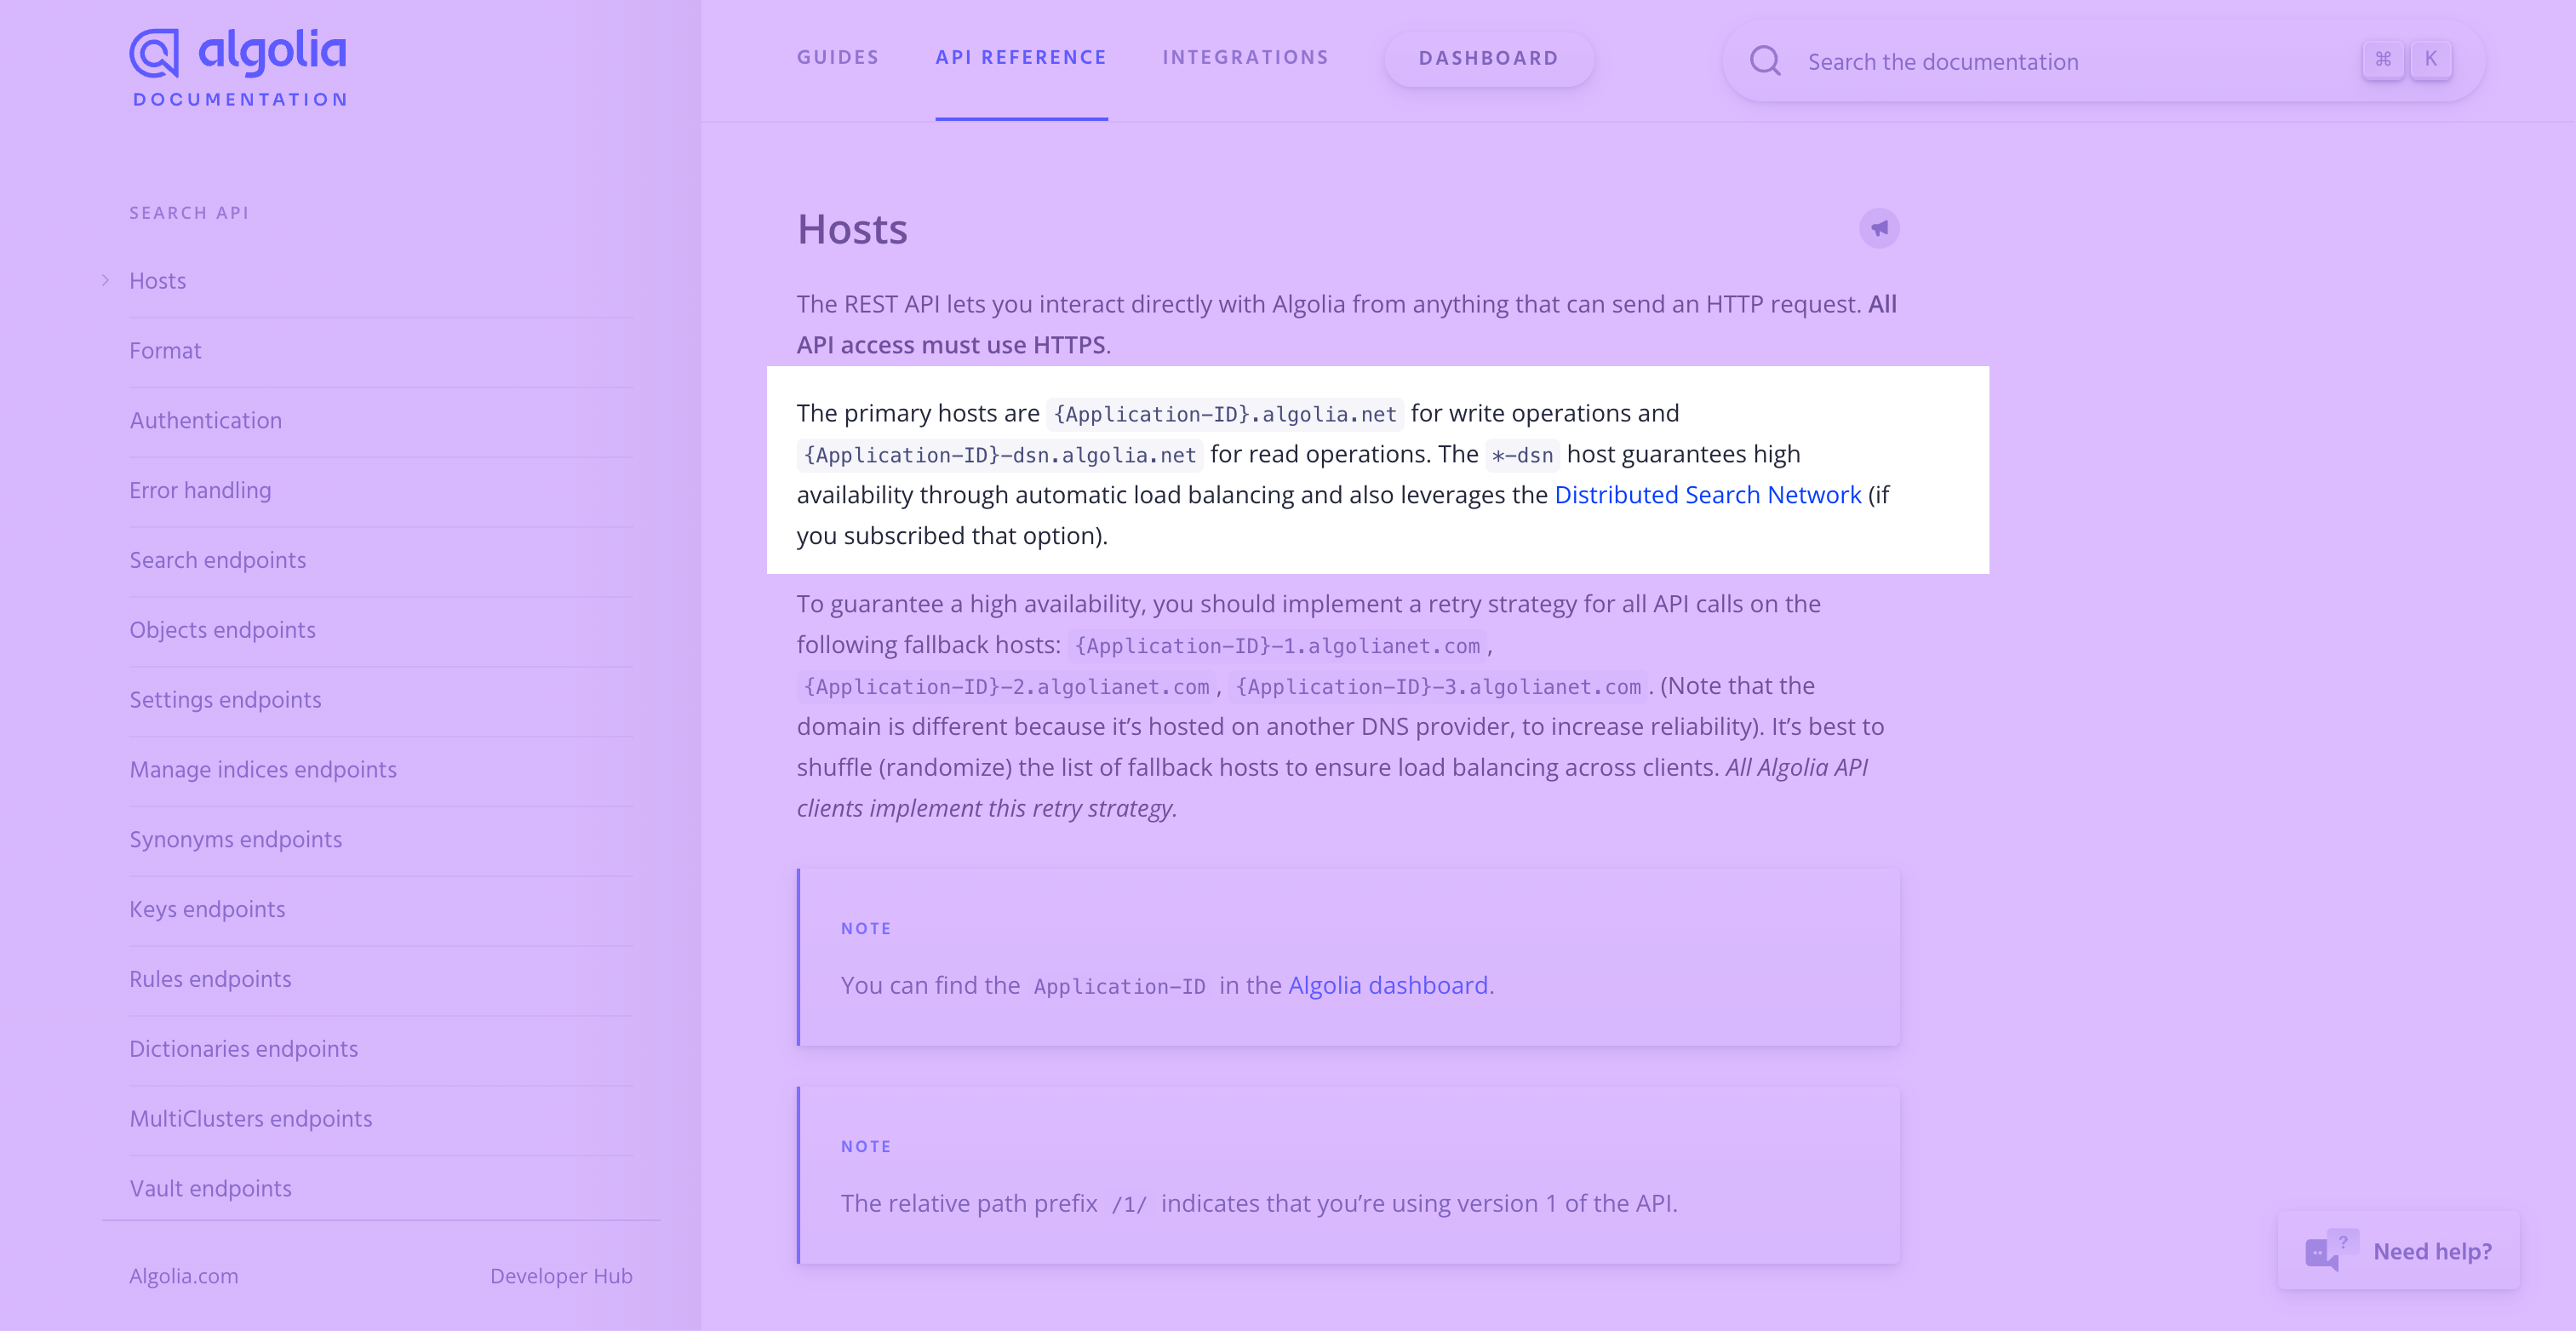
We can enter this URL as the base URL in Hightouch.

According to Algolia's docs, you should authenticate API requests with these headers:
X-Algolia-Application-Id: the ID of your Algolia applicationX-Algolia-API-Key: an API key
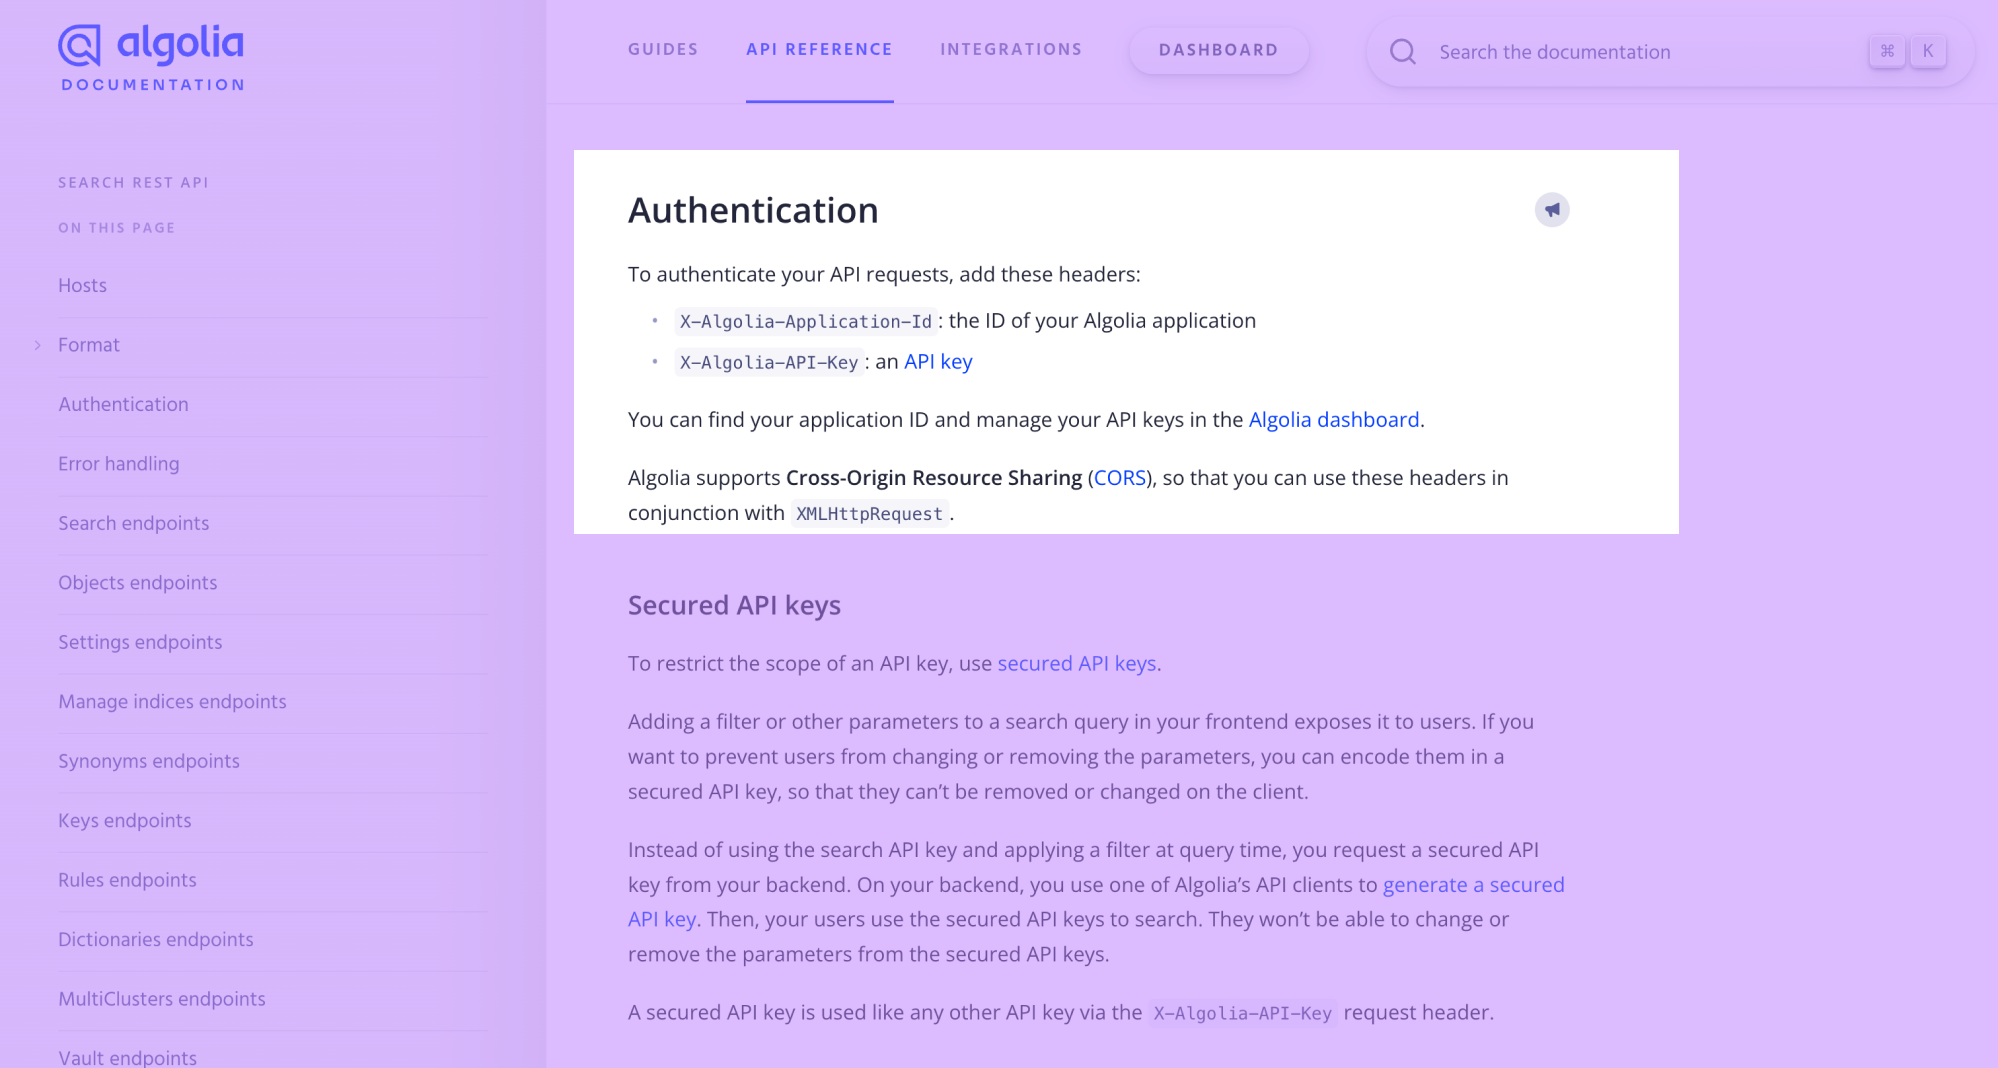
In Hightouch, we would provide these as the HTTP headers.

Be sure to replace the example headers with your actual Algolia application ID and an API Key with the write permission.
Since we don't need to use any security certificates, we can leave those options turned off and click Continue.
The last step of the initial configuration is giving our destination a descriptive name. In this case, "HTTP Request - Algolia REST API" lets us know what we can use this destination for.
Create synonyms
Next, we need to understand Algolia's API for adding synonyms to a search index. According to Algolia's API reference, we can add multiple synonyms by making a POST request to the /1/indexes/{indexName}/synonyms/batch endpoint.
Here's how we can configure the rows added trigger in Hightouch to match this:
- Select to add a batch of multiple rows in each request, we can leave the default batch size of 100
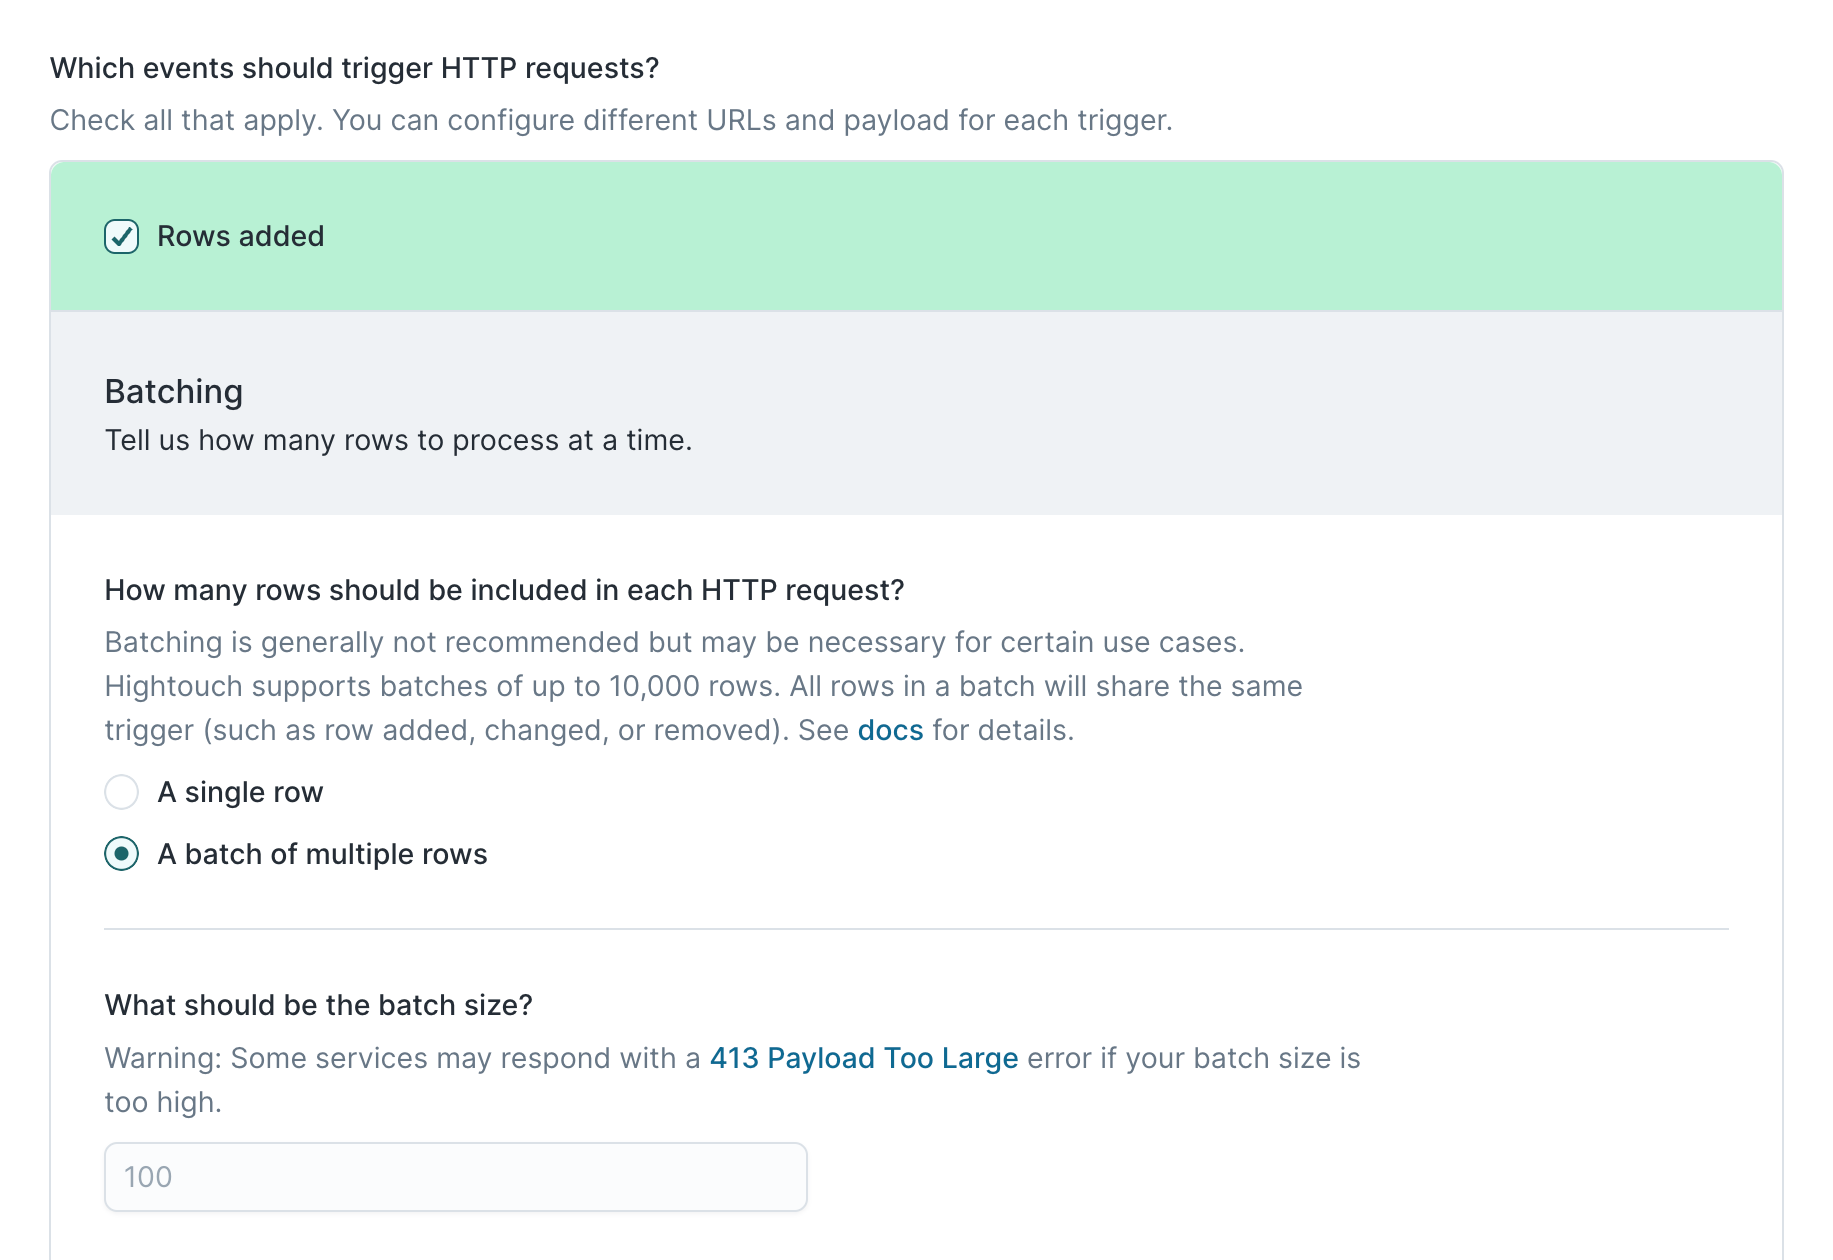
- Select POST as the HTTP method
- Enter
/1/indexes/{indexName}/synonyms/batchas the URL
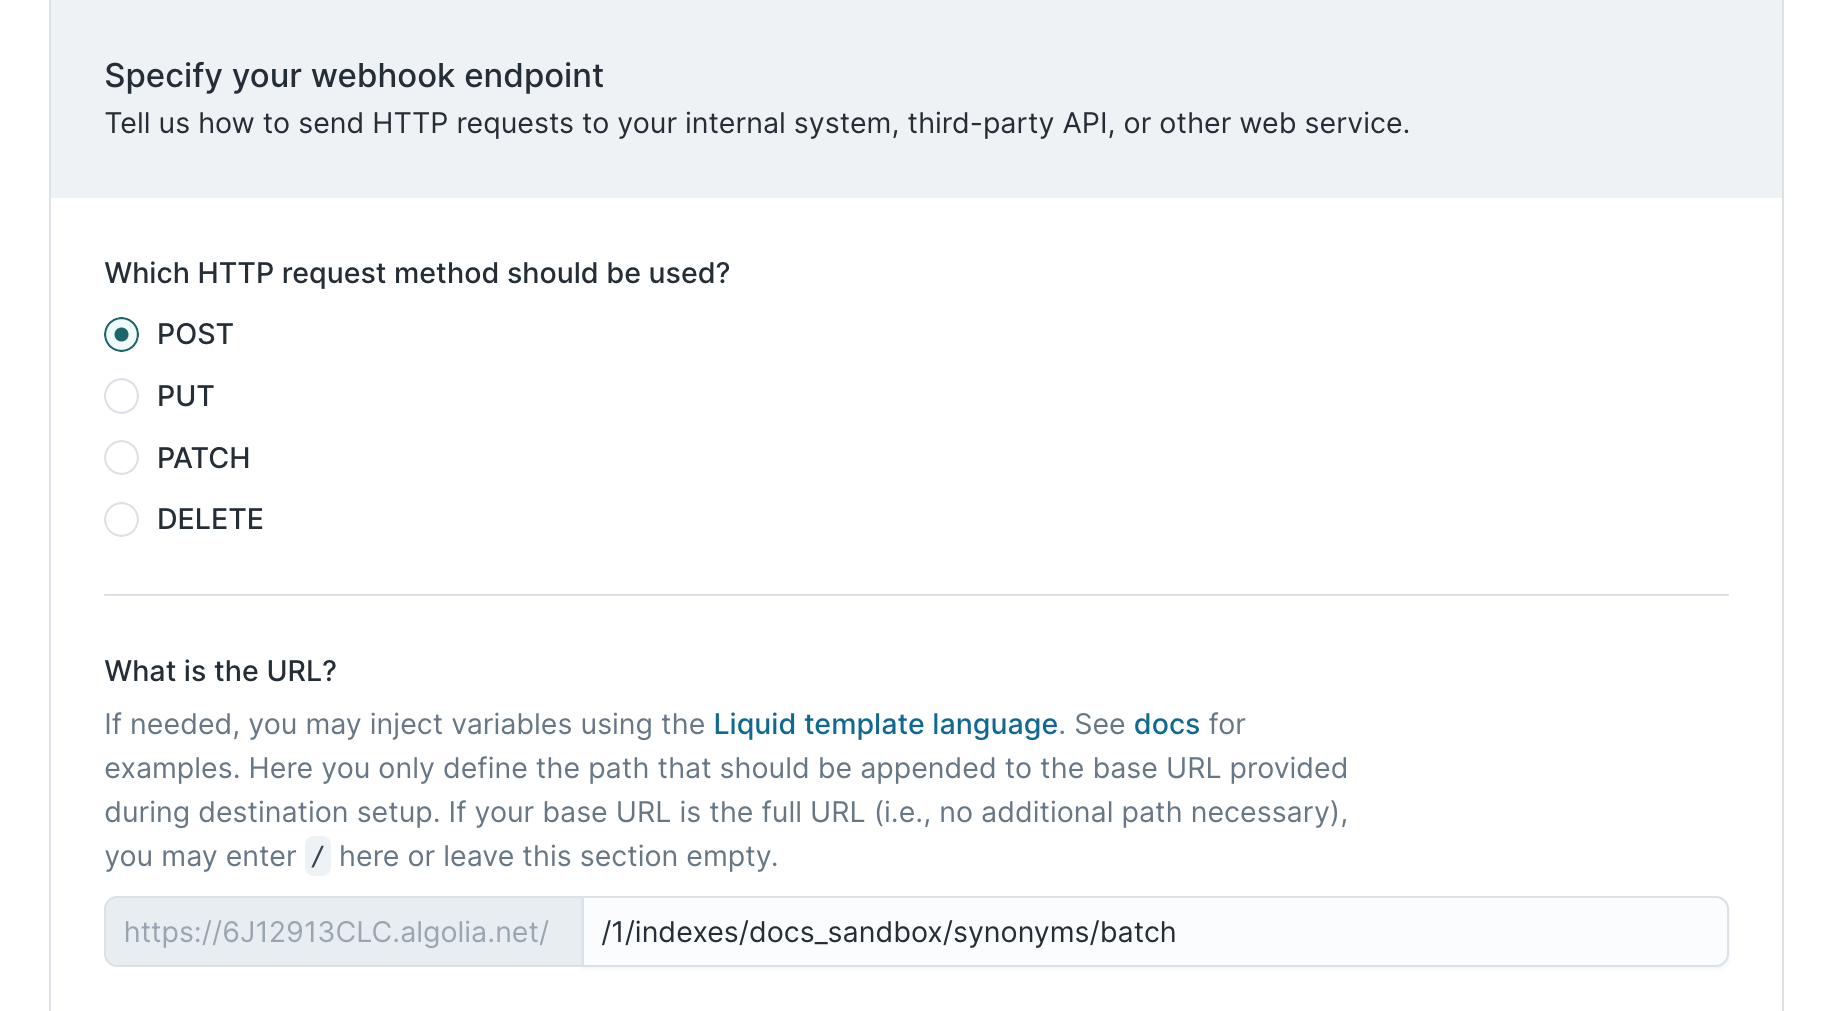
In the preceding screenshot, the application ID and index name we want to add synonyms to have been filled out; you need to include your own Algolia application ID and index name.
Algolia's docs say that the entire API uses JSON, so we select JSON as the payload type.
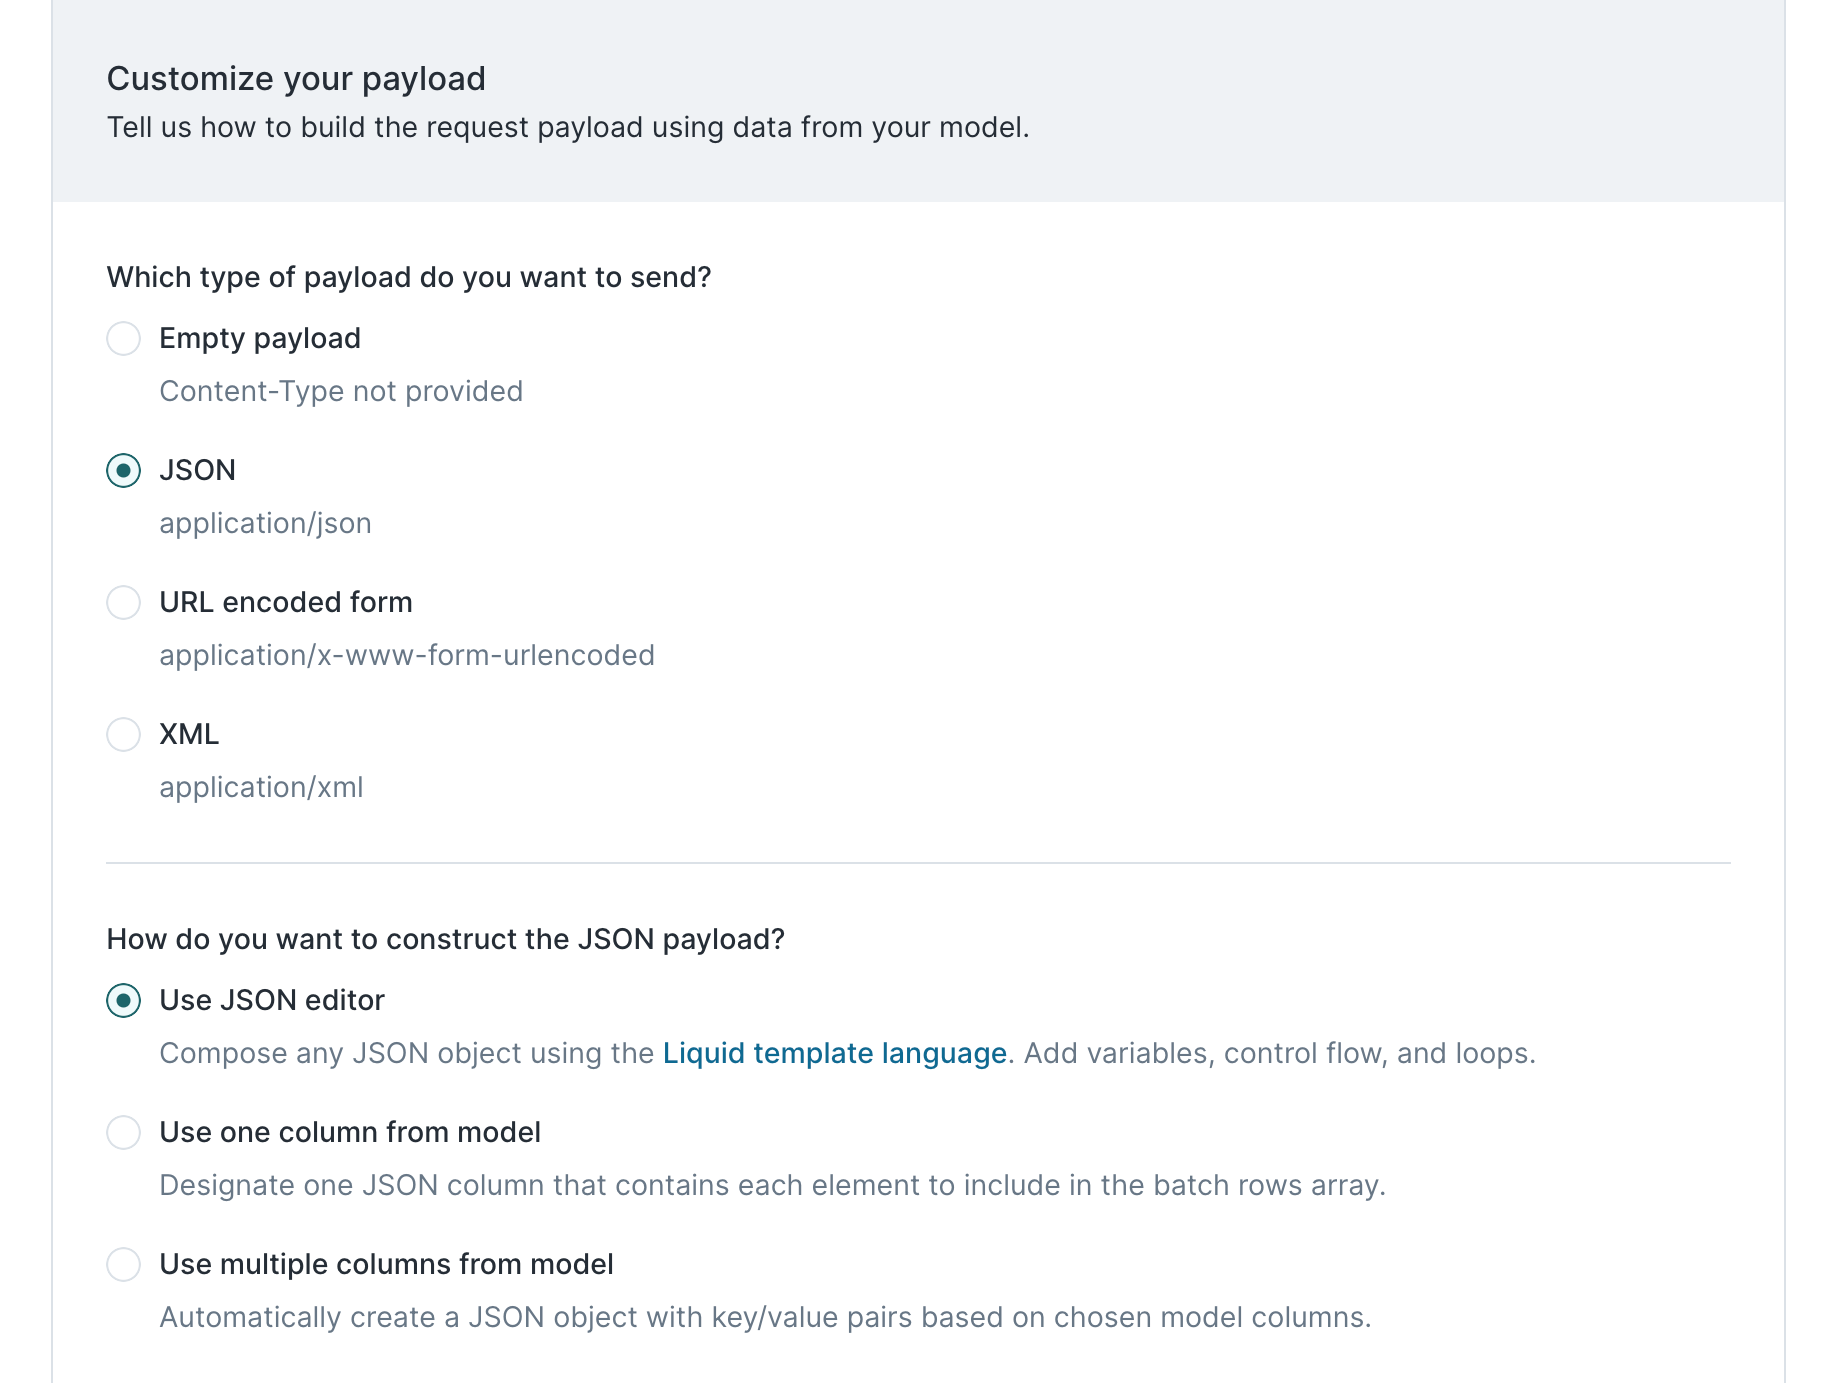
To construct the request payload, we need to reference our Hightouch model, which might look like this:
id | synonyms |
|---|---|
| "sso" | "sso, single sign on, single sign-on" |
| "cdc" | "diff, diffing, change data capture, cdc" |
Algolia's synonym batch endpoint reference tells us that the synonym batch endpoint expects a JSON array of synonyms with a specific format.
[
  {
    "objectID": "synonymID1",
    "type": "synonym",
    "synonyms": ["iphone", "ephone", "aphone", "yphone", "apple phone"]
  },
  {
    "objectID": "synonymID2",
    "type": "onewaysynonym",
    "input": "iphone",
    "synonyms": ["ephone", "aphone", "yphone", "apple phone"]
  }
]
We can construct this expected JSON payload by using the JSON editor and inputing this as the JSON payload definition:
[
    {% for row in rows %}
      {
        "objectID": "{{ row.id }}",
        "type": "synonym",
        "synonyms": [ "{{ row.synonyms | replace: ', ', '", "' }}" ],
      },
    {% endfor %}
  ]
This example uses the Liquid replace
function to create a
properly formatted array from a comma-separated string. If the data type in
the model results is already an array, this transformation isn't necessary.
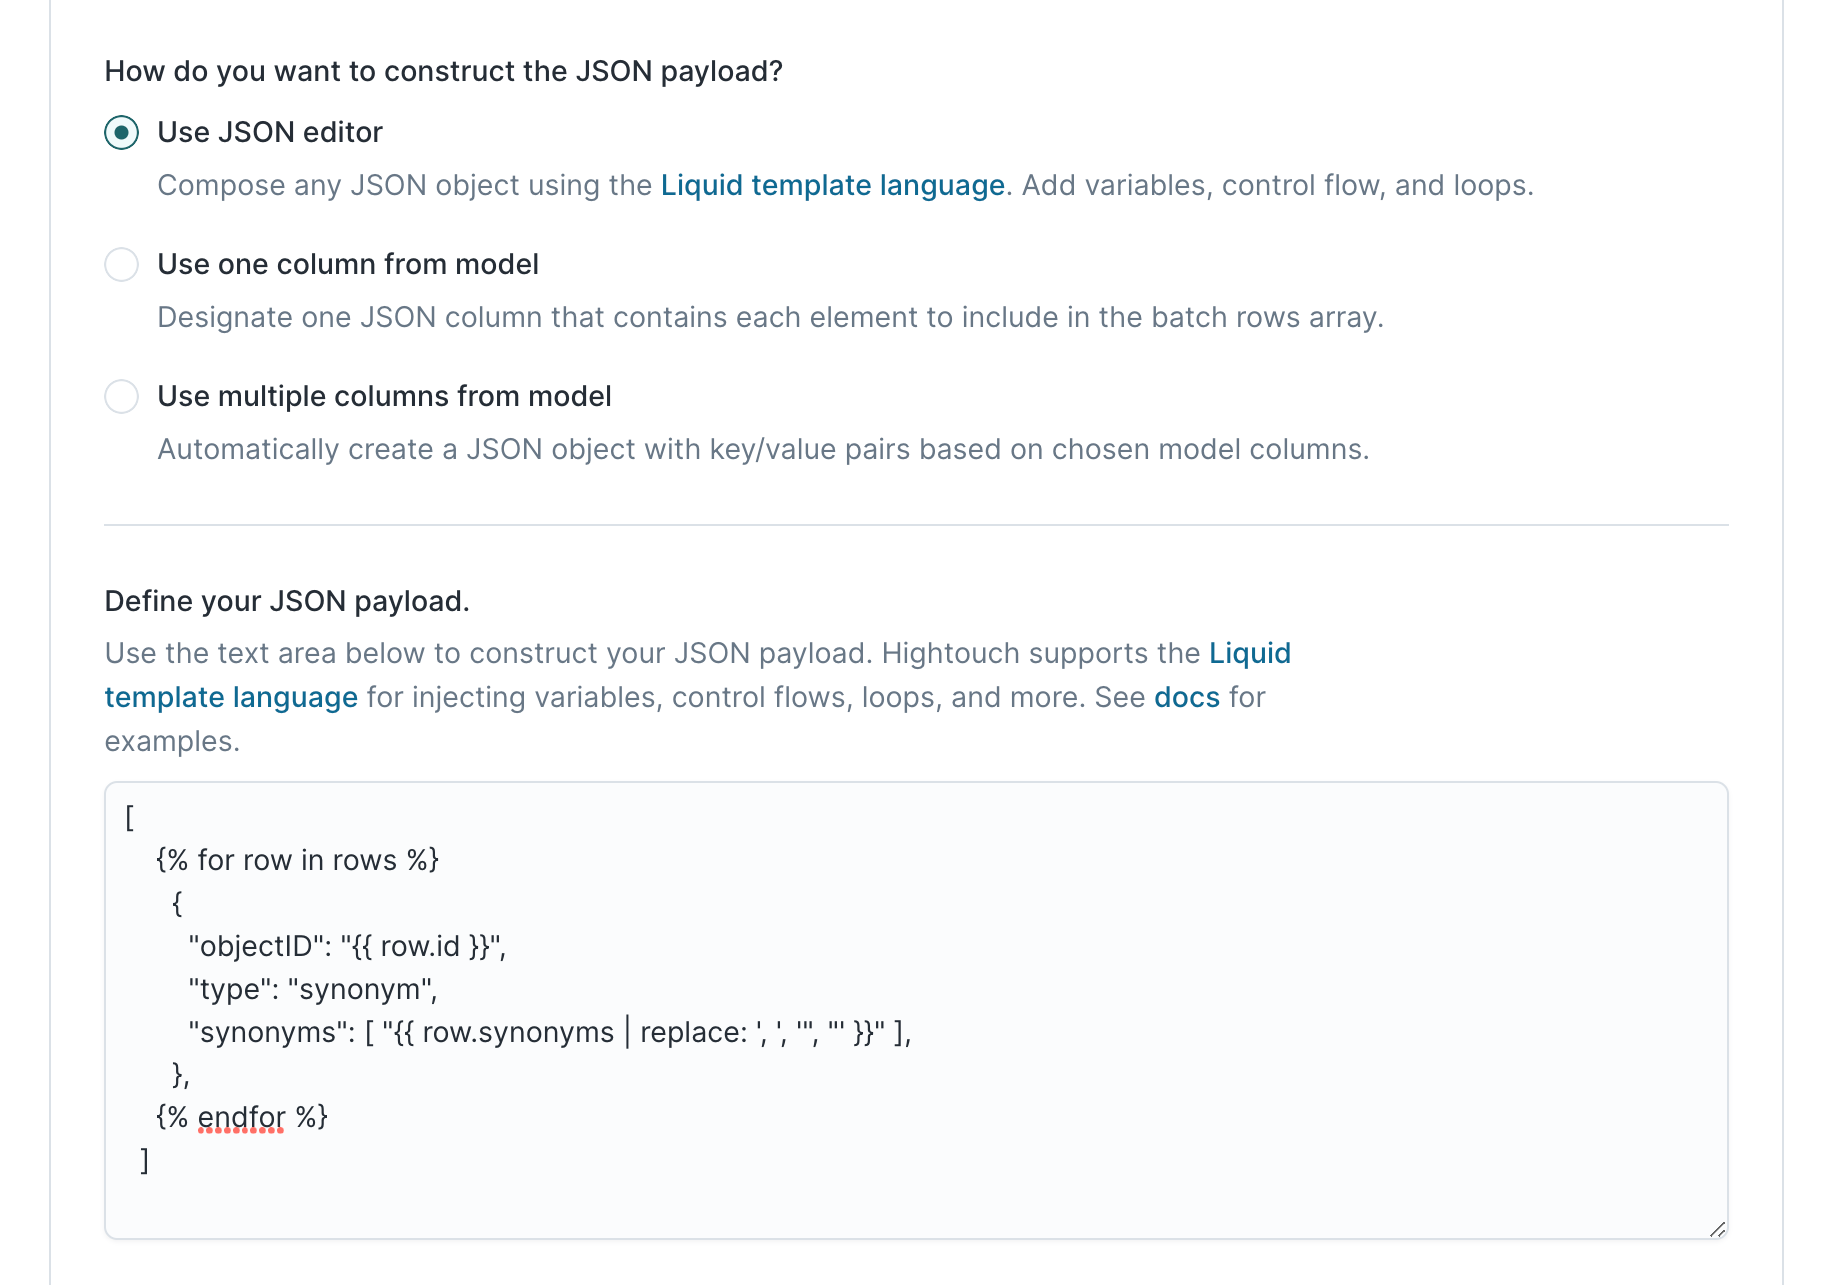
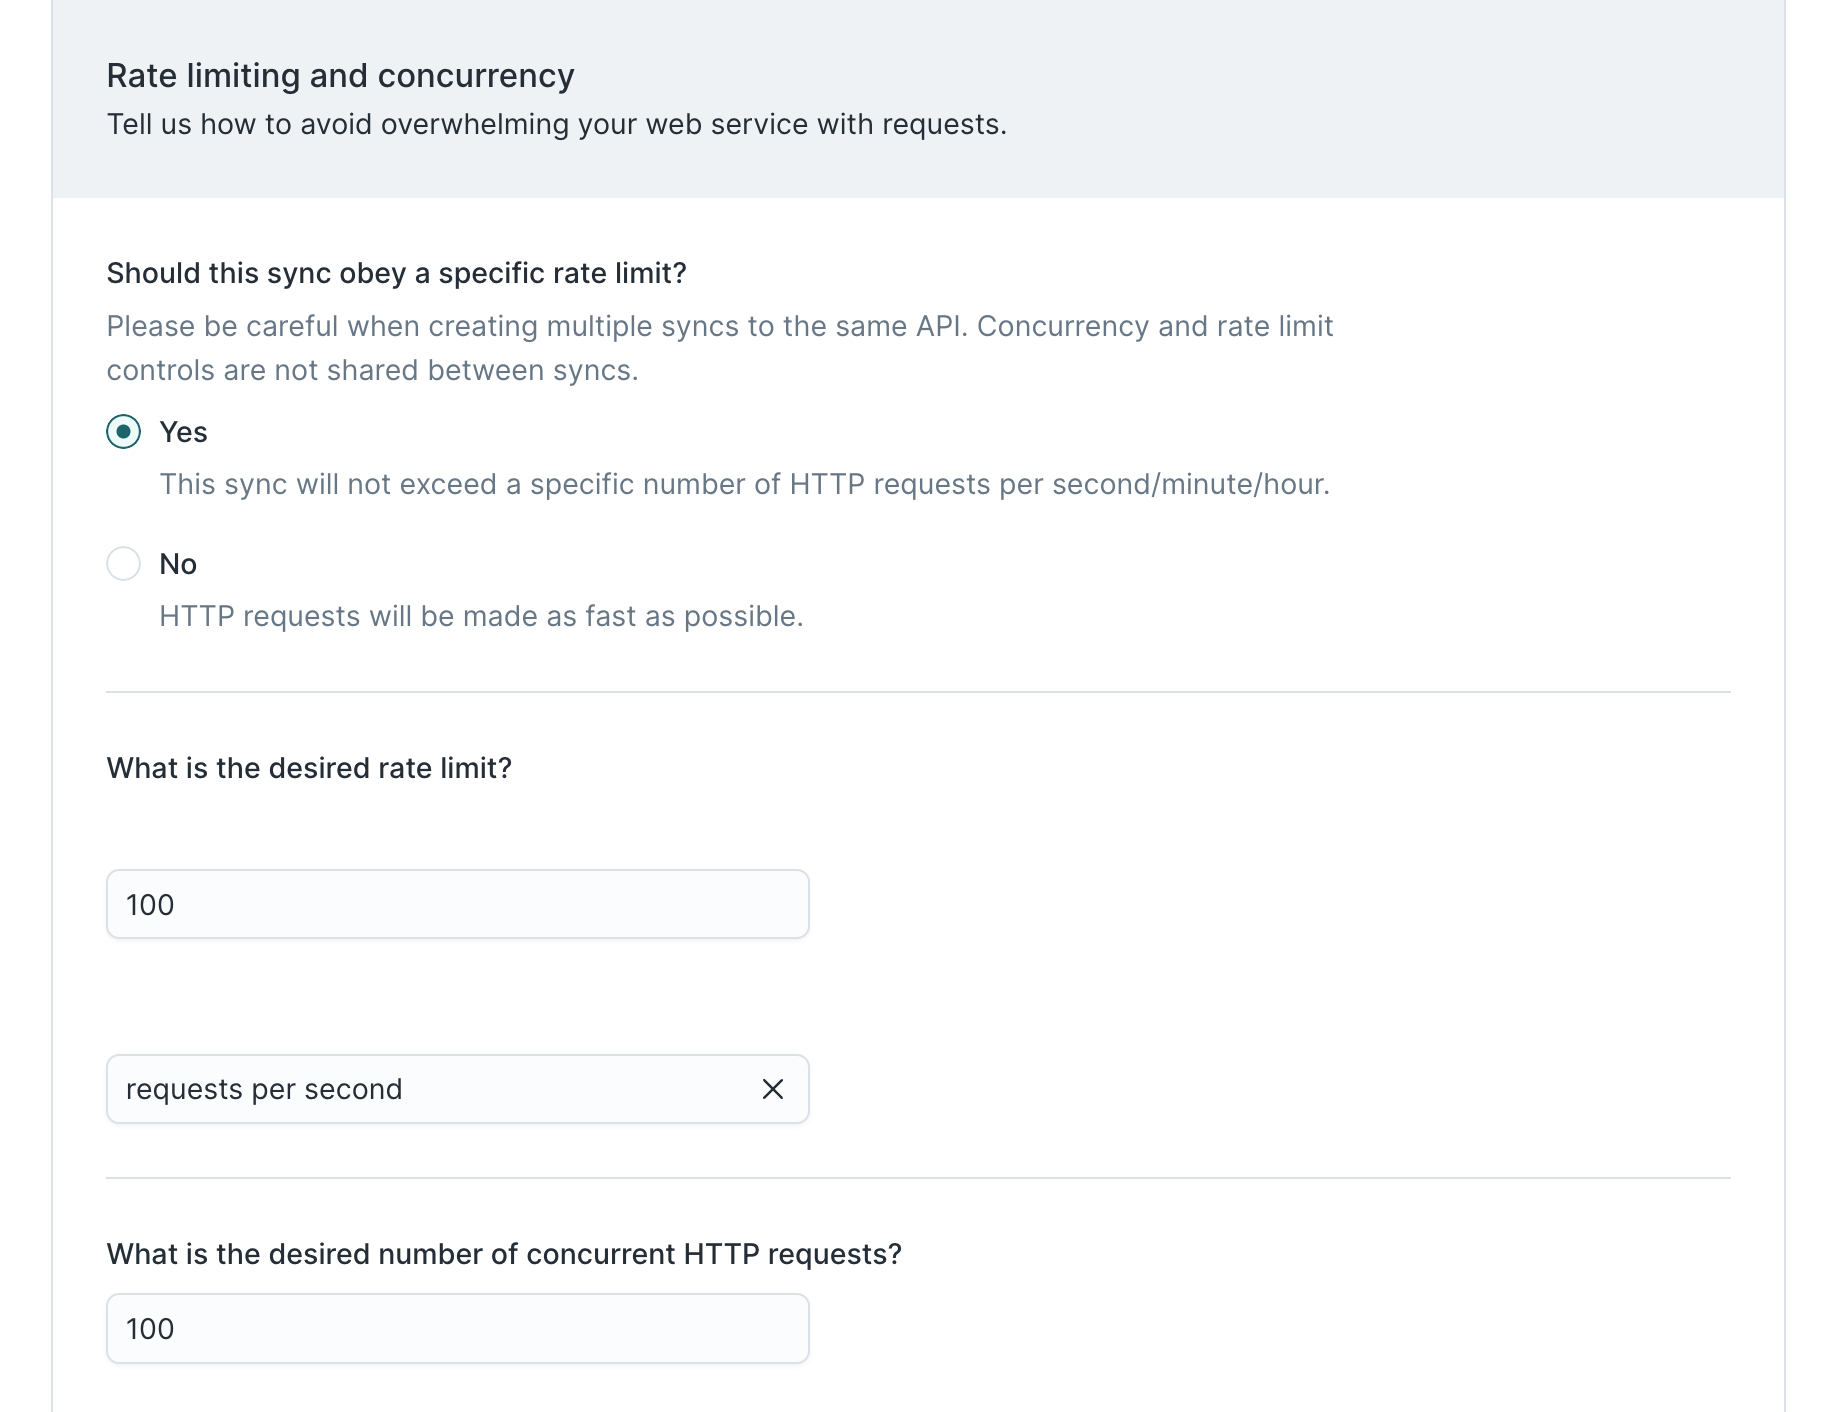
Next, we reference Algolia's docs regarding rate limits.
Algolia starts throttling indexing operations when you have over 100 pending requests, so we set a rate limit of 100 requests per second and a concurrency limit of 100 requests at a time.
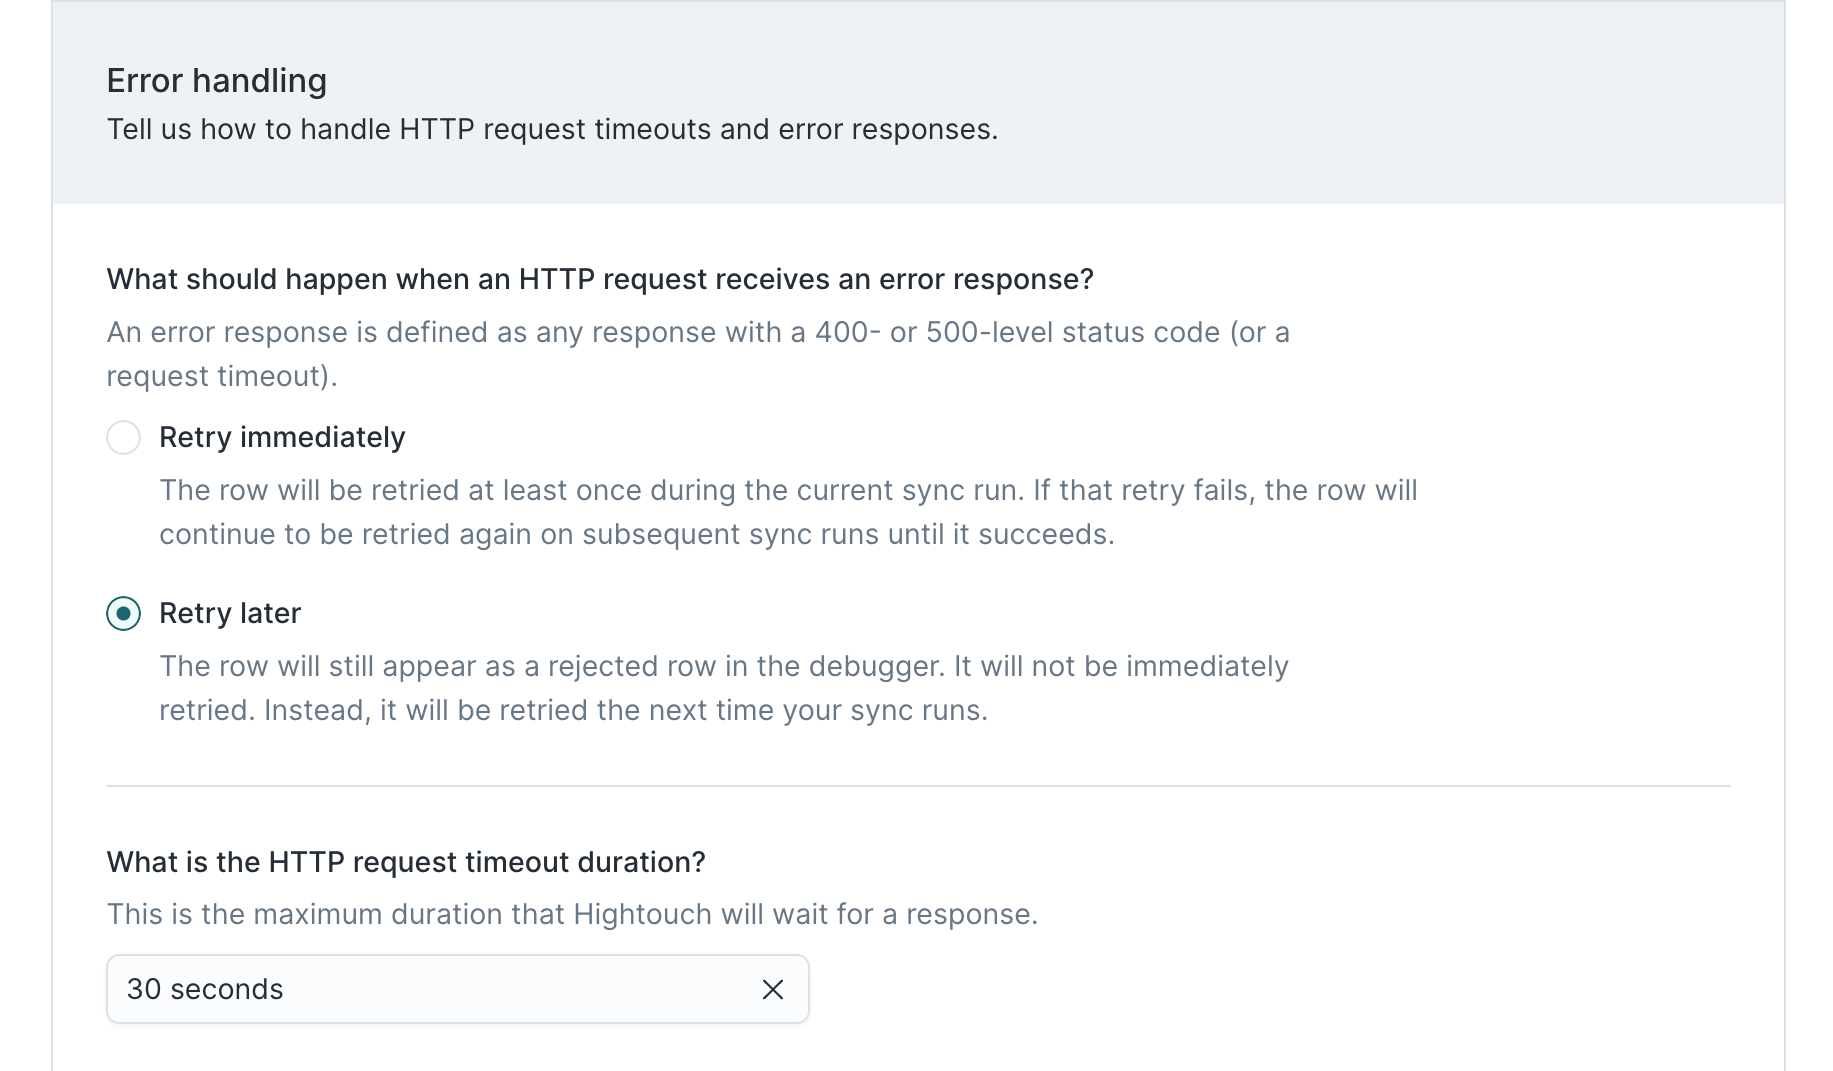
In the unlikely scenario that Algolia's API is experiencing downtime, we would want to wait a while before retrying failed rows. Therefore, we configure our sync to retry errors during the next sync run and give Algolia 30 seconds to respond to each of our HTTP requests.
Lastly, we want to make sure that our first sync run backfills our Algolia index with synonyms for all rows present in the initial model results.
That's it. Using Hightouch's UI, we've built a custom integration with Algolia to create new synonyms whenever new rows appear in our Hightouch model.
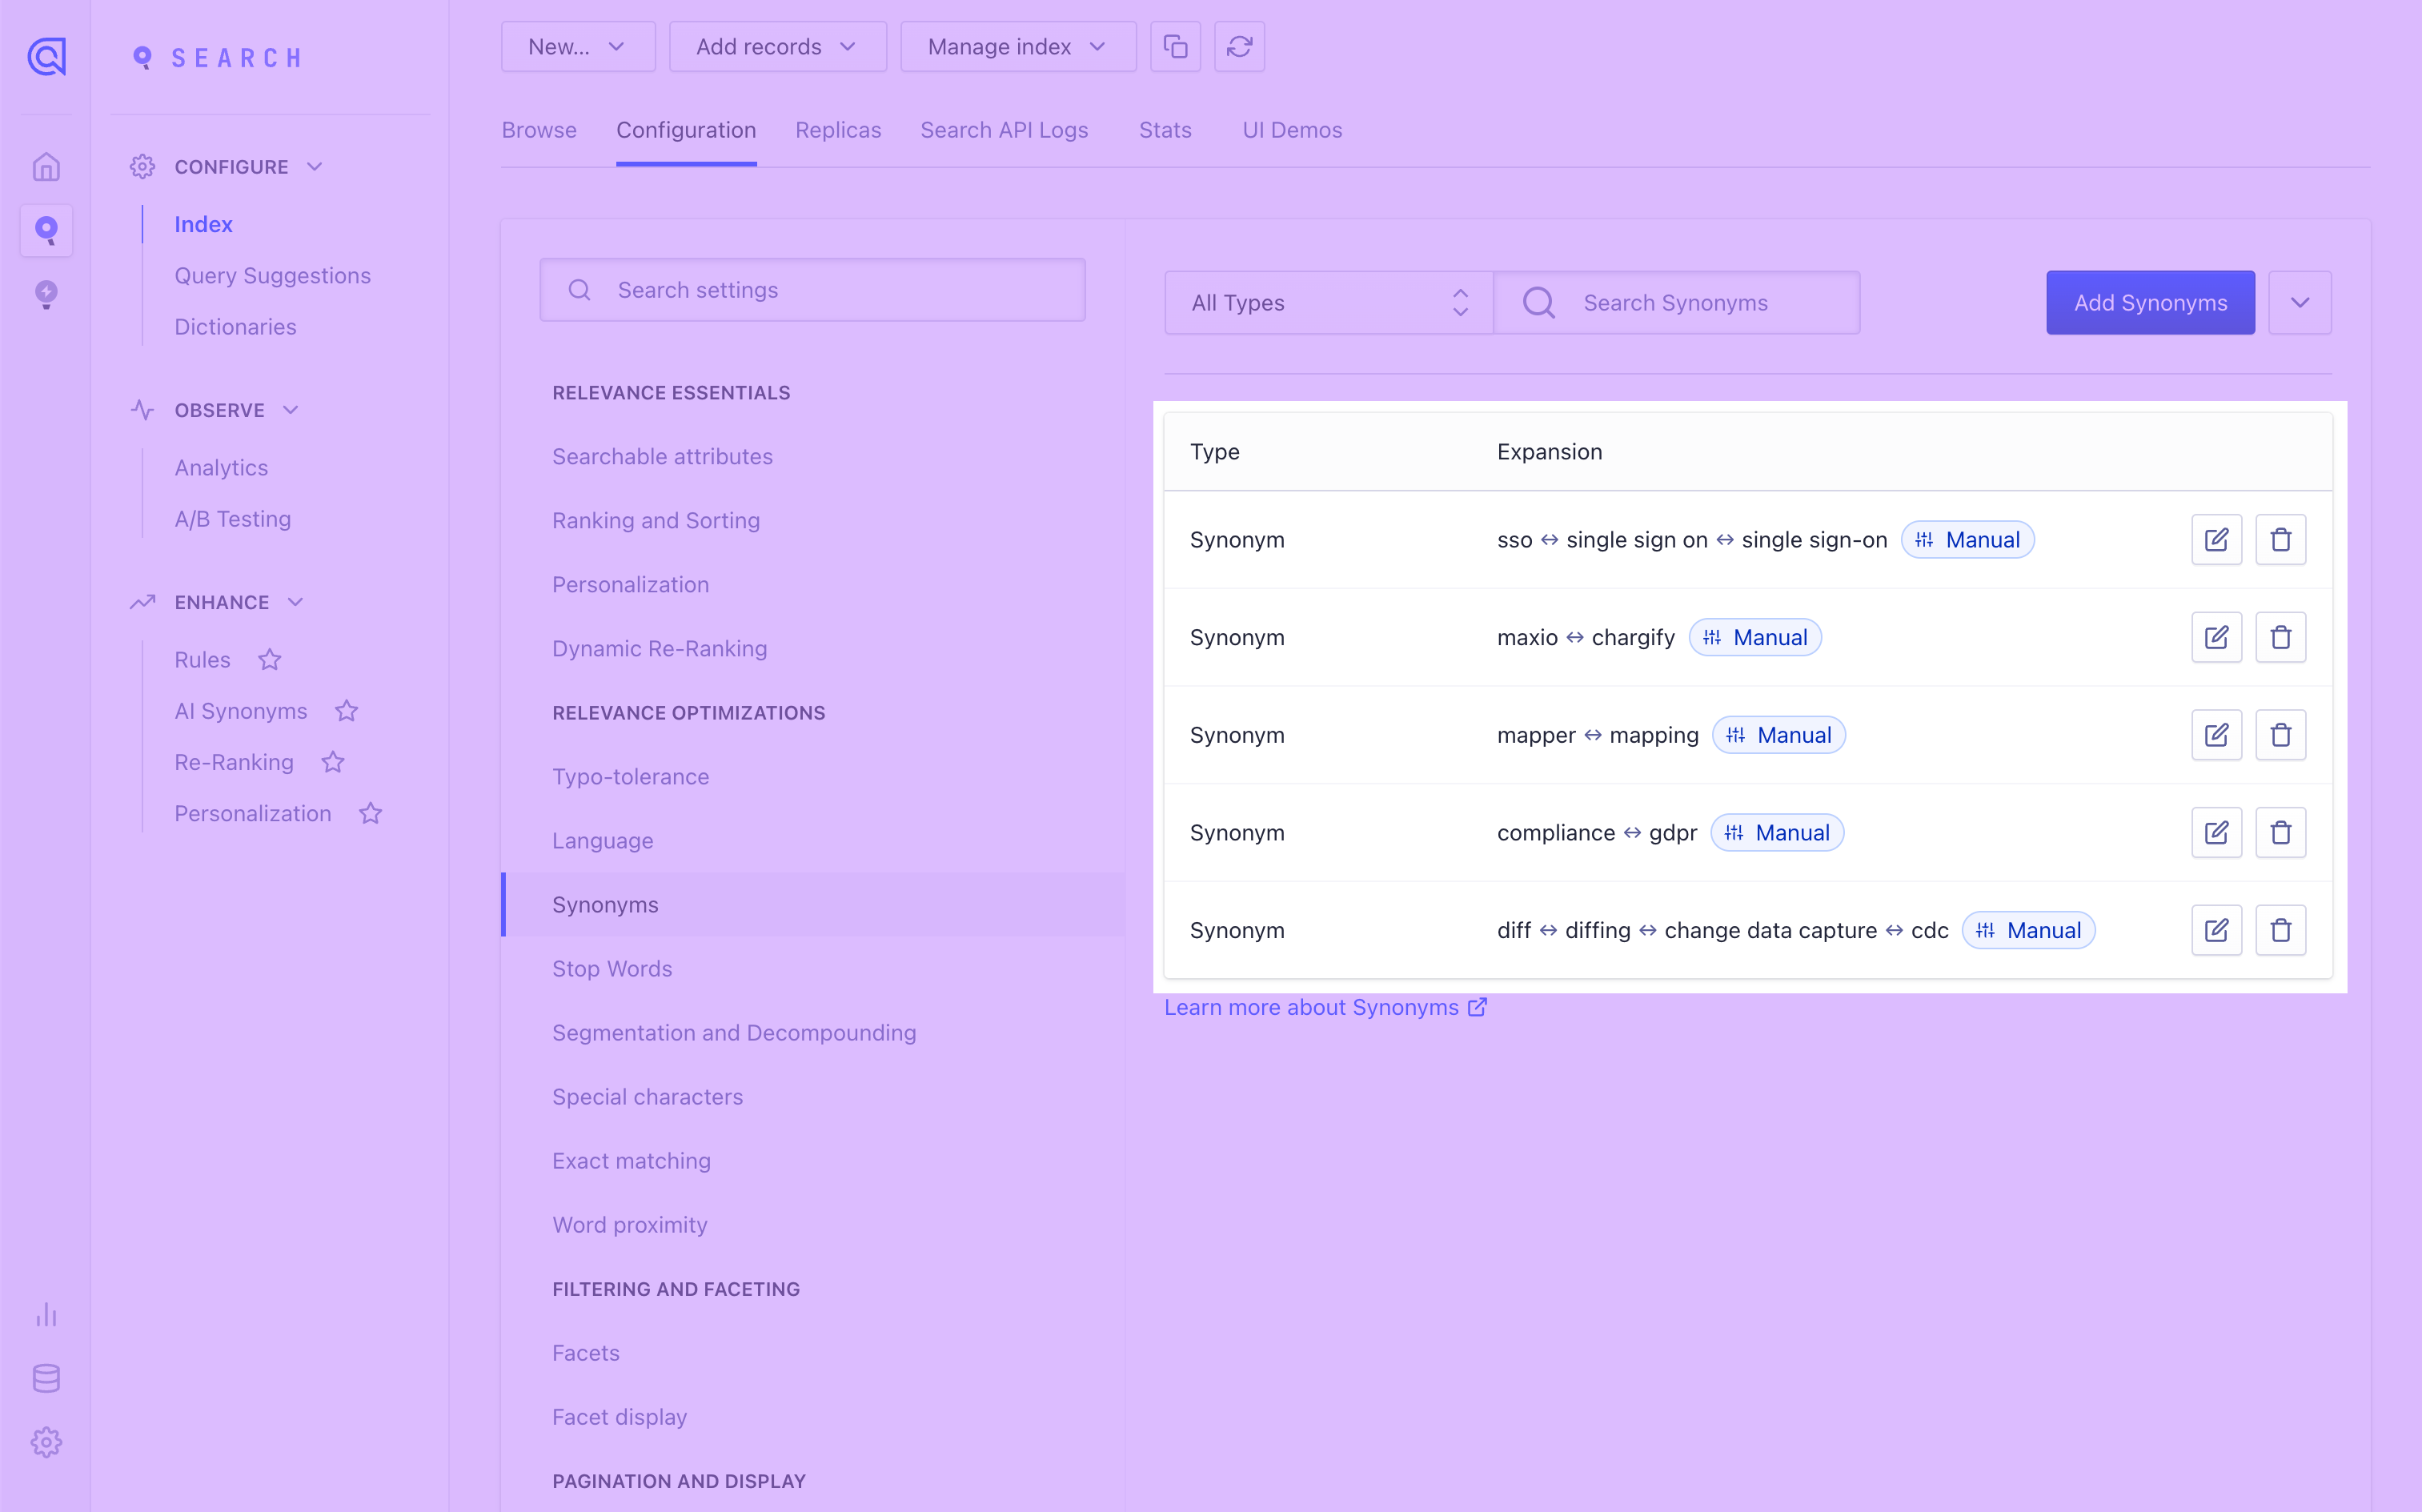
Once we've run the sync, we should check our Algolia dashboard to confirm the synonyms appear as we expect. We can also use the Hightouch debugger to inspect sync runs.
Updating or deleting synonyms
In the future, we might want to update and delete existing synonyms so that our Algolia index always stays in sync with the latest data in our source.
To do this, we would enable the rows changed and rows removed triggers for the HTTP Request destination. The configuration for each of these triggers would be slightly different from the tutorial above, but the same concepts apply. Reference the Algolia API docs to determine the appropriate HTTP method, endpoint, and payload for each operation.
