| Audience | Marketers, campaign managers |
| Prerequisites |
|
Use this checklist to QA your messages before launching an AI Decisioning agent.
Why QA in AI Decisioning
Your team has likely already QA'd creatives before adding them to AI Decisioning. This guide covers the additional QA you should run inside AID — specifically for things AID introduces on top of your existing creative workflow:
- Variants — AID can serve different subject lines, images, CTAs, and more. You need to confirm every option renders correctly.
- Payload fields — AID passes user data (like first name or product recommendations) to your messaging platform. You need to confirm these populate in the rendered message.
- Targeting and send rules — AID applies audience eligibility, send limits, and timing at the message, variant-type, and individual-variant levels. You need to confirm these match your campaign intent.
- UTM parameters — AID constructs links with tracking parameters. You need to confirm URLs resolve correctly and UTMs are intact.
Run through this checklist whenever you launch a new agent, add or update messages, or change targeting rules.
How to preview and test variants
A single message in AID can have multiple variant types (for example, subject line, image, CTA). Each variant type can have multiple options. To QA your message, you preview and test each option individually.
For each variant option:
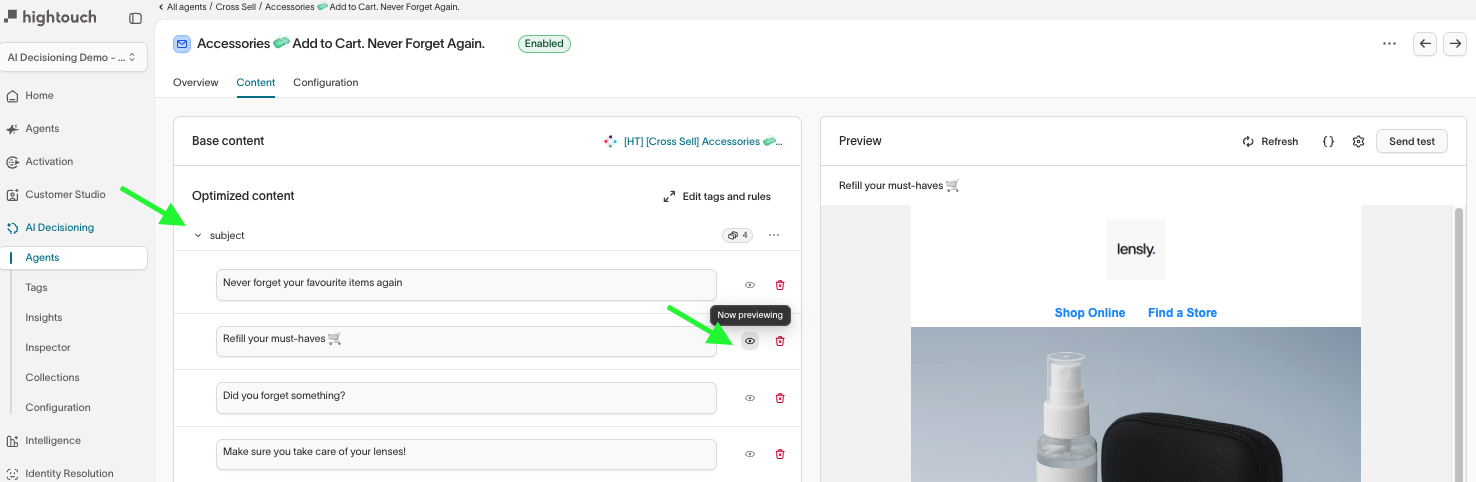
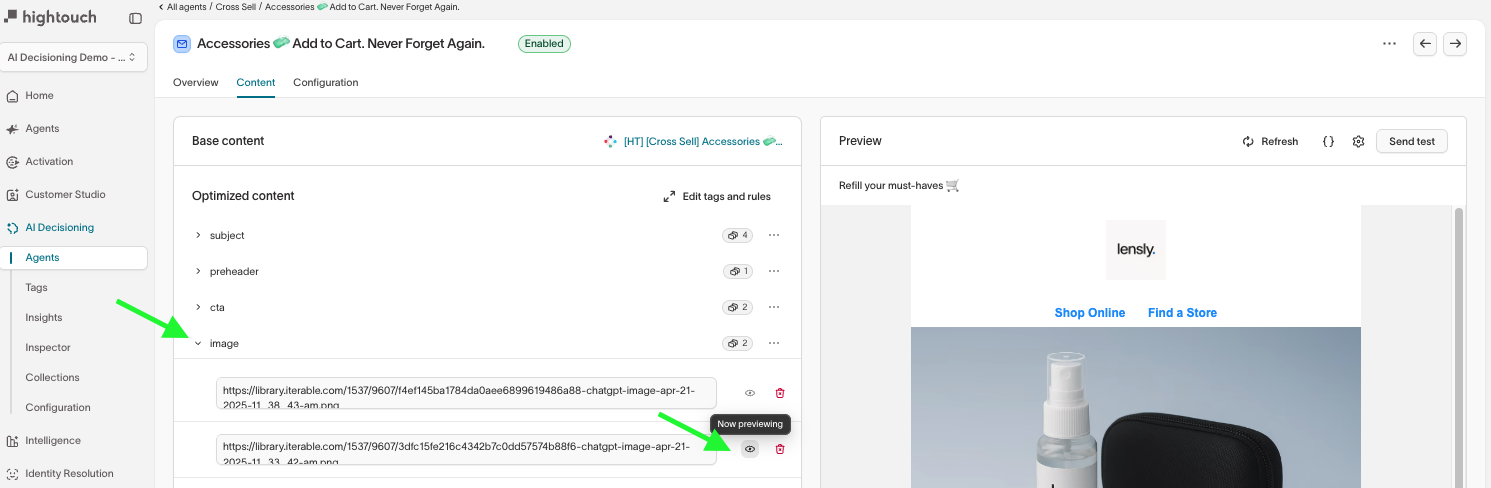
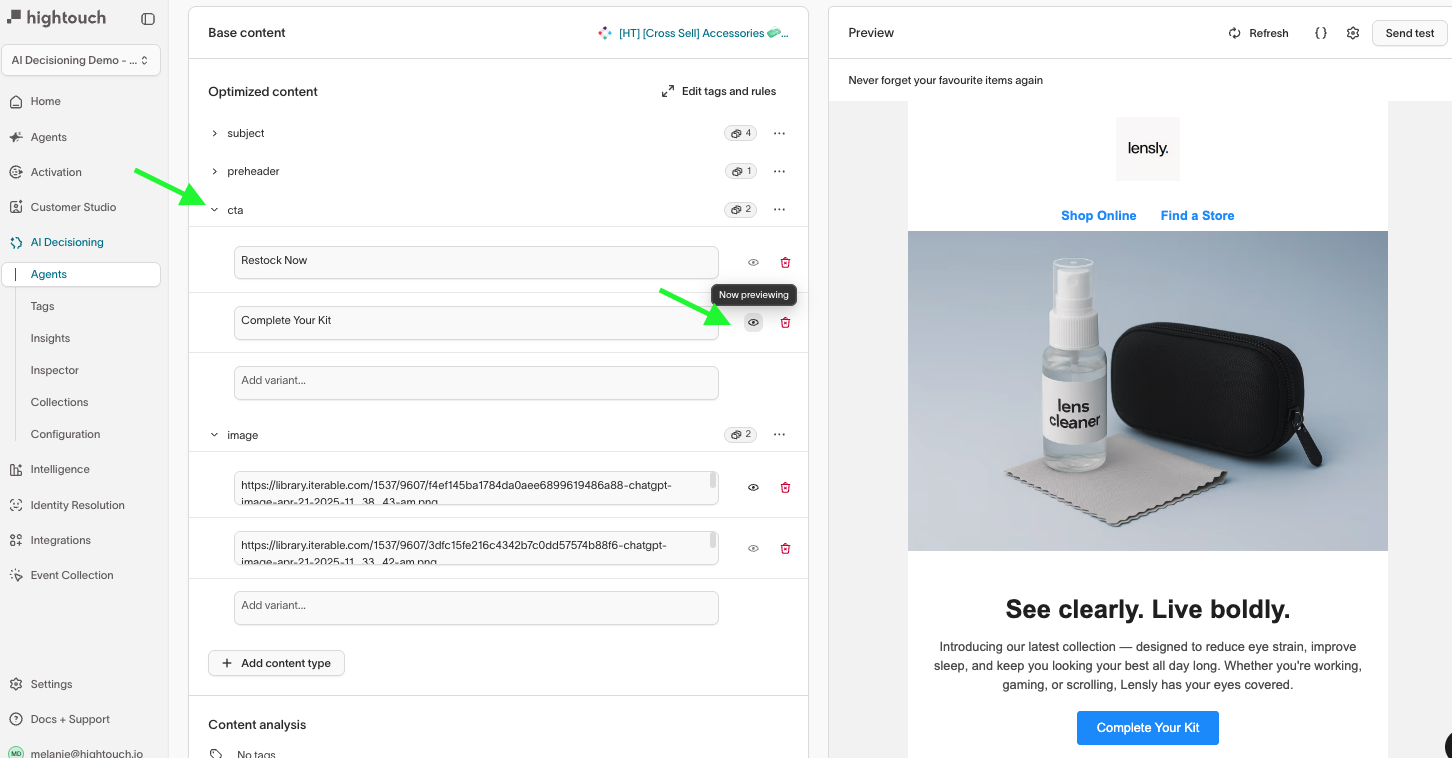
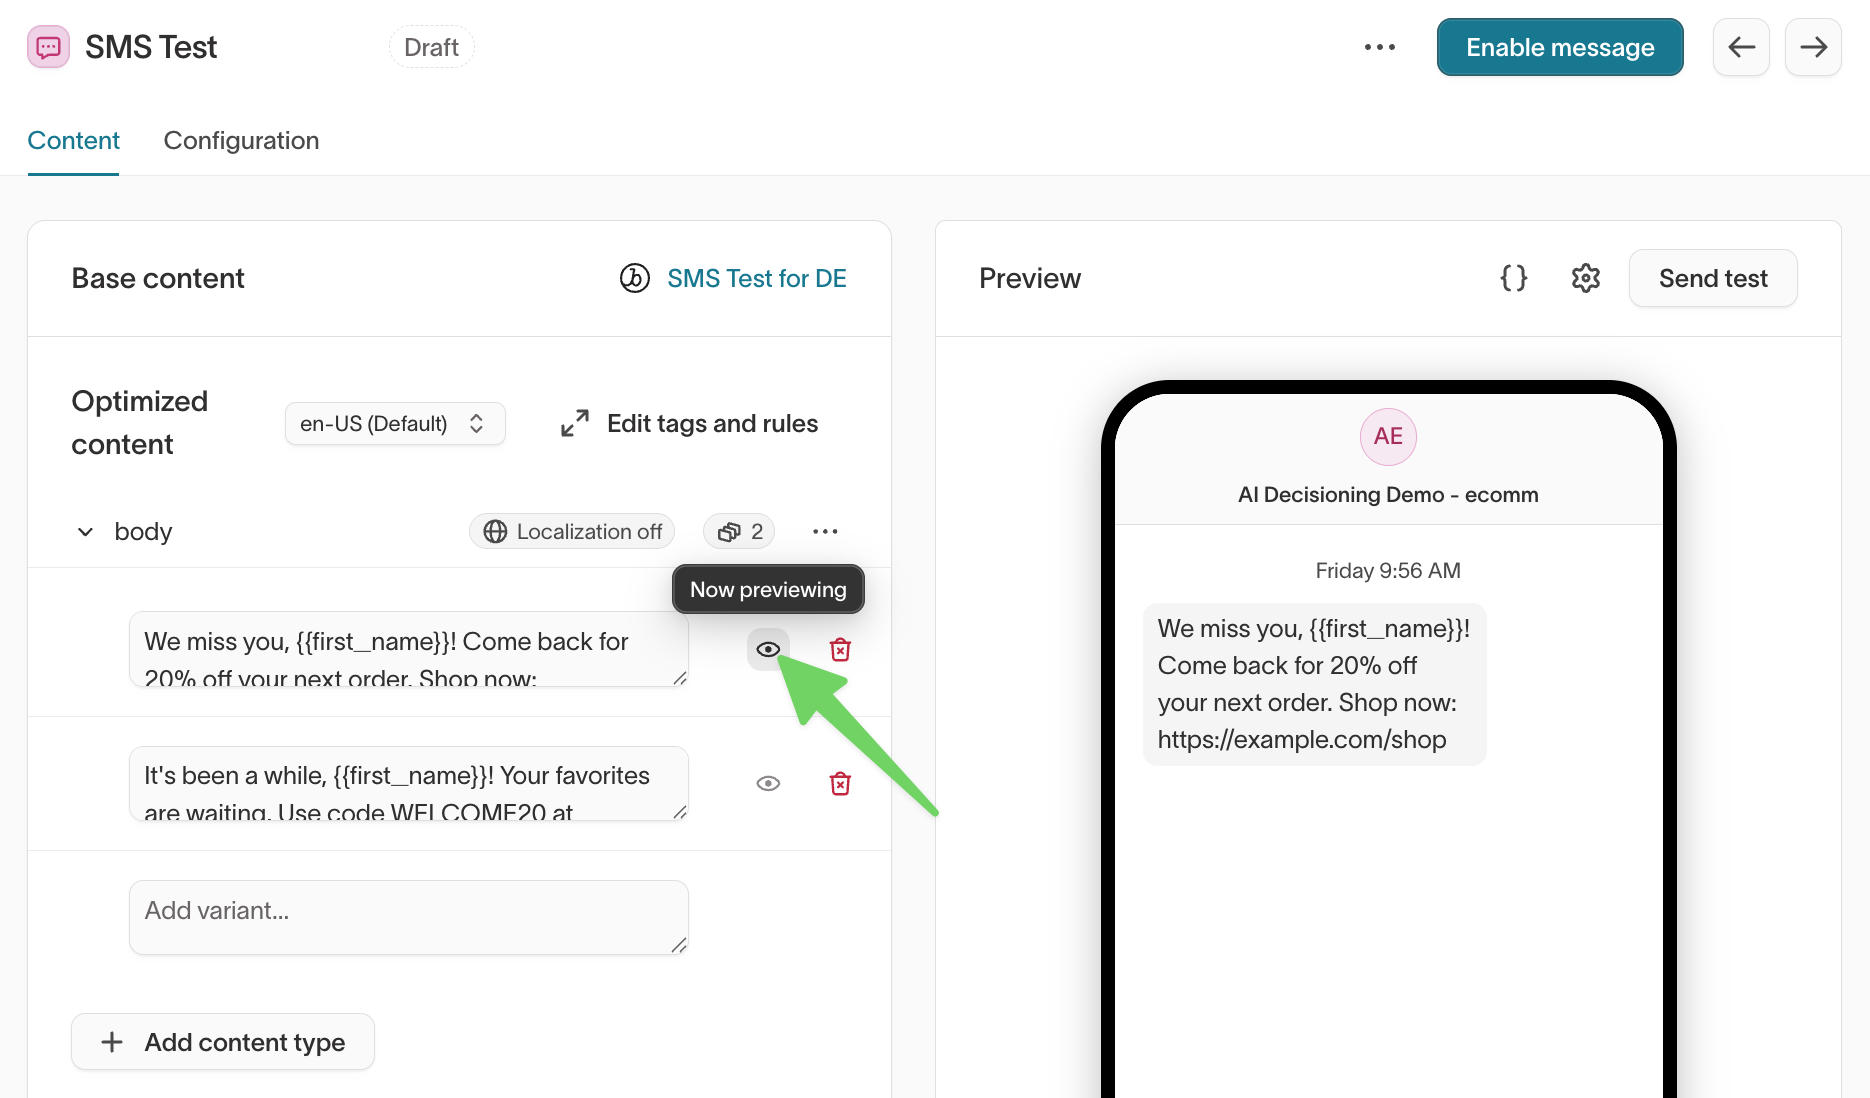
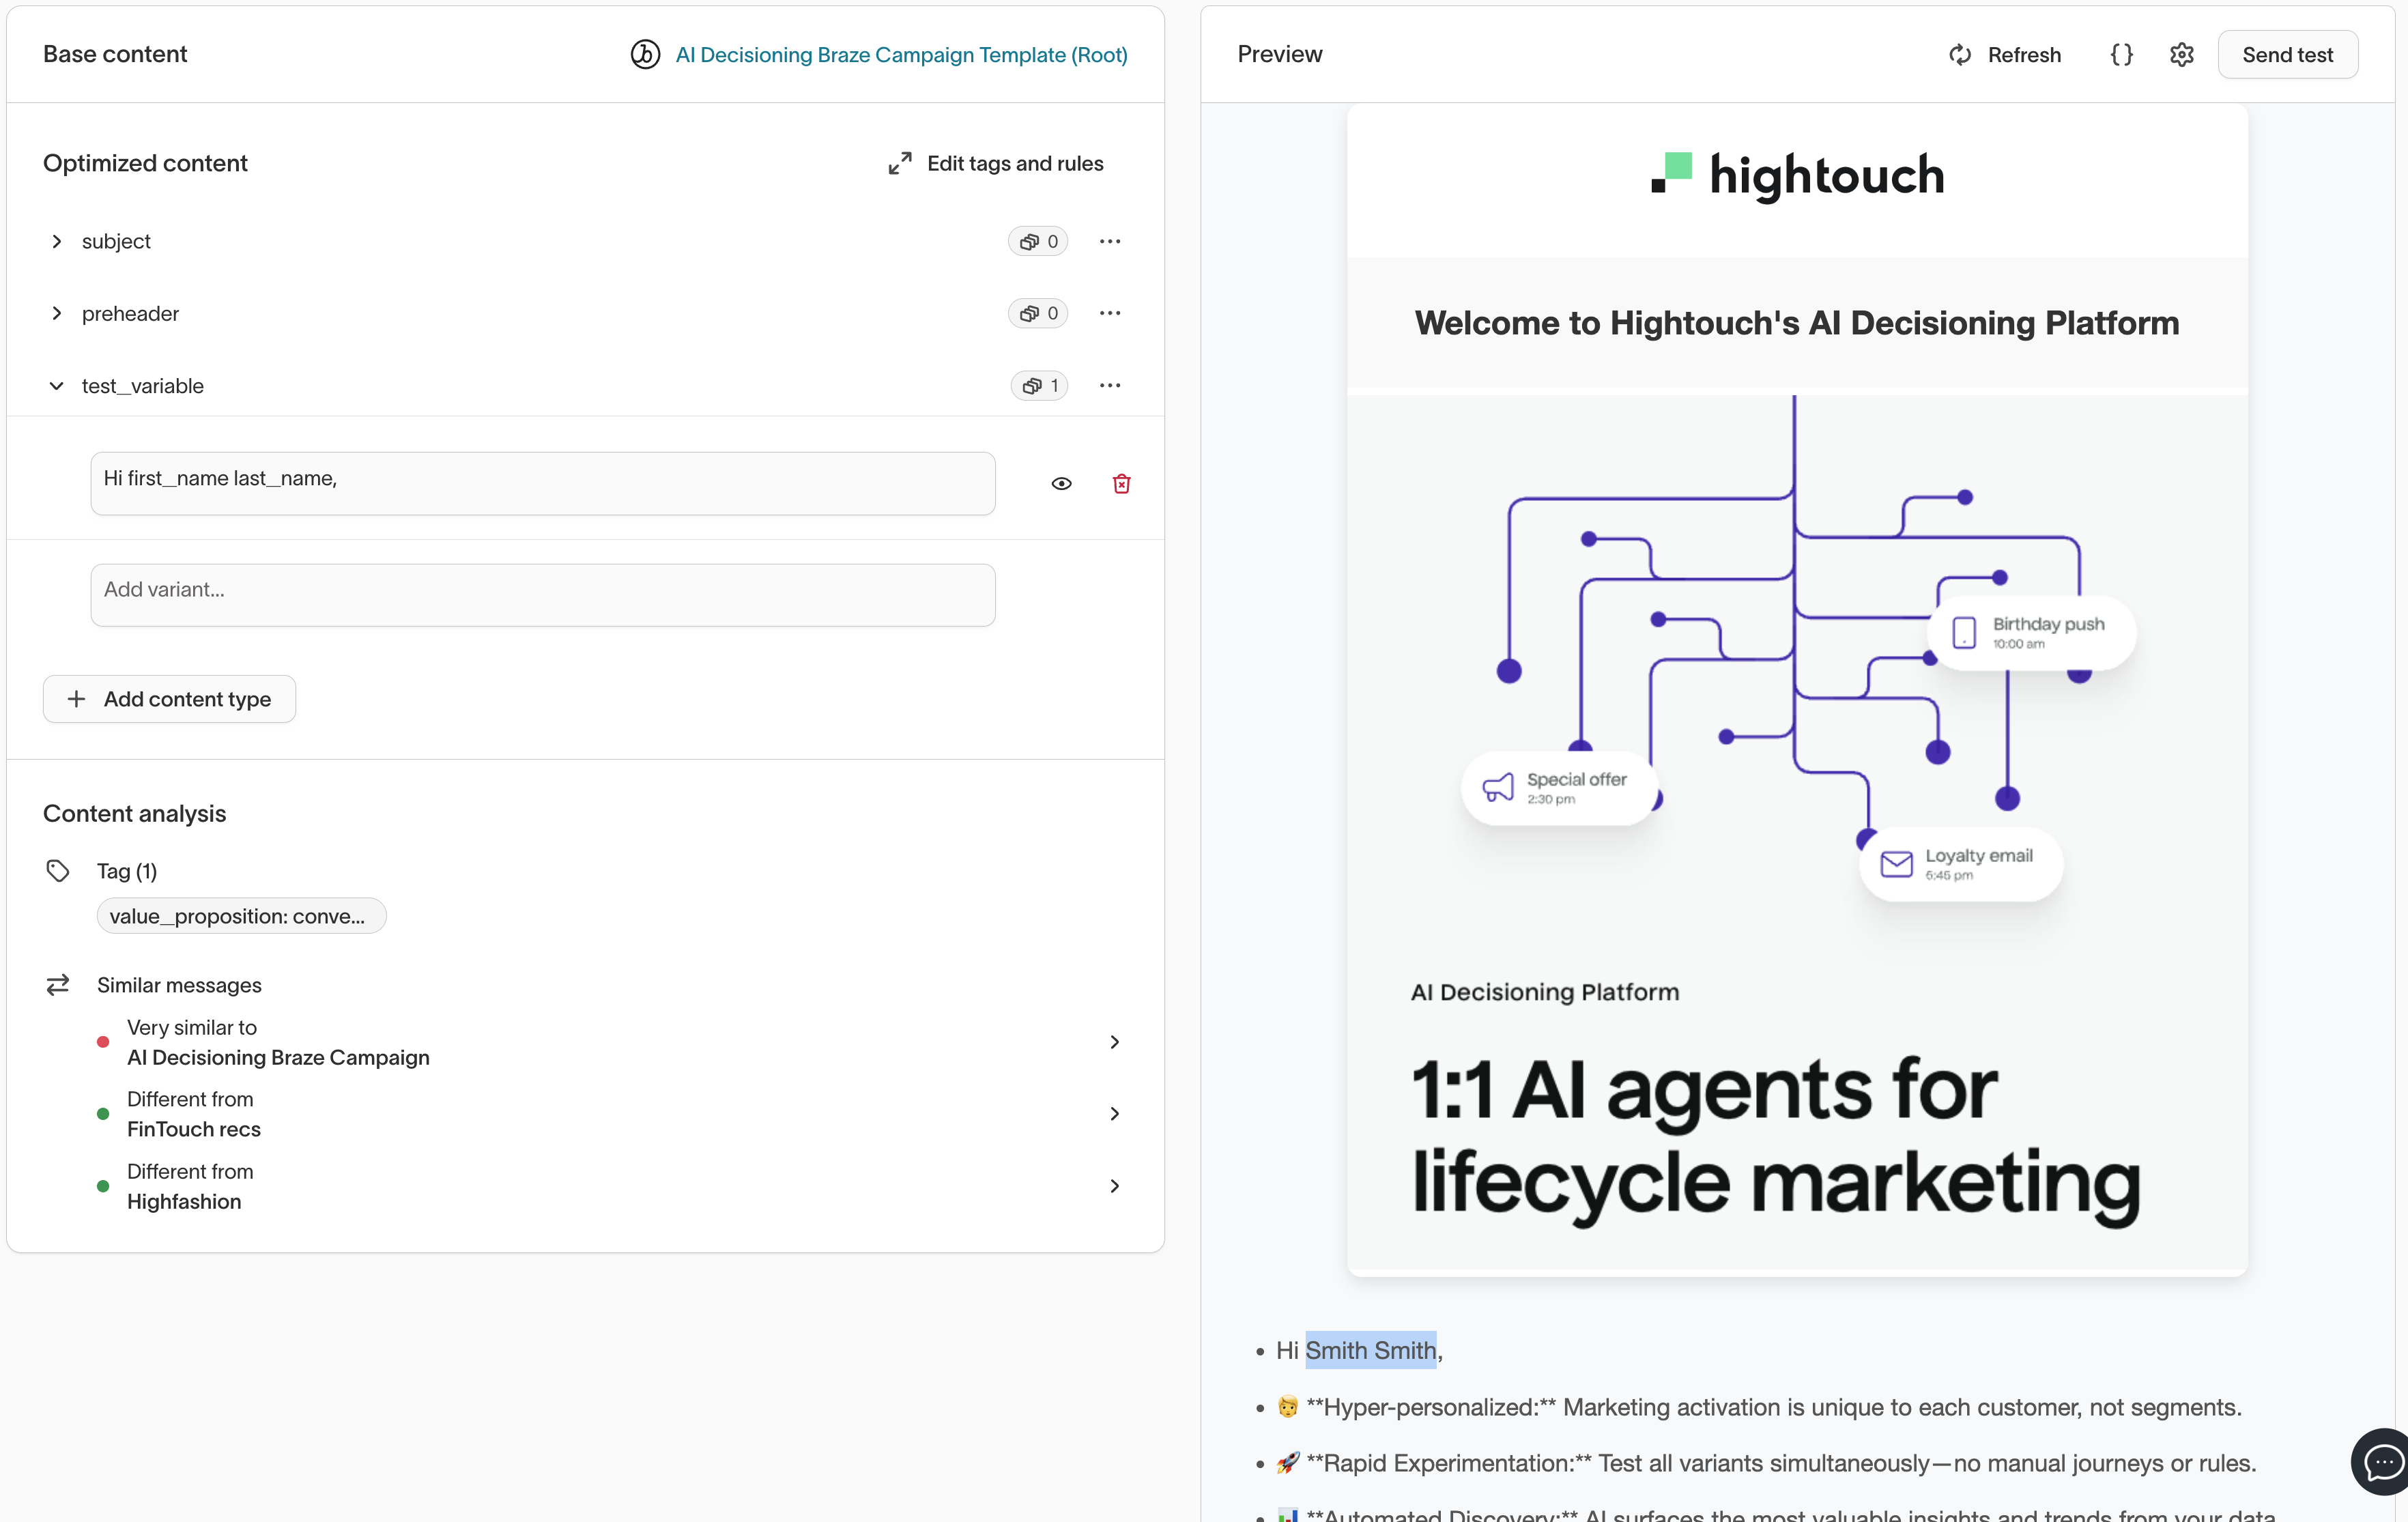
- Preview the variant — In your message’s Content tab, expand the variant type you want to test (for example, subject) and click the eye icon next to the option you want to preview. The "Now previewing" banner confirms the option is selected.
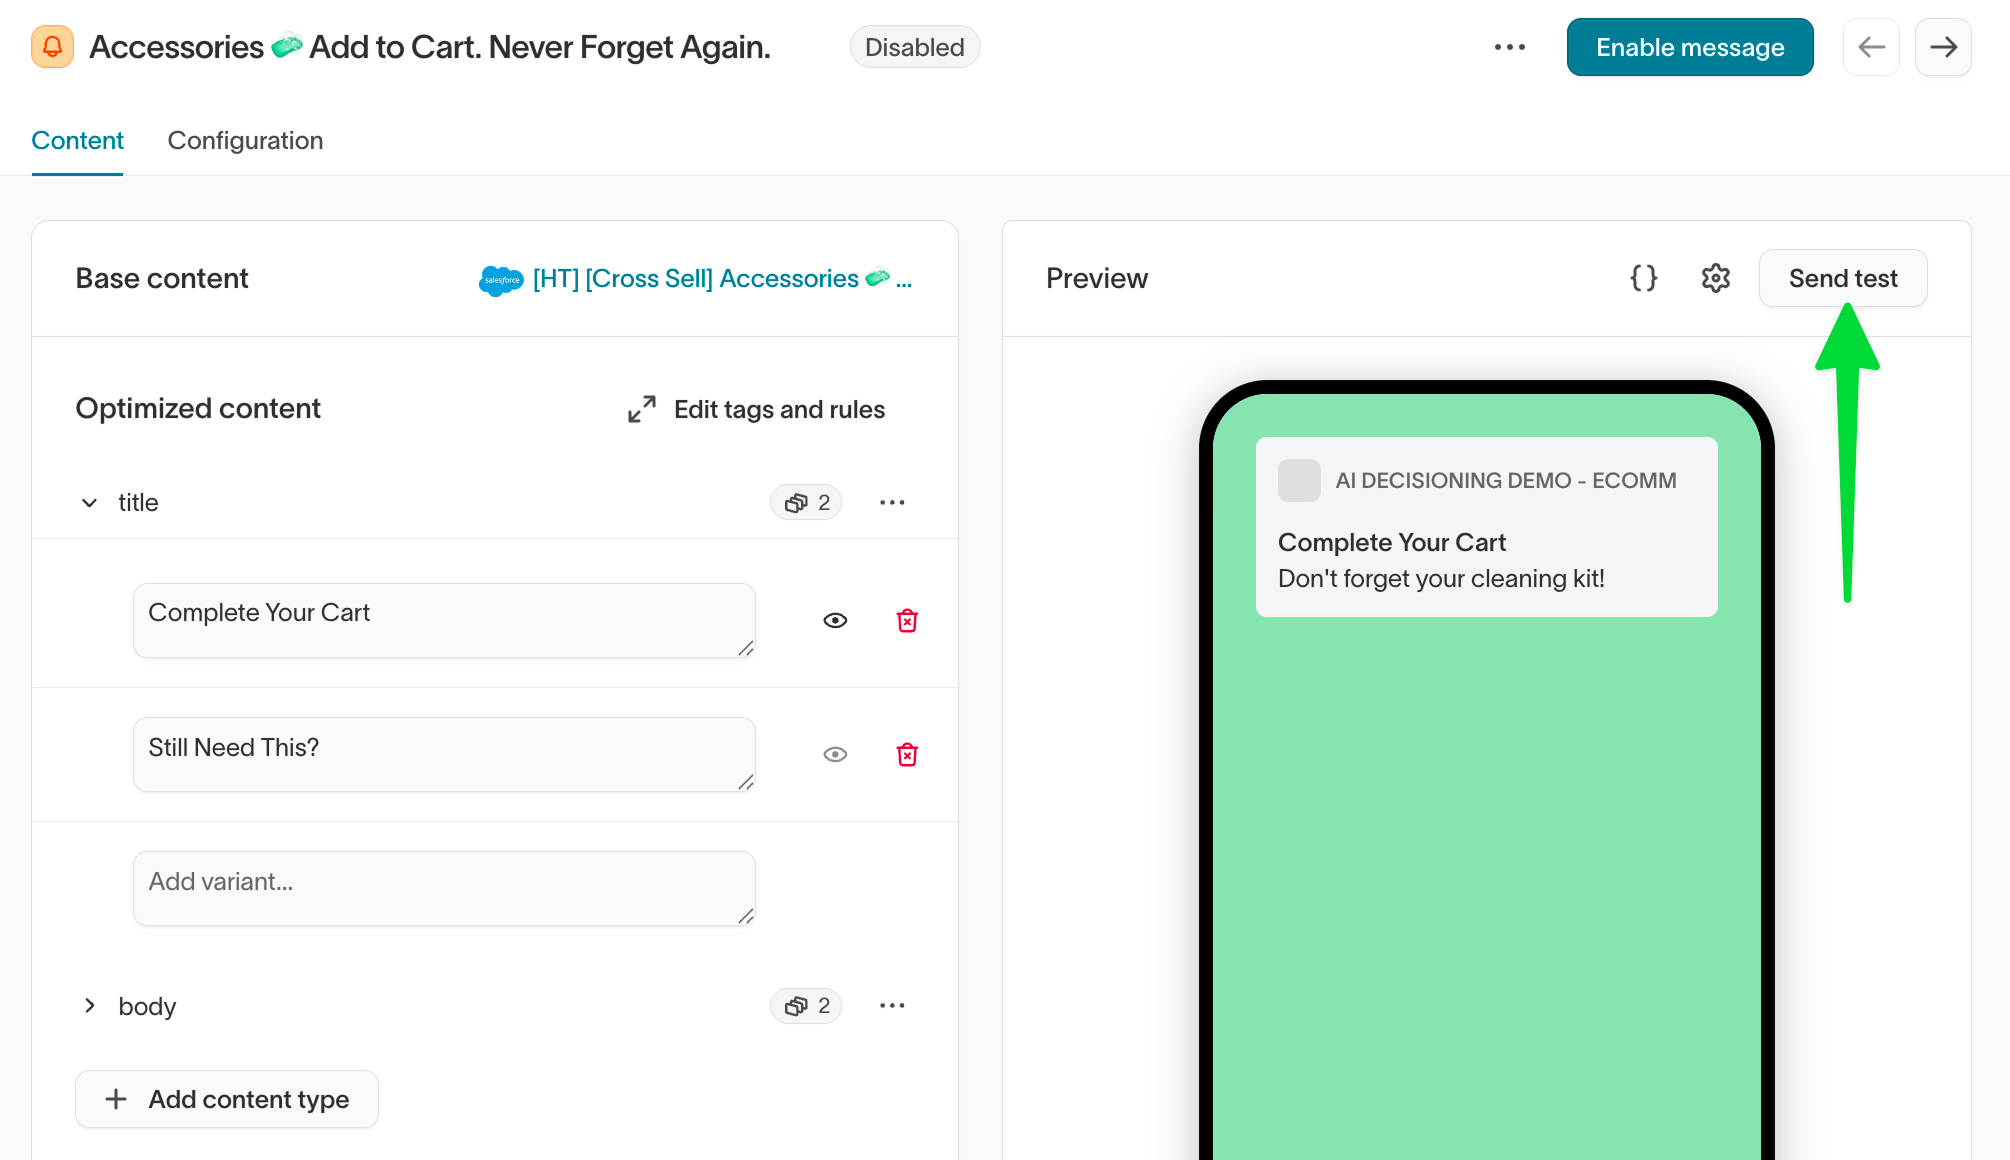
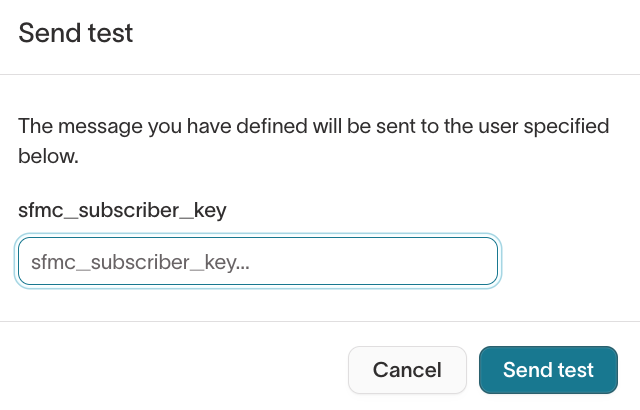
- Send a test — Click Send test. In the dialog that appears, enter the identifier for your test user (for example, an email address or user ID) and click Send test. The test message uses exactly the variant options you’ve selected.
-
Check the test message — Open the test email, SMS, or push notification and verify the content renders as expected. Use the channel-specific checklists below to know what to look for.
-
Repeat for each variant option until you’ve tested every option across all variant types.
-
After testing all variants, switch to the Configuration tab to review message-level settings like send limits, timing, and audience eligibility. See the channel-specific checklists below for the full list of configuration checks.
"Now previewing" is not just a visual preview. It determines what gets sent in your test message.
Email QA
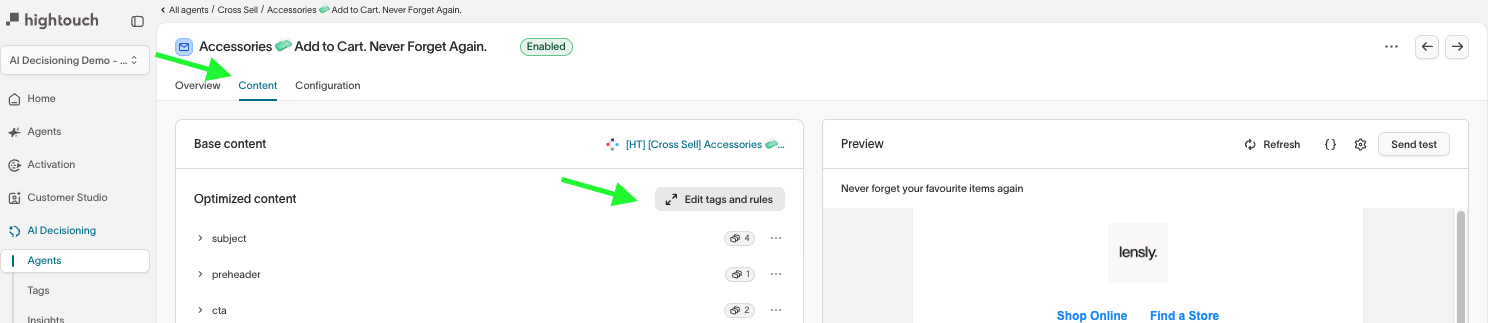
Preview and test each variant option in the Content tab, then confirm your send rules in the Configuration tab.
Go to: AI Decisioning → Agents → [Your Agent] → Messages → [Your Message]
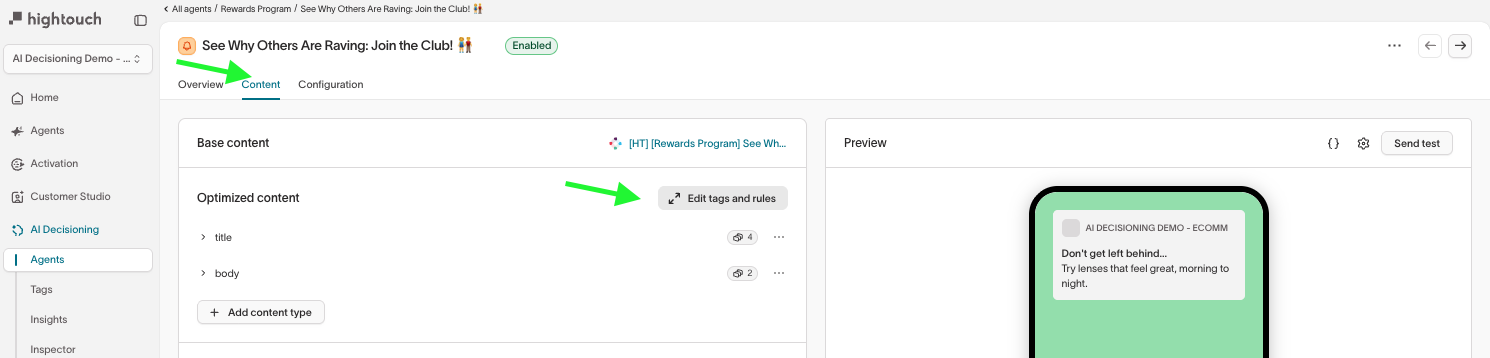
Content tab
If your message uses variants, preview and test each option as you work through the checks below.
- Sender and metadata
- Subject line and preheader
- Body content
- Links and CTAs
- Footer
- Variant-type send limits
- Individual variant eligibility
Sender and metadata
- Confirm the sender email address matches what recipients should see in their inbox.
Subject line and preheader
- Confirm the subject line and preheader render correctly for each variant.
- Confirm personalization tokens (first name, dynamic fields, etc.) populate with real user data — not placeholder text or blanks.
Body content
- Confirm the content matches your intended messaging and layout.
- Confirm images render correctly and include alt text.
- Confirm dynamic or conditional content behaves as expected for different audience segments.
Links and CTAs
AID constructs the final URL including UTM parameters, so check the full link — not just the display text.
- Confirm all links and buttons lead to the correct destination.
- Confirm UTM parameters and tracking links are intact.
Footer
- Confirm the footer displays correctly.
- Confirm unsubscribe, privacy, and legal links work.
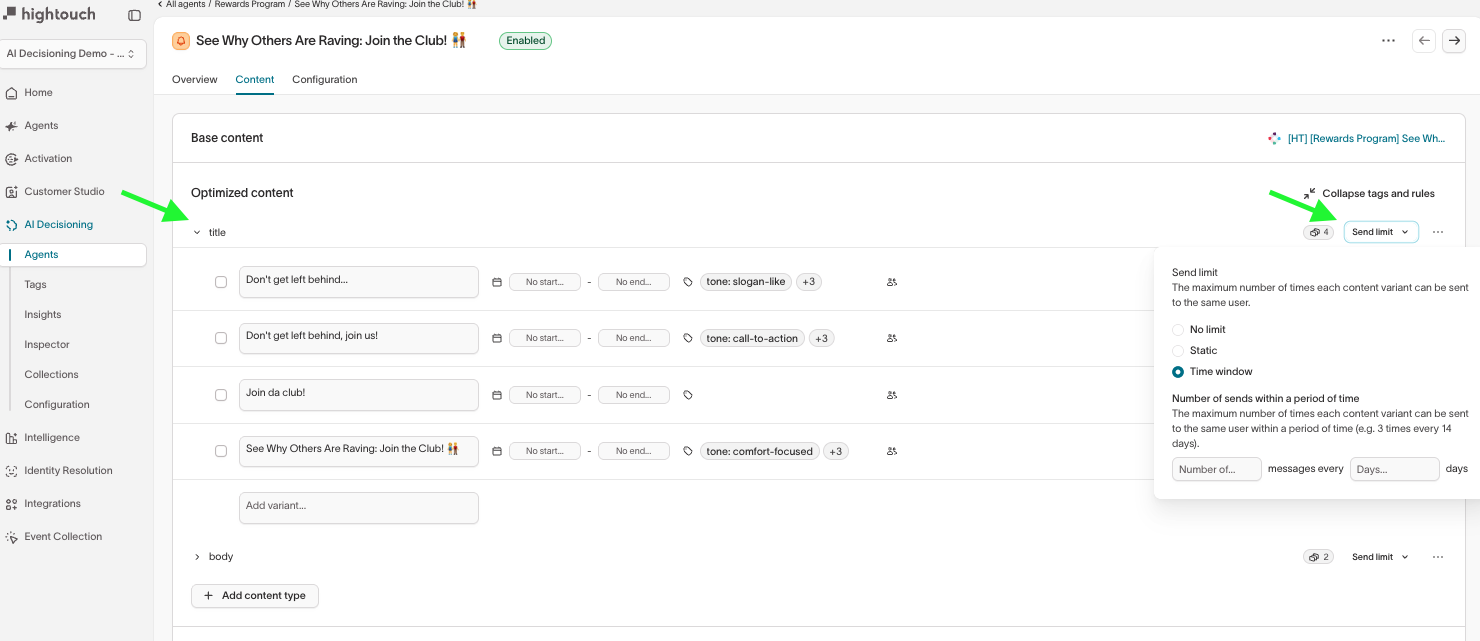
Variant-type send limits
These let you set send limits per variant type. For example, you can cap how often a specific subject line is sent to the same user. To access these, click Send limit at the top of a variant type section.
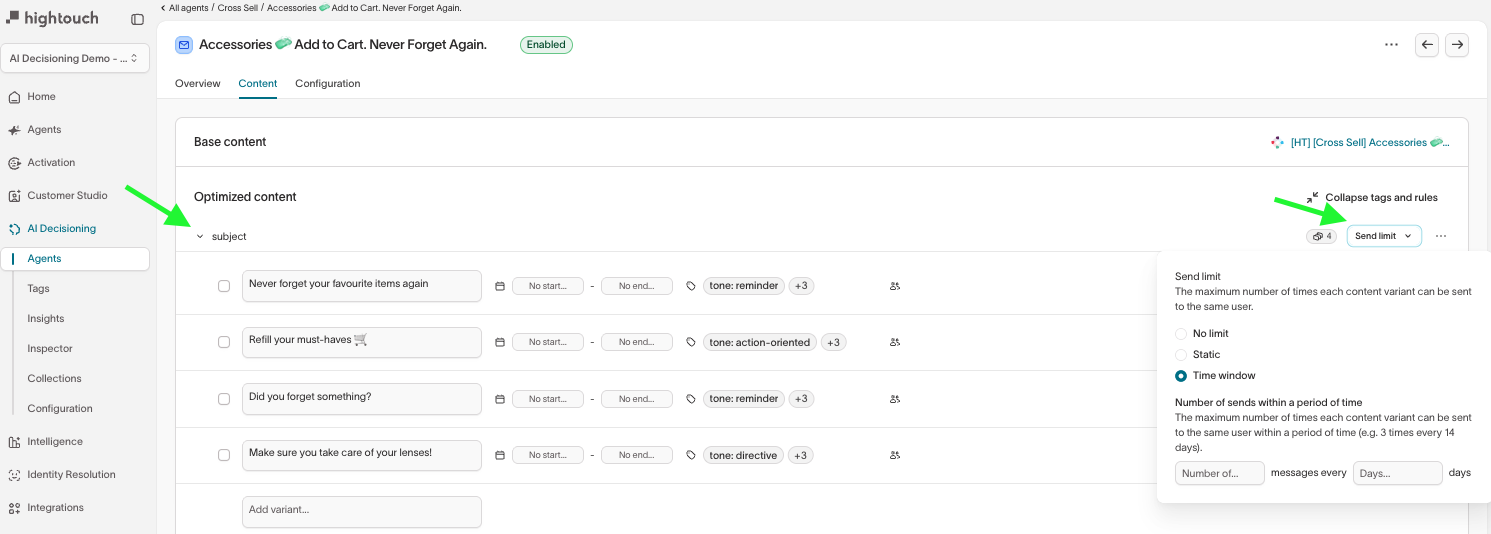
- Confirm send limits are set correctly for each variant type.
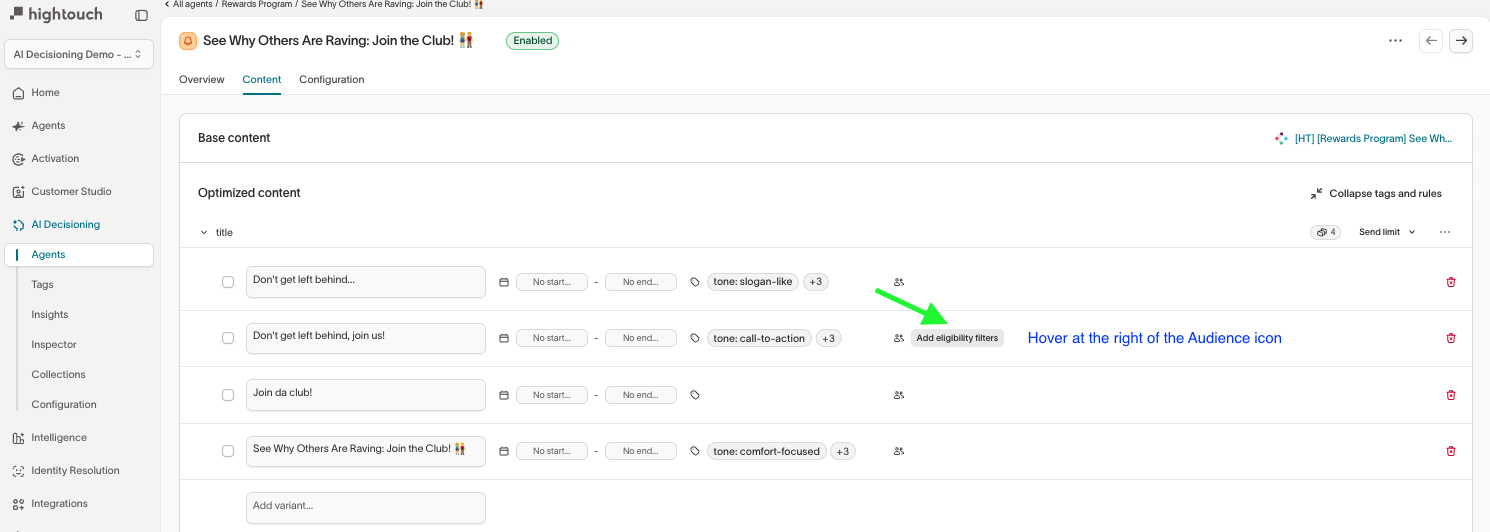
Individual variant eligibility
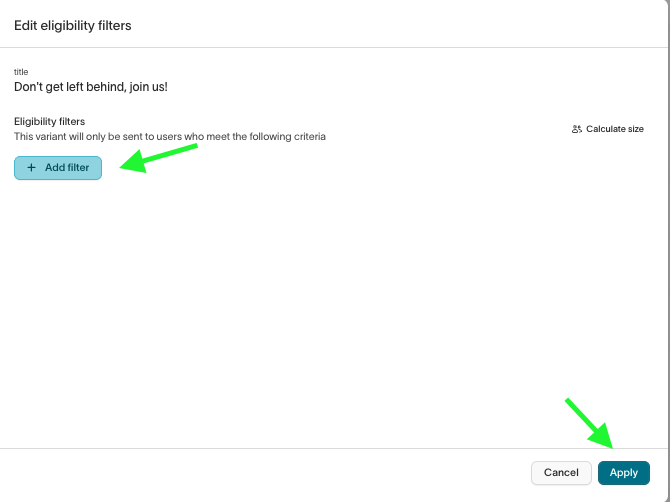
These let you restrict specific variant options to certain audience segments. For example, you can limit a "VIP exclusive" subject line to loyalty-tier users. To access these, hover over the audience icon to the right of a variant option and click Add eligibility filters.
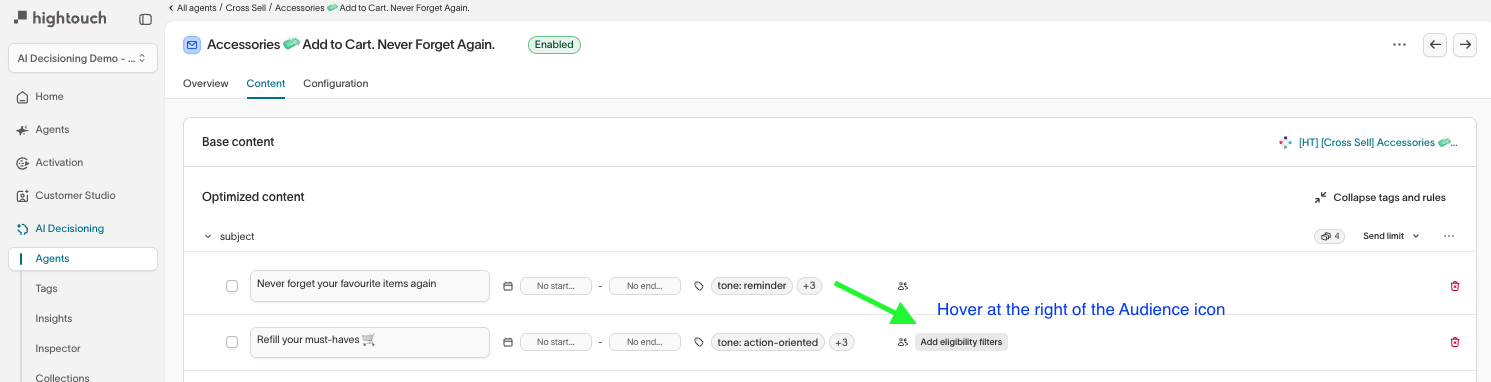
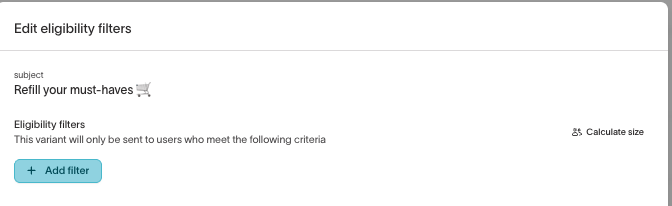
- Confirm audience eligibility filters are correct for each variant option.
Configuration tab
Expand the Advanced section.
Message-level settings
These apply to all variants of this message.
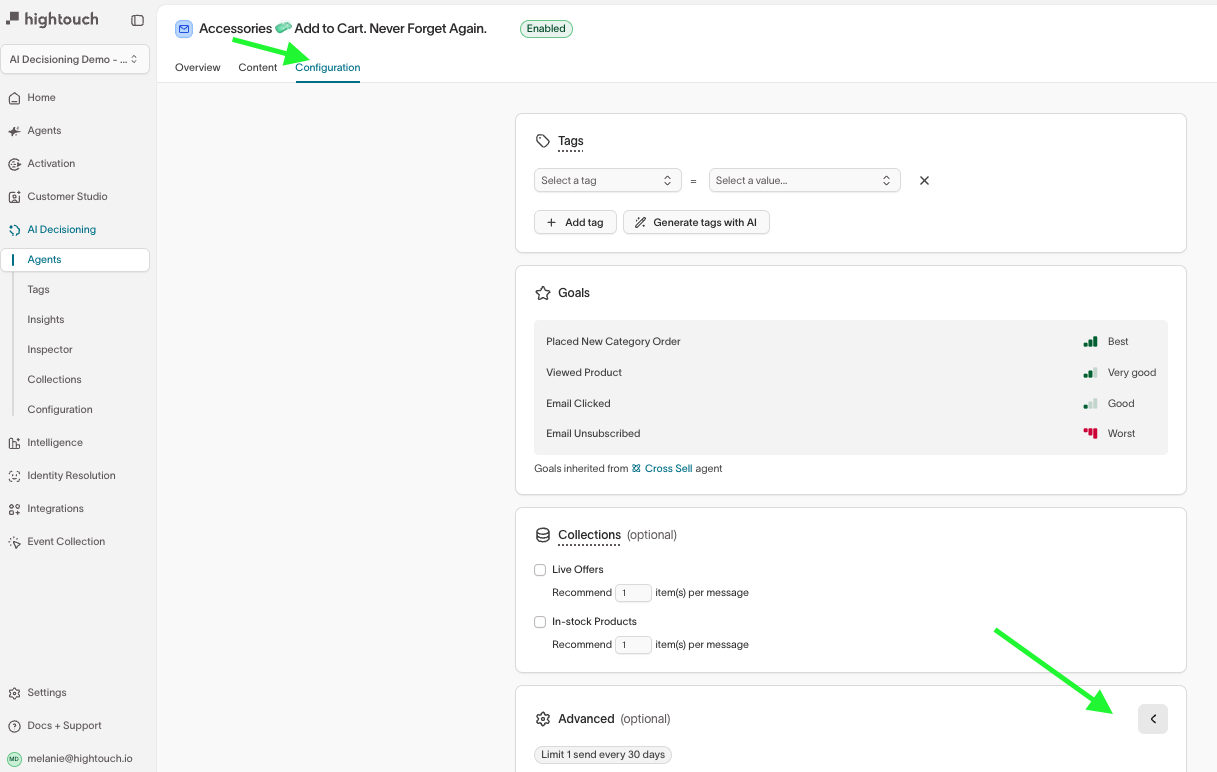
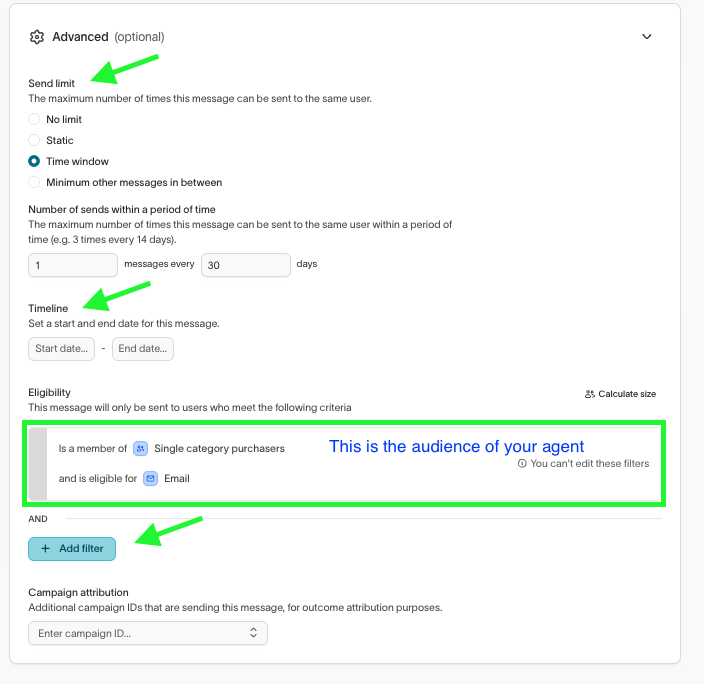
- Send limit: How often this message can be sent to the same user. Confirm this matches your campaign cadence (for example, 1 send every 30 days). See Send limits.
- Timeline: Start and end dates for the message. Confirm these are set or intentionally left open. See Timeline.
- Delivery windows: If enabled, confirm the allowed days and time blocks match your intended send schedule. See Delivery windows.
- Audience eligibility: The base audience filter inherited from your agent. You can’t edit it here, but confirm it’s correct. See Eligibility.
- Campaign attribution: If set, confirm the campaign IDs are correct for outcome tracking. See Campaign attribution.
Message status
Confirm the message is set to Enabled before your agent goes live.
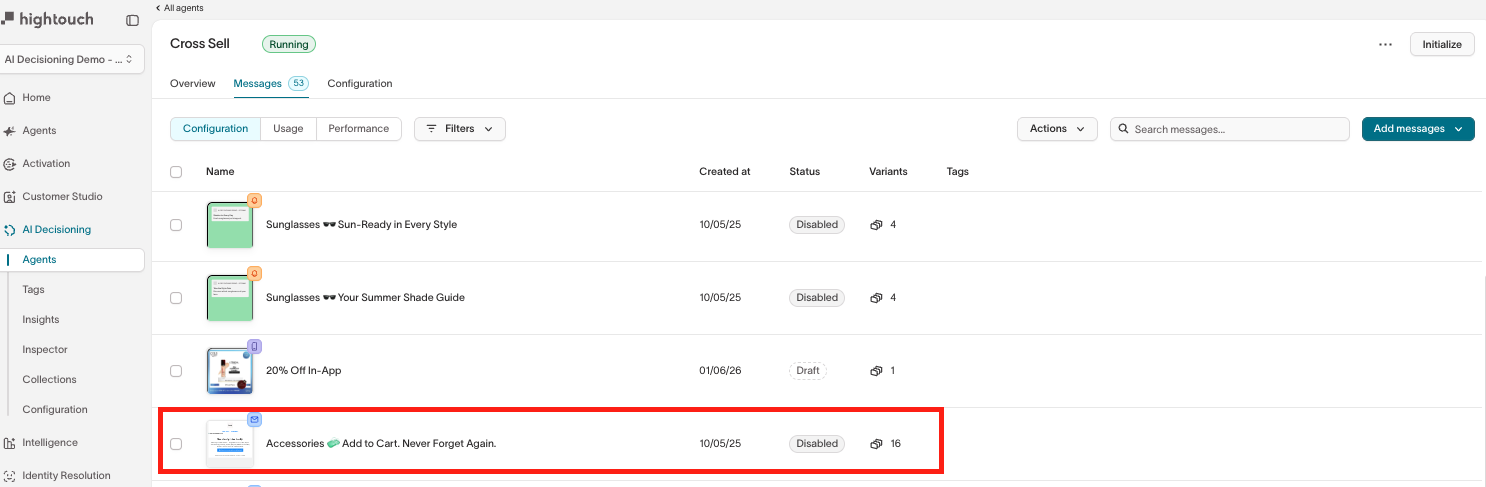


You can send a test even if a message is disabled.
However, once AID is live, agents will NOT send a message unless it is enabled.
SMS QA
SMS has tighter constraints than email — character limits, carrier filtering, and compliance requirements. Preview and test each variant option in the Content tab, then confirm your send rules in the Configuration tab.
Go to: AI Decisioning → Agents → [Your Agent] → Messages → [Your Message]
Content tab
If your message uses variants, preview and test each option as you work through the checks below.
Sender
- Confirm the sender ID or phone number appears as expected.
Title and body content
- Confirm the text is accurate, correctly formatted, and not truncated. SMS messages over 160 characters split into multiple segments, which can affect readability and cost.
- Confirm personalization tokens populate with real user data.
- Confirm dynamic content renders correctly for different audience segments.
Links and actions
- Confirm all links work and track correctly.
- Confirm shortened URLs or deep links open as expected.
Compliance
- Confirm opt-out instructions are included in every variant (for example, "Reply STOP to unsubscribe").
- If your messages are subject to TCPA or other regulations, confirm required disclosures are present.
Variant-type send limits and eligibility
If your message has variants, confirm send limits and audience eligibility filters are set correctly at the variant level. See the email QA section for details on where to find these settings.
Configuration tab
Expand the Advanced section.
- Confirm message-level send limits, timing, delivery windows, audience eligibility, and campaign attribution are correct. See Message configuration → for details on each setting.
- Confirm the message is set to Enabled before your agent goes live.
You can send a test even if a message is disabled.
However, once AID is live, agents will NOT send a message unless it is enabled.
Push notification QA
Push notifications have tighter display constraints than email — titles and body text can be truncated differently on iOS and Android. Preview and test each variant option in the Content tab, then confirm your send rules in the Configuration tab.
Go to: AI Decisioning → Agents → [Your Agent] → Messages → [Your Message]
Content tab
If your message uses variants, preview and test each option as you work through the checks below.
- Sender and app info
- Notification content
- Links and actions
- Variant-type send limits
- Individual variant eligibility
Sender and app info
- Confirm the app name and sender ID are correct.
- Confirm icons or media display correctly.
Notification content
- Confirm the title and body display as expected.
- Confirm personalization tokens populate with real user data.
- If possible, test on both iOS and Android. iOS typically truncates titles around 40 characters and bodies around 110 characters. Android varies by device.
Links and actions
Deep links open specific screens in your app (for example, a product page or cart). If misconfigured, the user may land on the home screen instead.
- Test all deep links by tapping the notification on a test device and confirming you reach the correct screen.
- If you have fallback URLs for users without the app, test those as well.
Variant-type send limits
These let you set send limits per variant type. For example, you can cap how often a specific notification title is sent to the same user.
- Confirm send limits are set correctly for each variant type.
Individual variant eligibility
These let you restrict specific variant options to certain audience segments. For example, you can limit a promotional notification to users who have the latest app version.
- Confirm audience eligibility filters are correct for each variant option.
Configuration tab
Expand the Advanced section.

Message-level settings
These apply to all variants of this message.
- Confirm send limits, timing, delivery windows, audience eligibility, and campaign attribution are correct. See Message configuration → for details on each setting.
Message status
Confirm the message is set to Enabled before your agent goes live.
You can send a test even if a message is disabled.
However, once AID is live, agents will NOT send a message unless it is enabled.
Troubleshooting
If something isn't working during QA, check here for the most common issues.
Go to: AI Decisioning → Agents → [Your Agent] → Messages → [Your Message]
Message test not received
If your test send doesn’t arrive:
- Confirm the message is enabled.
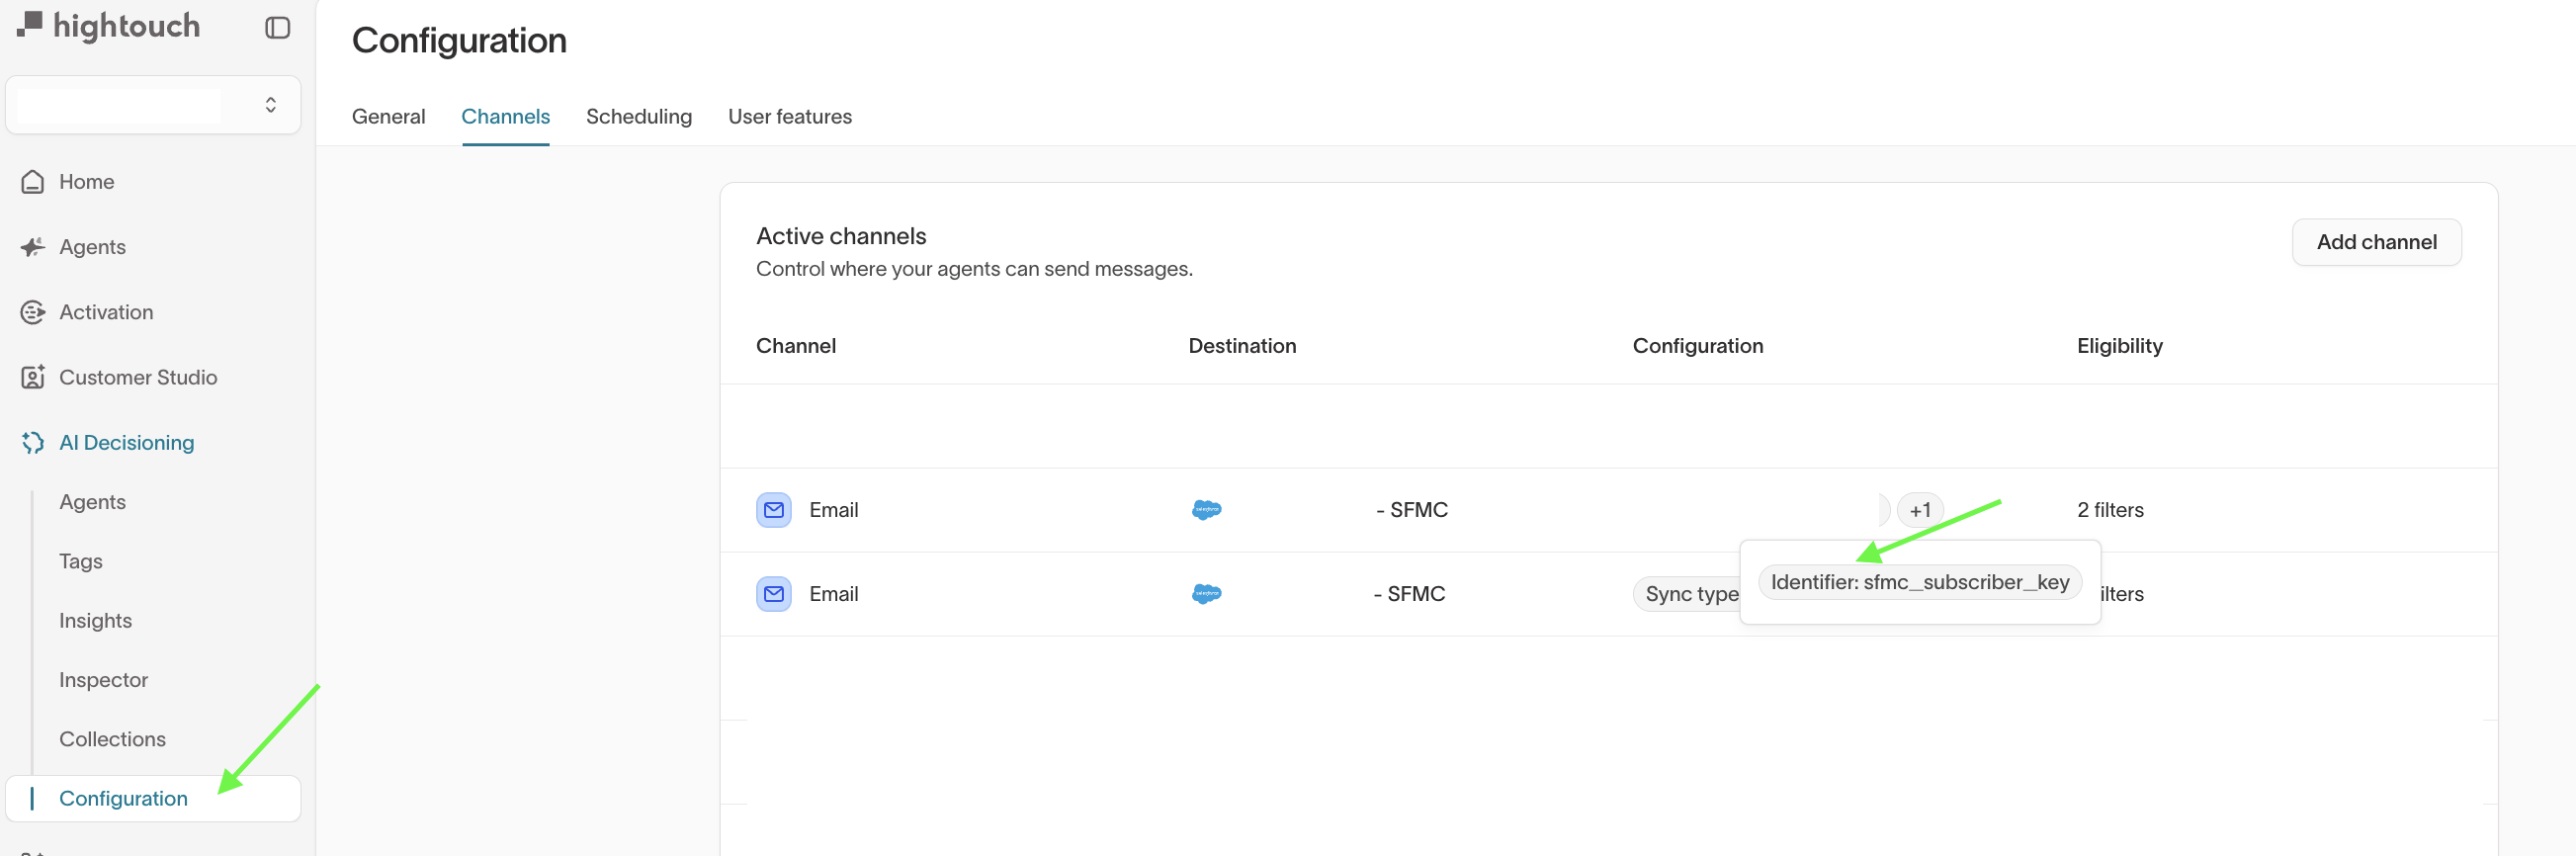
- Check the identifier.
- Confirm you entered the correct identifier (for example, email, user ID, or subscriber key).
- It must match both your channel configuration and the value shown in the test send.
- Confirm the identifier exists in your destination.
- The user must already exist in your email or messaging platform.
- Select a user in preview (SFMC).
- Go to Settings → Select user before sending a test.

Personalization not working
If personalization appears blank or incorrect:
- Check your channel payload configuration.
- Confirm the fields you’re using are included in the channel payload (these are the fields sent with each message).

- Check your user data model.
-
Fields like
first_nameandlast_namemust exist on your main user model (AID parent model). -
If they’re on a related model, you can either:
- Merge the model into the main user model (so all fields are available in one place), or
- Add the fields through Configuration → Additional user columns (to include specific fields without merging everything)
Variants not showing
If your test email shows the same content regardless of which variant you select, the destination template is likely missing the required code snippet.
- Confirm the code snippet is added to your destination template.
- See the variable setup guide for your destination: Braze, Iterable, or Salesforce Marketing Cloud.
This is a one-time setup step. Once the snippet is in your template, it applies to all messages and variants.
Variant images not displaying
If images appear broken or don't load in your test email:
- Confirm the code snippet is added to your destination template.
- Confirm all image URLs are publicly accessible — open each URL in an incognito browser window to verify.
Next steps
Once you've completed QA, confirm your agent is enabled and ready to launch.