| Audience | Platform admins, data teams |
| Prerequisites | Agents enabled. A data warehouse and Customer Studio schema are required for data-driven features but not for Ad Studio or basic brand configuration. |
Context Hub is where you define your brand identity, metric definitions, content rules, and channel connections so agents act correctly and consistently across products.
What you'll learn
- Access Context Hub and understand who can configure it
- See where Context Hub fits in the setup and ongoing maintenance workflow
- Create brand profiles to organize context and assets by brand
- Provide organizational context, best practices, and guardrails
- Connect marketing channels and email service providers
- Create reusable visual styles for generated content
Overview
Context Hub is Hightouch's shared context layer. It brings together the knowledge, brand assets, and marketing connections that Agents, Ad Studio, and Lifecycle Studio rely on. Instead of managing this configuration separately in each product, you configure it once in Context Hub and it applies everywhere.
Agent output improves with better context. Define your metrics, upload brand guidelines, set guardrails, and connect your marketing channels in one place. Every agent across your workspace references the same context.
Context Hub is organized into four pages:
- Brands — manage brand profiles, business context, logo files, and fonts
- Context — provide organizational knowledge, best practices, guardrails, memories, and research signal configuration
- Connections — connect ad platforms and email service providers
- Styles — create reusable visual styles that guide image and ad generation
Access Context Hub
To open Context Hub, select Context Hub in the left navigation. From there, select Brands, Context, Connections, or Styles.
Only users with the Configure Agents grant can modify Context Hub. See Roles for the full list of grants and Agents data governance for how data access applies.
How Context Hub fits into Hightouch
Context Hub sits between data setup and agent execution. You configure it during initial workspace setup, then return to it periodically as your business evolves.
During setup
After connecting your data warehouse and configuring your Customer Studio schema, Context Hub is the next step before your team starts using Agents, Ad Studio, or Lifecycle Studio.
| Step | What to do | Where |
|---|---|---|
| 1 | Connect your data warehouse | Sources |
| 2 | Set up your schema | Customer Studio |
| 3 | Teach Hightouch about your business | Context Hub |
| 4 | Use agents across products | Agents, Ad Studio, Lifecycle Studio |
During ongoing maintenance
After setup, you return to Context Hub when:
- Agent outputs need refinement — add metric definitions, update guardrails, or correct assumptions saved as memories
- You launch a new brand or sub-brand — create a new brand profile with its own context, logos, and fonts
- You add a marketing channel — connect a new ad platform or ESP to make its performance data available to agents
- Business context changes — update brand guidelines, campaign formats, or organizational rules
What flows in and out
Context Hub receives data and configuration from your warehouse and marketing tools, then makes that context available to downstream products.
| Direction | What | Where it connects |
|---|---|---|
| In | Warehouse data (via your connected source and schema) | Sources, Customer Studio schema |
| In | Campaign performance data from connected channels | Ad platforms (Meta, Google Ads, TikTok, etc.) and ESPs (Braze, Iterable, etc.) connected in Connections |
| Out | Brand profiles, context cards, guardrails, and memories | Agents chats and reports |
| Out | Brand guidelines, logos, fonts, and styles | Ad Studio, Lifecycle Studio |
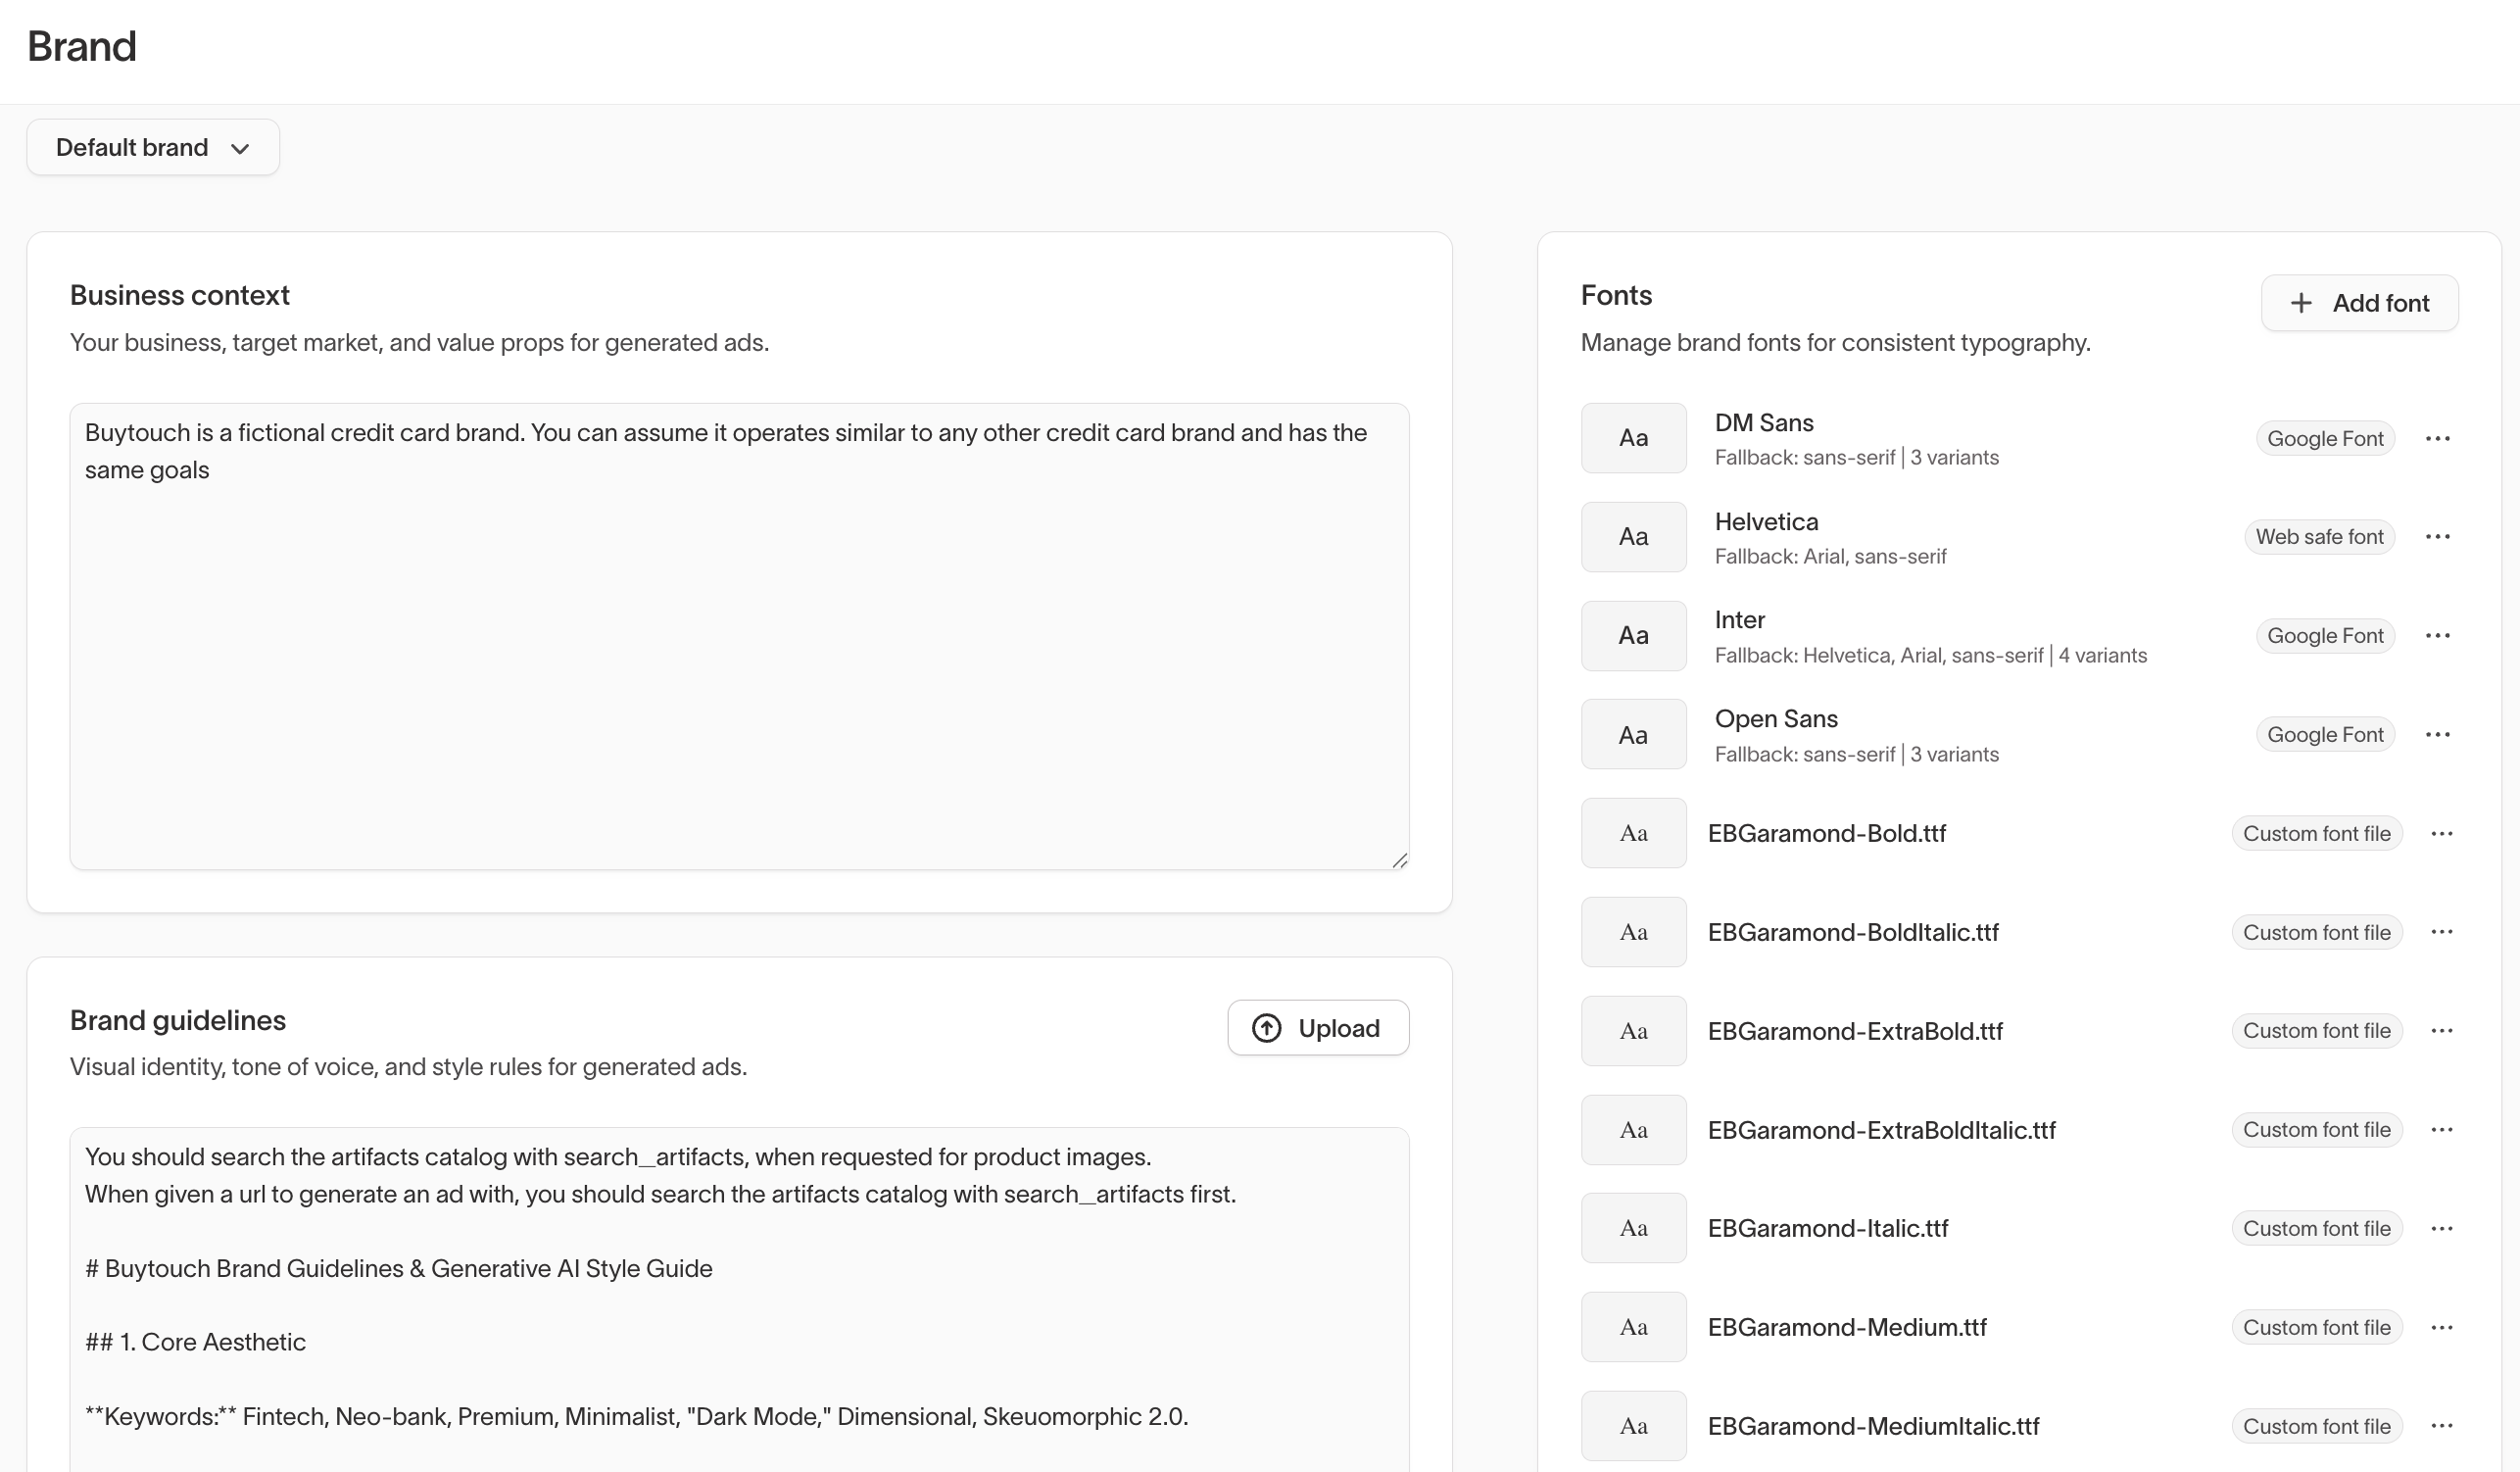
Brands
The Brands page manages brand profiles, logo files, and fonts. Logo files and fonts are shared across Ad Studio and Lifecycle Studio.
Brand profiles
Brand profiles let you organize context and brand assets by brand. For example, a company with both a consumer brand and a B2B brand can create separate profiles, each with its own context, logo files, and fonts. Use the brand selector dropdown at the top of the page to switch between profiles.
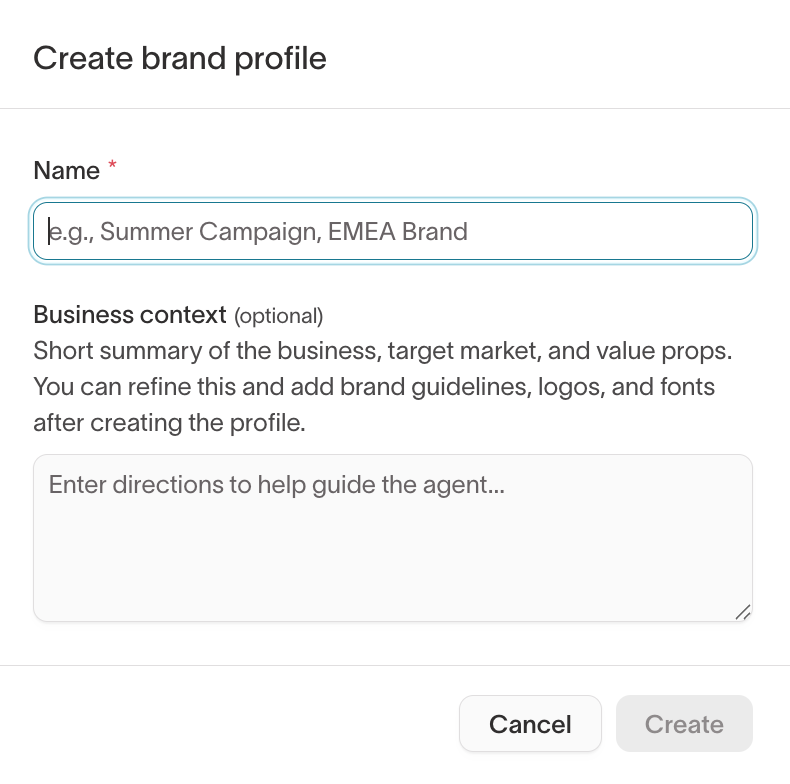
To create a brand profile, go to Context Hub → Brands and select Add brand profile. Each profile has a Name and an optional Business context field for a short summary of the business, target market, and value props. Agents reference this background when generating creative content. You can add brand guidelines, logos, and fonts after creating the profile.
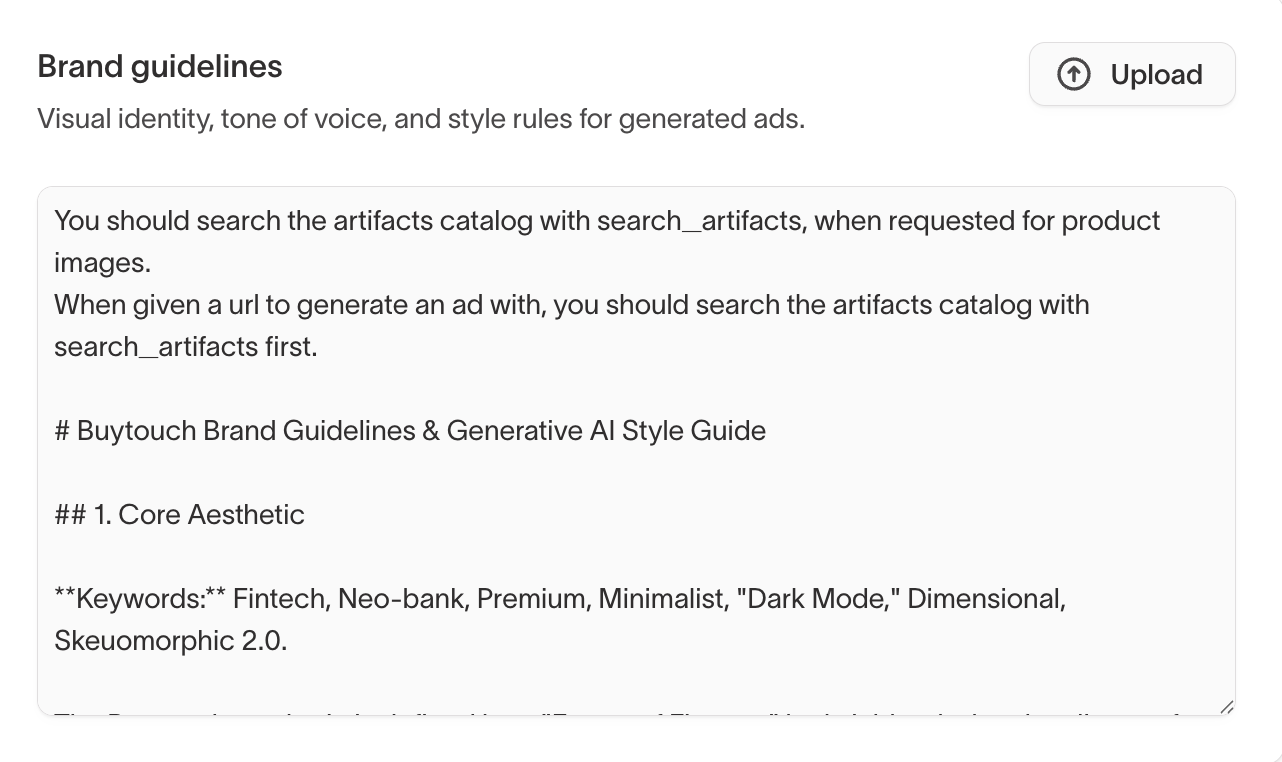
Brand guidelines
Upload brand guidelines that the agent references when generating creative content. Brand guidelines define visual identity, tone of voice, and style rules. Select Upload to add a brand guidelines document.
What to include in your brand guidelines
Consider covering: color palette with exact hex codes, typography rules (font styles, sizes, usage), copywriting voice and tone, visual style (iconography, illustrations, imagery), hero objects and product photography direction, composition and layout rules, logo usage rules (sizing, positioning, color variants), and image-generation prompting dos and don'ts with examples.
Logo files
Upload logo files that Ad Studio and Lifecycle Studio can reference when generating creative content. Logos are shared across both products, so you only need to upload them once. Logo files can be PNG, JPEG, WebP, HEIC, HEIF, or SVG, and you can add up to 10.
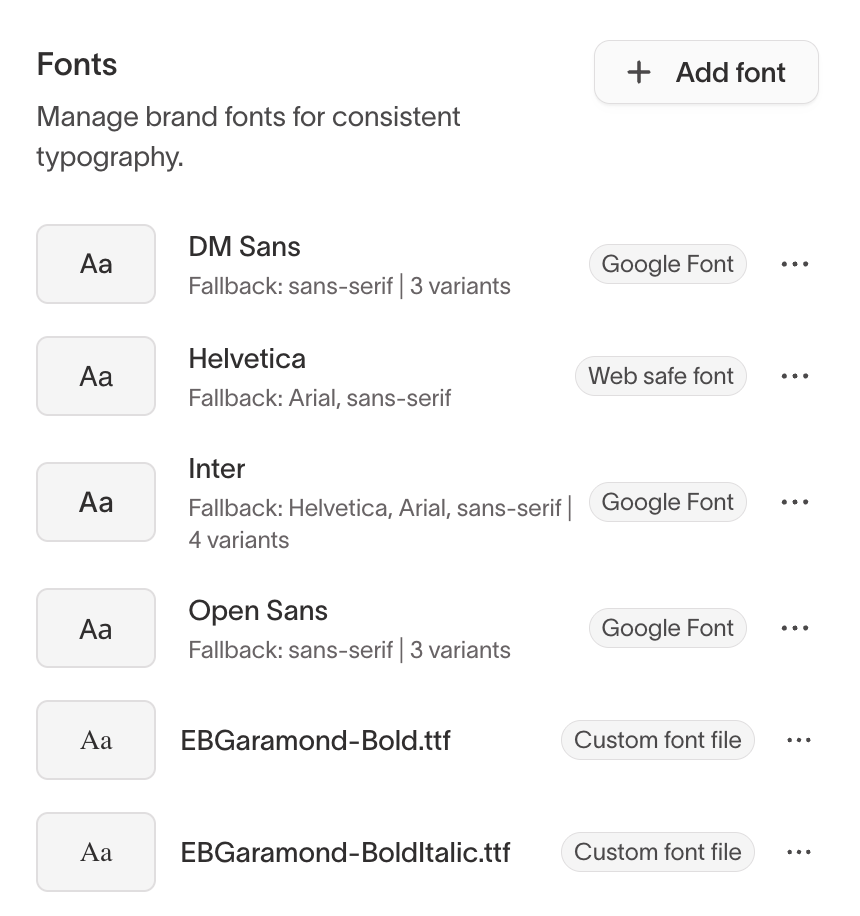
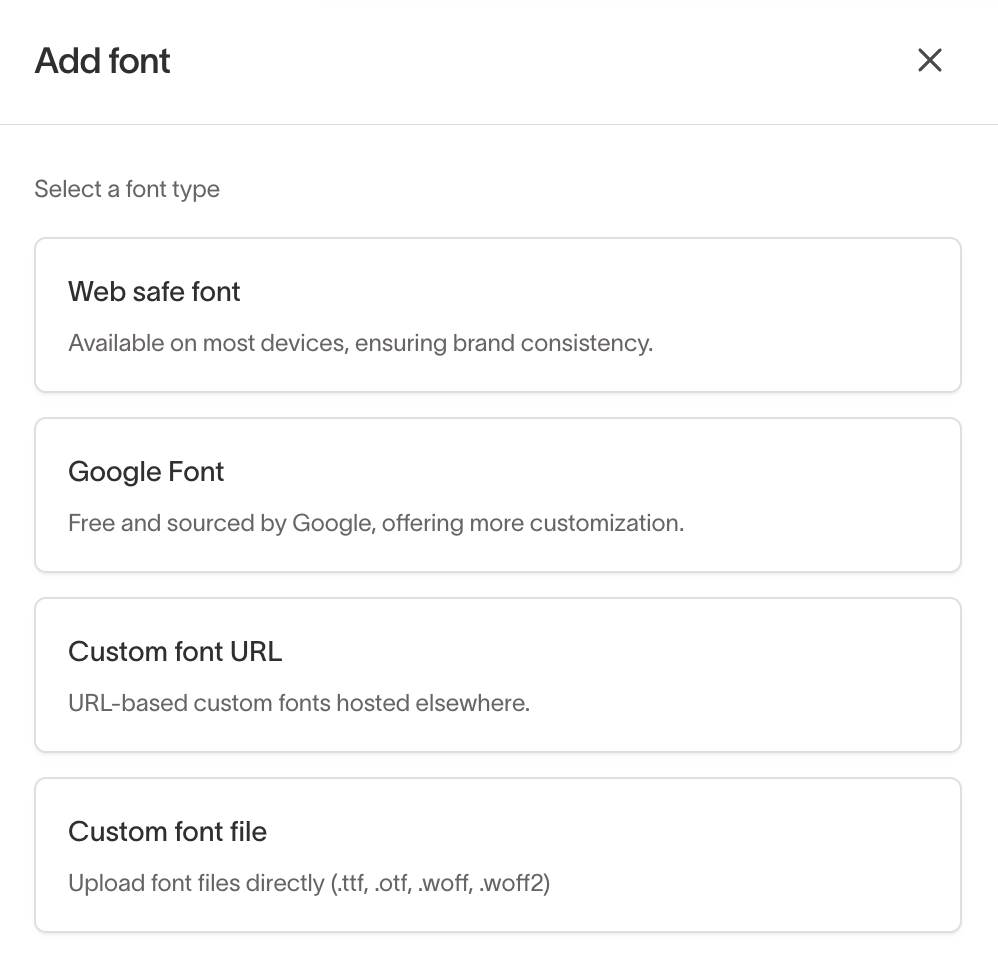
Fonts
Add fonts for use in generated content. Select Add font to add a new font. Context Hub supports four font types:
- Web safe fonts — standard fonts available on most devices (for example, Helvetica, Arial)
- Google Fonts — fonts loaded from Google Fonts (for example, Inter, DM Sans, Open Sans)
- Custom font URL — URL-based custom fonts hosted elsewhere
- Custom font files — upload font files directly (.ttf, .otf, .woff, .woff2)
Fonts are shared across Ad Studio and Lifecycle Studio.
Context
The Context page tells agents how your metrics are defined, which data to trust, how outputs should be structured, and what rules to follow. Context is organized into five tabs: Context, Best Practices, Guardrails, Memories, and Signals.
Context cards
Context is organized into named cards, each containing instructions or definitions the agent should follow. Select Add context to create a new card.
Each context card includes a brand profile selector. Assign a card to one or more brand profiles to scope it to those brands, or leave it unassigned to make it available to all profiles.
Common context cards include:
- General — how the agent should behave, which data tables to prioritize, and any global instructions
- Metric definitions — your organization's specific definitions for metrics like LTV, attribution windows, conversion rates, or engagement scores
- Campaign formats — templates or formatting rules for campaign briefs, reports, or other structured outputs
- Email copy guidelines — rules for generating or reviewing email content
You can also upload files directly within a context card. Files are useful for qualitative context that's hard to express as text instructions, like planning documents, brand guidelines, or example reports the agent should reference.
What to add first
The context that most improves agent output removes ambiguity about metrics, data, and expectations. Start with these, roughly in priority order:
- Metric definitions — formulas, attribution windows, fiscal calendar rules, KPI thresholds, and known caveats.
- Schema and table guidance — what key tables mean, which tables agents should prefer, and how important fields should be interpreted.
- Report requirements — example reports, required sections, preferred comparisons, formatting expectations, and stakeholder-specific rules.
- Business glossary and rules — standard terminology, segment definitions, campaign taxonomy, and compliance constraints.
- Brand and copy rules — approved messaging, restricted language, tone, and audience-specific voice guidance.
- Durable reference docs — upload planning docs, briefs, research, benchmarks, and other files the agent should reuse across conversations.
You can start with a single general context card and split into more specific cards as your needs evolve.
Best practices
Best practices are rules the agent applies when analyzing and fixing email HTML for cross-client compatibility. Each rule category contains individual rules that can be toggled on or off. Disable any rules that don't apply to your templates.
Rule categories include:
- Compatibility — rules for cross-client rendering consistency
- Mobile Responsiveness — rules for responsive email layouts on mobile devices
- CSS Patterns — rules for CSS usage that works across email clients
- Dark Mode — rules for dark mode support and fallback styling
- Accessibility — rules for accessible email markup and content
- Structure — rules for email HTML structure and organization
- Custom — add your own rules for organization-specific email requirements
Guardrails
Guardrails control what actions Lifecycle Studio AI is allowed to take when modifying images in your campaigns.
Each guardrail can be toggled on or off independently:
- Edit text — change text burned into images, like headlines, prices, or calls-to-action
- Resize — resize images to fit different formats or aspect ratios
- Blend elements from your content library — replace or combine visual elements using only images from your approved content library
- Adjust colors and styling — change colors, backgrounds, and visual styling of existing elements
- Generate new visual elements — create new objects, change scenes, or generate compositions beyond your existing assets
Select Disable all to turn off all image modification capabilities at once.
Memories
Memories are saved facts and definitions from conversations. When an agent makes an assumption during a chat — like how to define a metric or interpret a data field — it flags the assumption for your review. You can then save it as a memory so future conversations use the same definition.
Memories are created in two ways:
- From chats — when the agent flags an assumption during a conversation, you can save it as a memory. For example, if the agent assumes a specific definition for cart abandonment, that definition can be saved so all future conversations use the same one.
- Explicitly via chat — ask the agent to create memories directly. For example, upload a file containing metric definitions and ask the agent to create memories, which you can then save.
Memories are grouped by scope:
- Workspace — memories that apply globally across all agents and conversations
- Parent model — memories associated with a specific parent model
Admins can view and delete memories in the Memories tab. Memories are optional — if you prefer to manage all agent knowledge through context cards, you can rely entirely on those instead.

Signals
The Signals tab configures the external sources and topics that agents use when researching trends, competitor activity, and industry developments. Signal data configured here feeds into Ad Studio Insights → Signals.
Signals has two sections:
- Research sources — platforms the agent searches for relevant information. Default sources include Open web research, Reddit, X (Twitter), TikTok, Instagram, and Facebook. Toggle individual sources on or off, or select Add source to include additional platforms.
- Topics — categories that focus the agent's research. Five predefined categories are available: Industry, My brand, Competitors, Cultural, and Creative trends. Select + within any category to add specific topics, or use Add a custom category at the bottom to create your own.
Signals configuration determines what the agent searches. To view the results, go to Ad Studio → Insights → Signals.
Tips for effective context
Be opinionated, not encyclopedic. Good context tells the agent what to prioritize, how to interpret ambiguity, and what rules override defaults. Context Hub works best as a governed knowledge base, not a place to dump everything.
Scope context when definitions differ. If metrics, terminology, or rules vary by brand, region, team, or business unit, assign context cards to the relevant brand profiles instead of forcing one global definition.
Reconcile conflicting definitions. Terms like "revenue," "conversion," and "active user" often exist in multiple conflicting forms. Resolve conflicts in your context cards so agents reference a single authoritative definition.
Keep context fresh. Stale metric definitions, outdated brand guidance, and old competitive intelligence degrade agent output over time. Review context cards periodically, especially after business changes.
Which products use what
Different Hightouch products draw on different parts of Context Hub:
- Agents and reports — benefit most from metric definitions, schema guidance, business glossary, memories, and report formatting instructions
- Ad Studio — draws on brand rules, logos, fonts, styles, reference assets, and channel-specific constraints
- Lifecycle Studio — uses brand guidelines, fonts, logos, styles, guardrails, and email best practices
- Signals — depends on configured research sources and topics, then feeds downstream signal outputs in Ad Studio
Connections
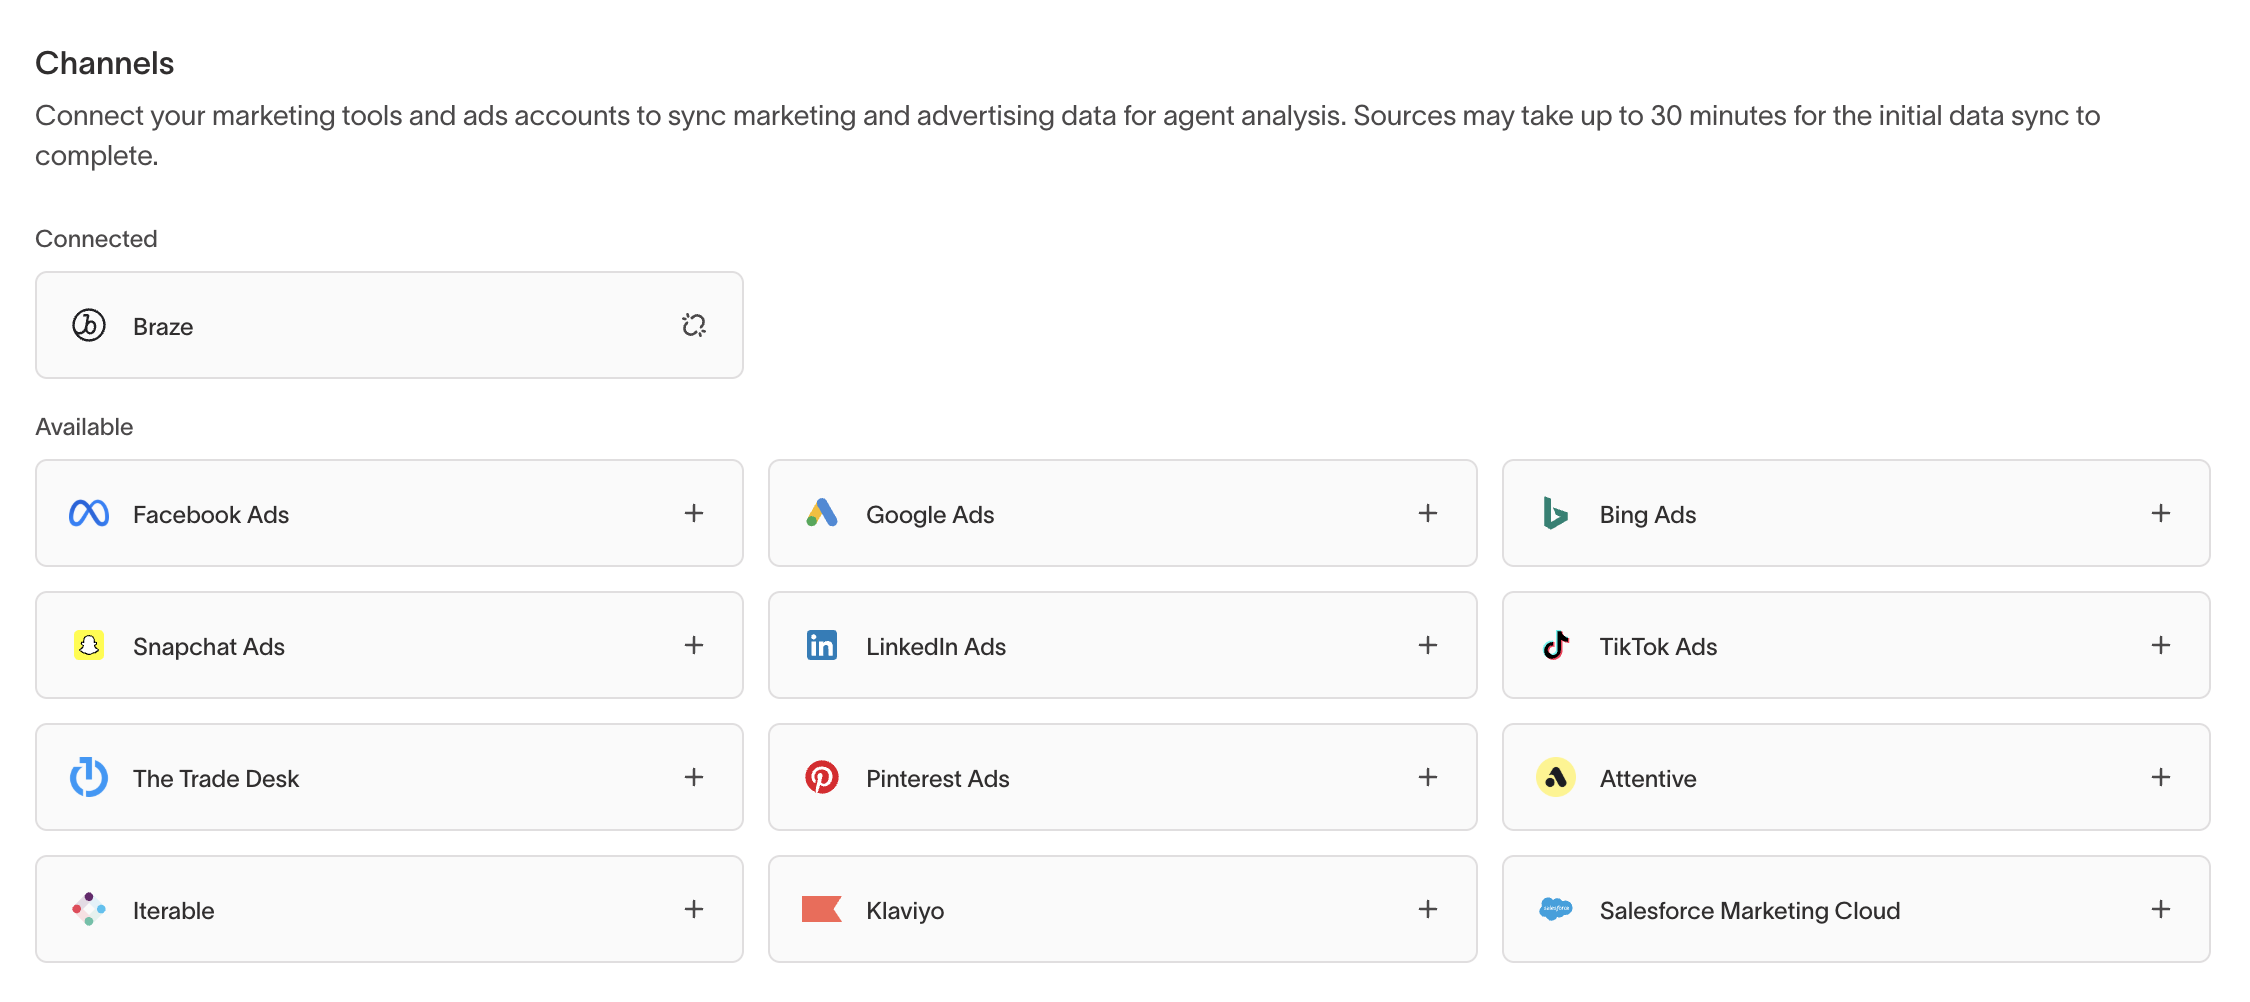
The Connections page connects your marketing tools and ad accounts so campaign performance data is available alongside your warehouse data when you use agents.
Channels
Under Connected, you'll see any channels already set up. Under Available, select + next to a platform to connect it.
Available channels include:
- Facebook Ads
- Google Ads
- Bing Ads
- Snapchat Ads
- LinkedIn Ads
- TikTok Ads
- The Trade Desk
- Pinterest Ads
- Reddit Ads
- Attentive
- Braze
- Iterable
- Klaviyo
- Salesforce Marketing Cloud
Sources may take up to 30 minutes for the initial data sync to complete after you connect a channel.
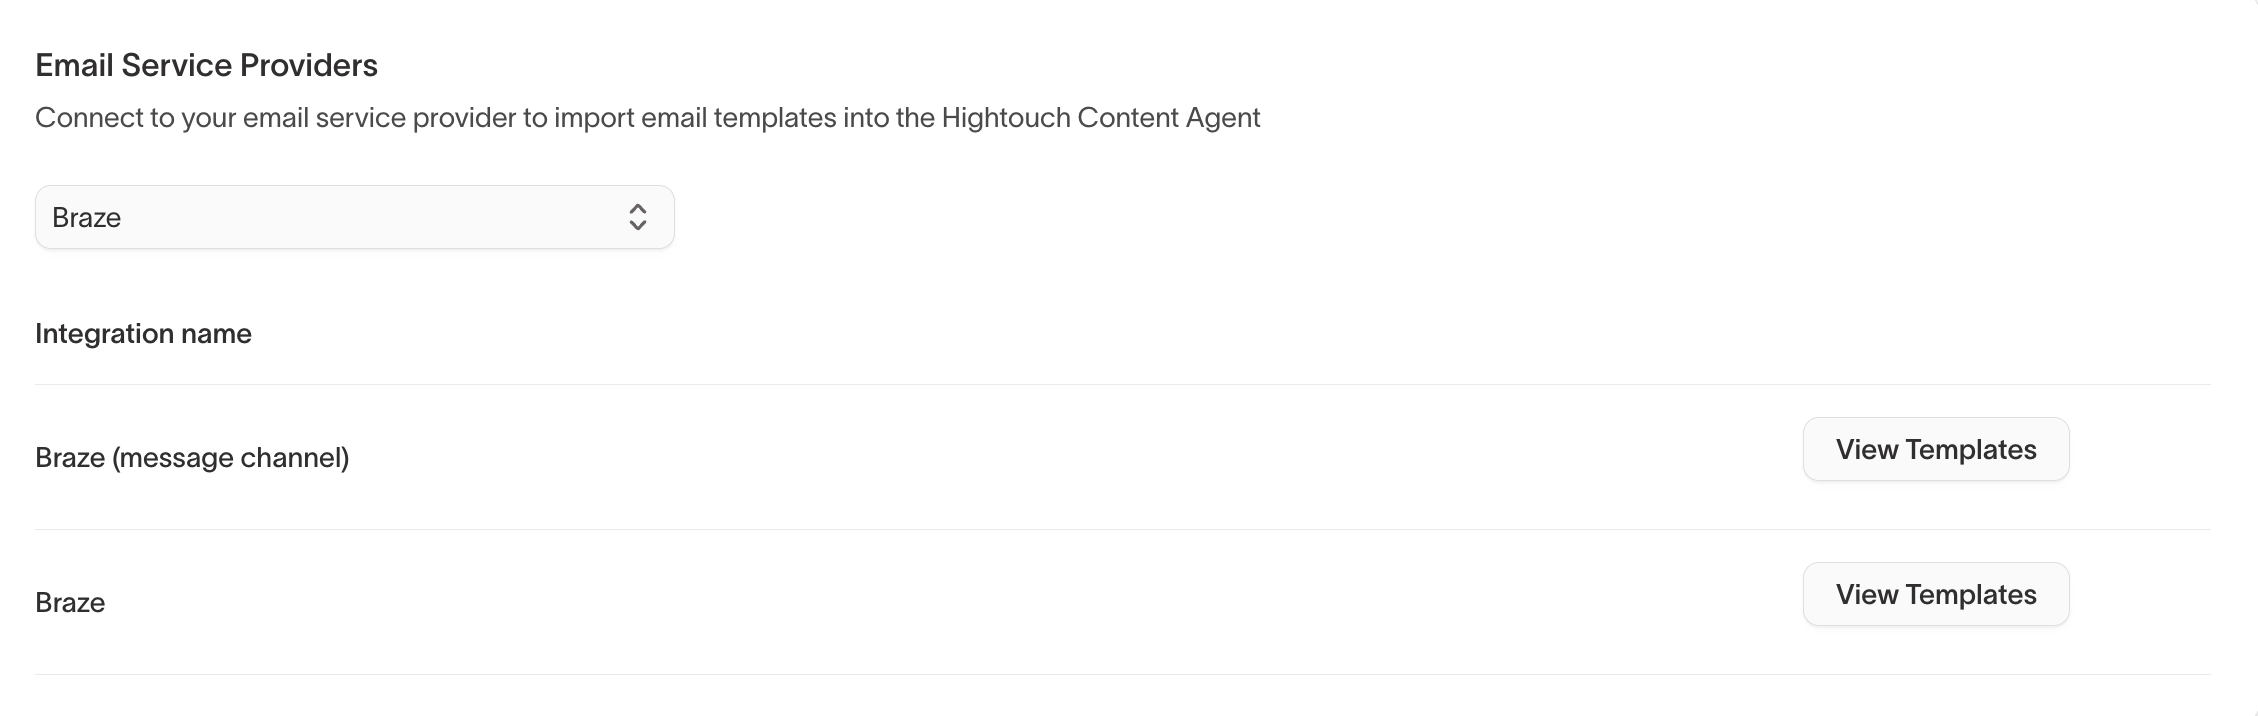
Email service providers
Below the channel connections, connect an email service provider to import email templates. Select your ESP from the dropdown and provide an integration name. Once connected, select View Templates next to any integration to browse imported templates.
Styles
A style is a reusable set of visual direction — mood, palette, composition, and art direction — that Ad Studio and Lifecycle Studio apply when they generate images and ads. Saving a style once keeps generated creative consistent instead of re-describing the look in every prompt.
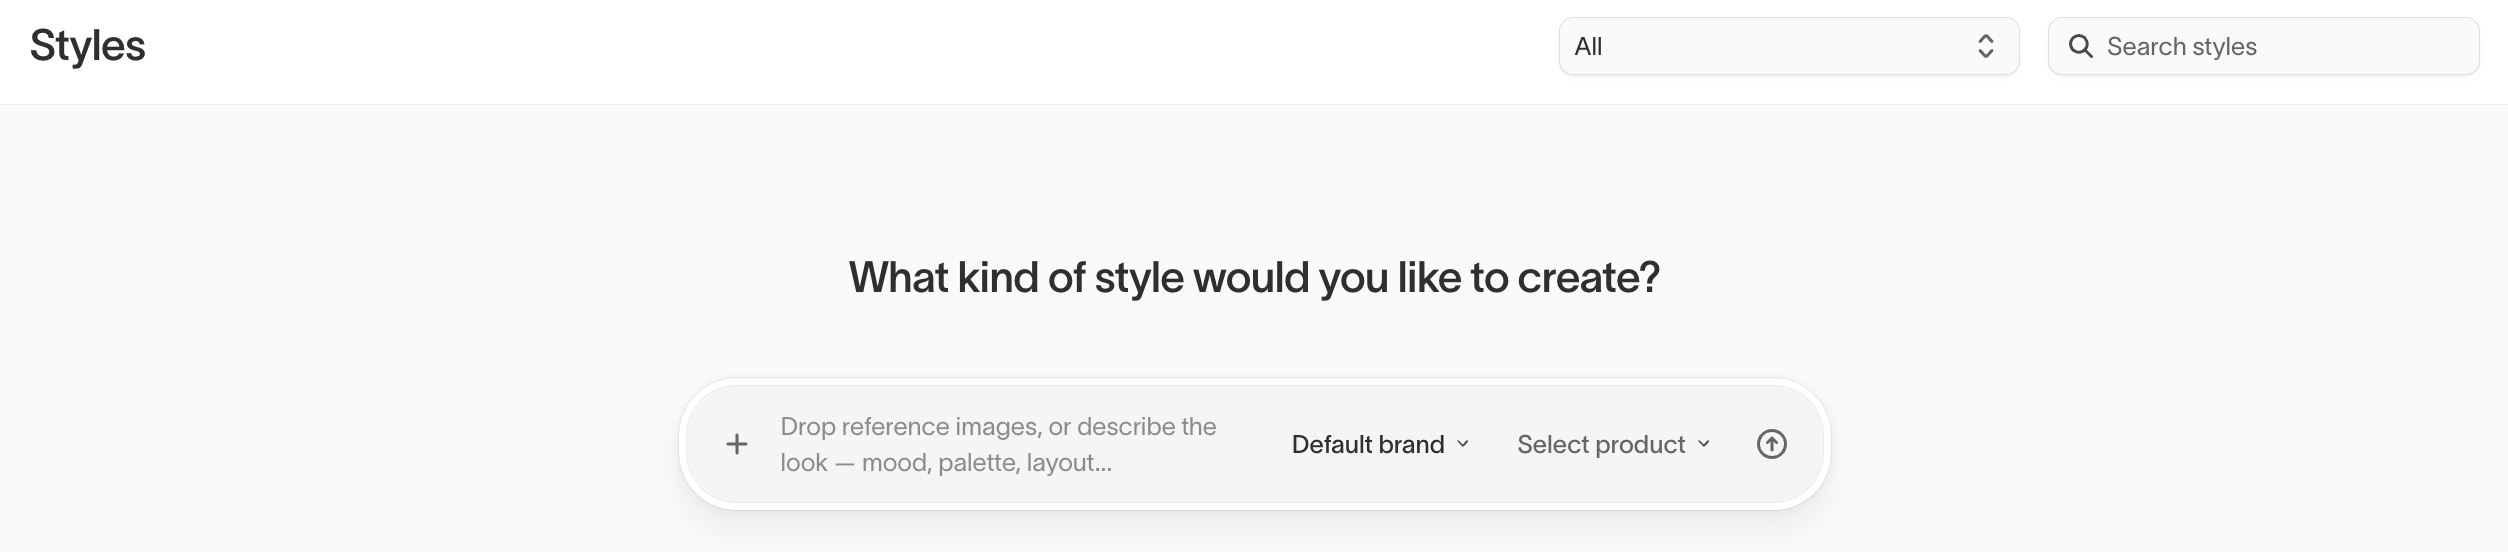
Create a style
To create a style, go to Context Hub → Styles. In the prompt at the top of the page, describe the look you want — mood, palette, layout — or drop in reference images for the agent to match. Choose a brand profile and a product surface, then submit.
Each style is scoped to one product surface:
- Ad Studio — available when generating ads
- Lifecycle Studio — available when generating images for email content
Use the filter at the top of the Styles list to show all styles or only those for a single product surface, and use search to find a style by name.
Add guidance and dimensions
Open a style to refine its direction. A style has two parts:
- Guidance — the global creative direction that applies to the whole style.
- Dimensions — named facets of the look, each with its own art direction and reference images. For example, a style might have separate dimensions for color and palette, lighting and mood, and environment.
Add reference images to guidance or to any dimension so the agent has concrete visual examples to match.
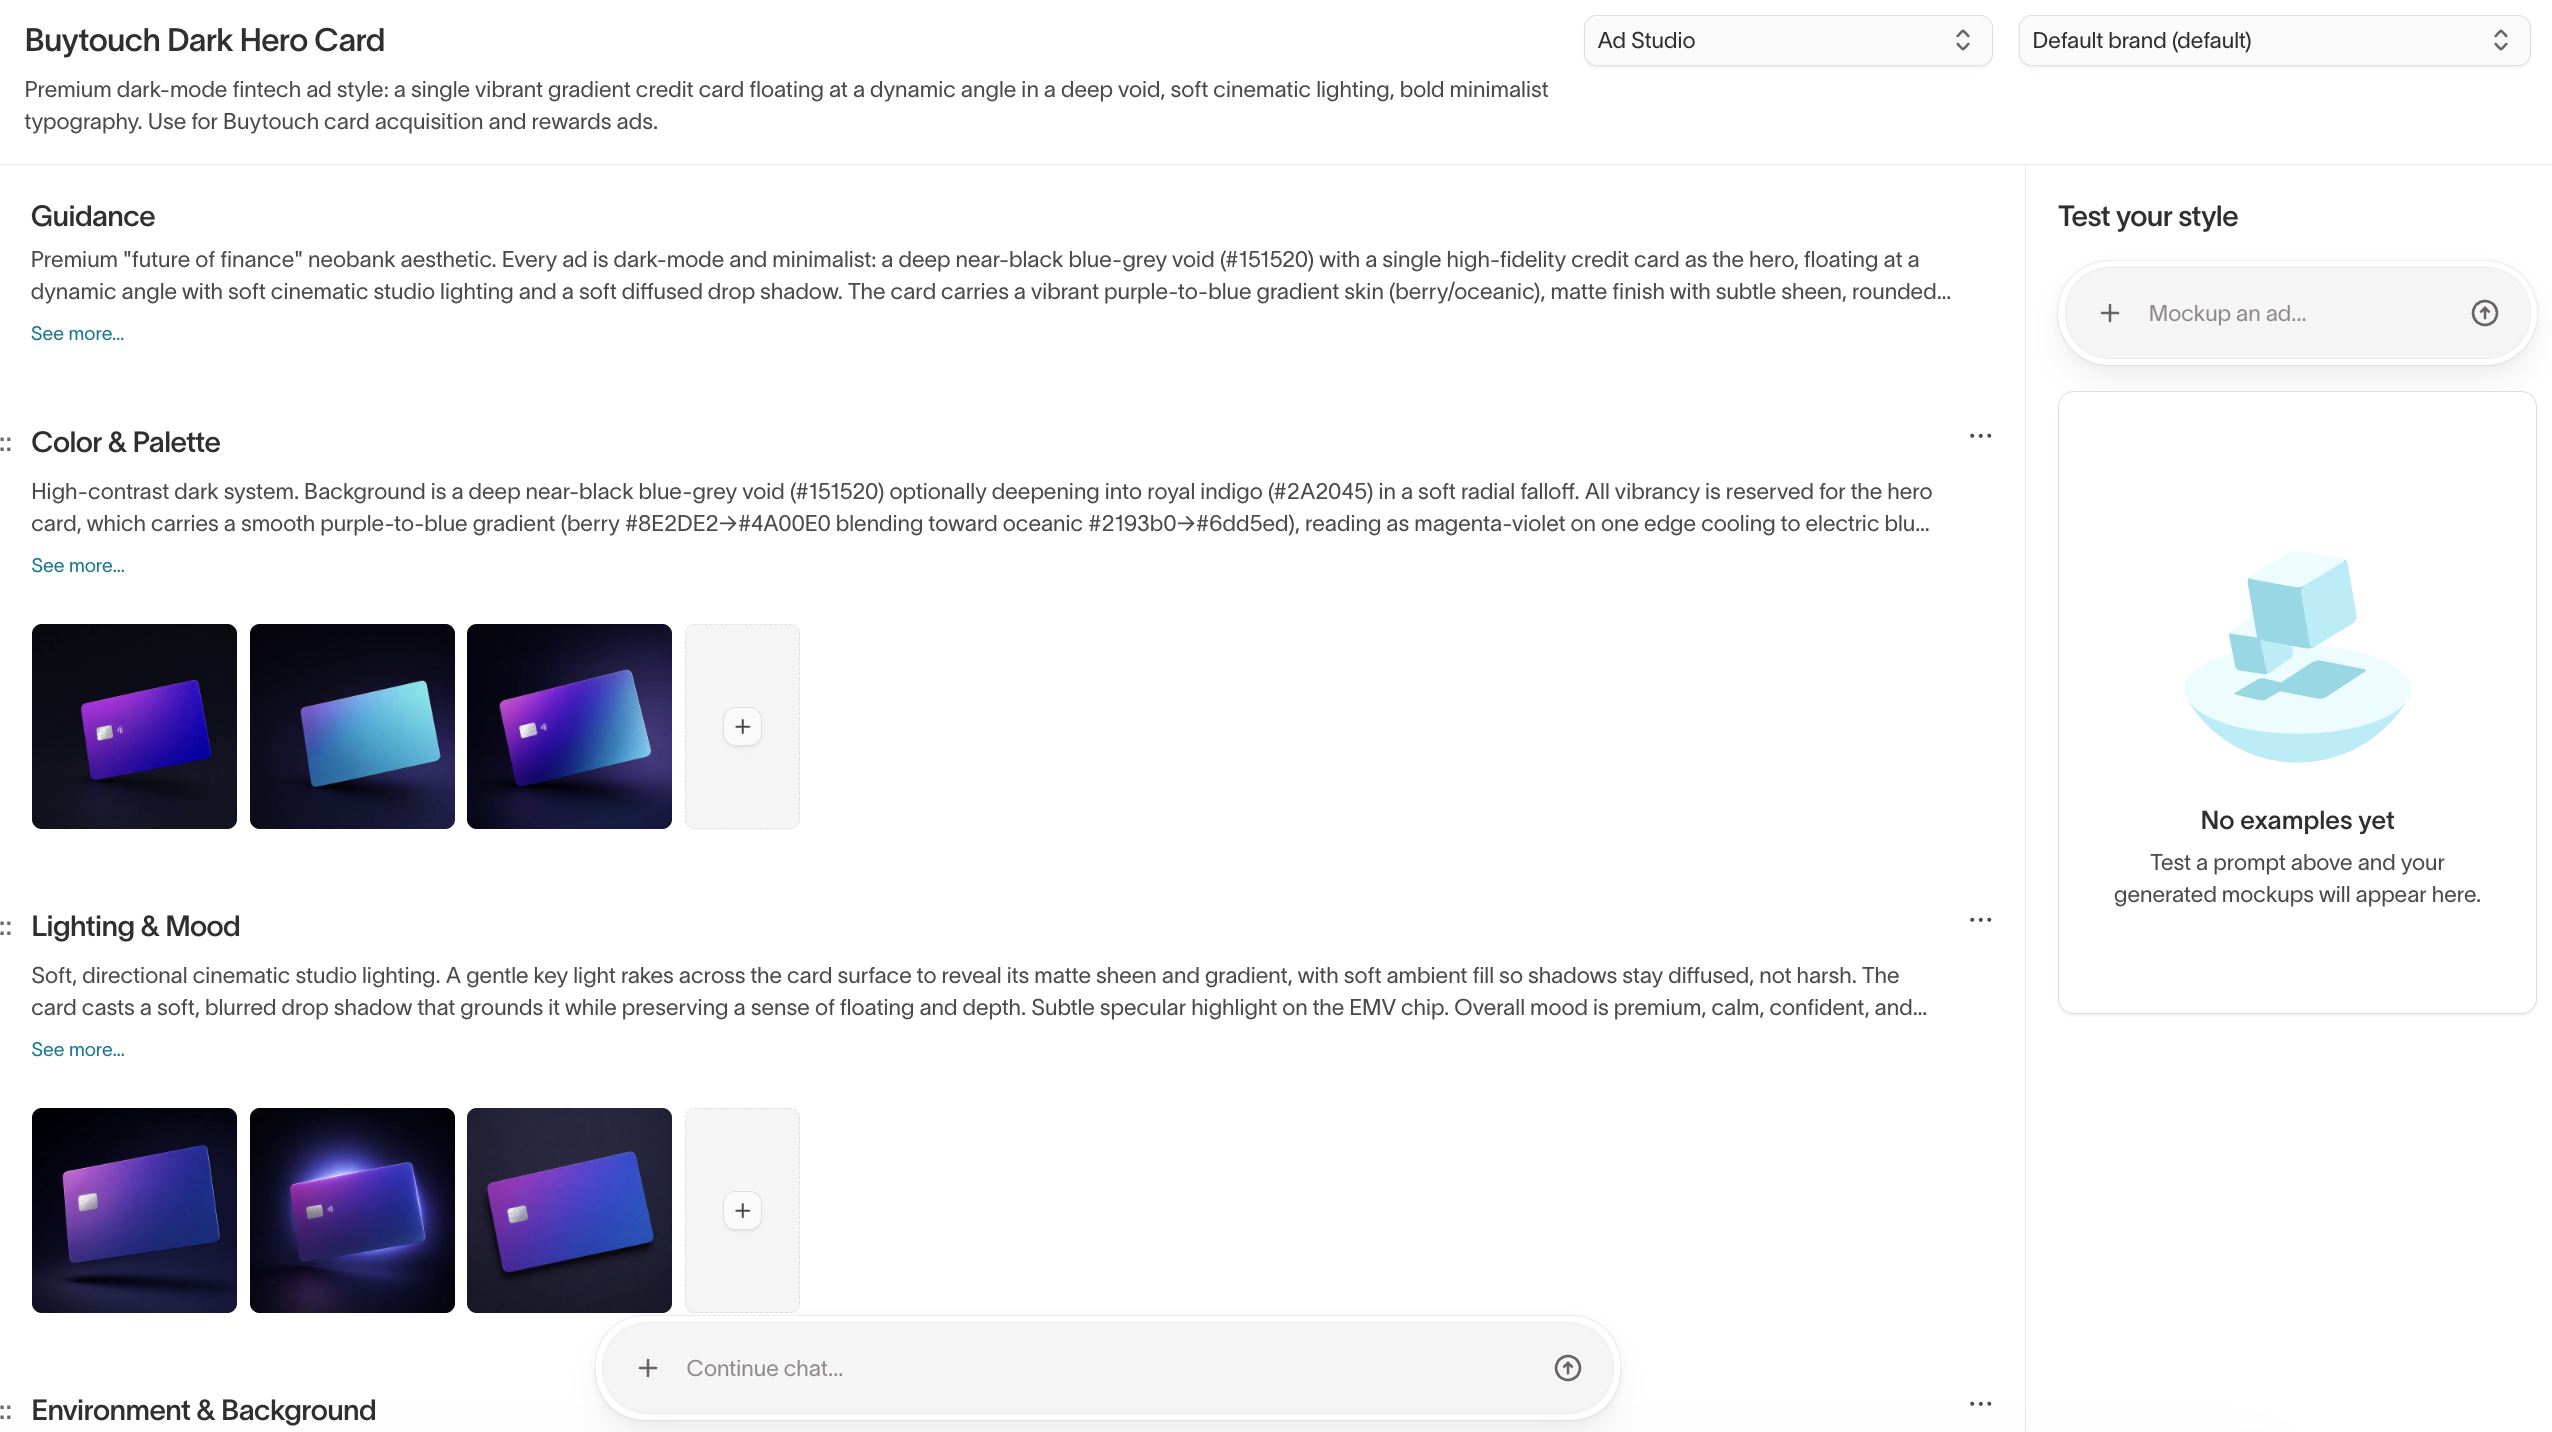
Test a style
Use the Test your style panel to preview how the style renders before you rely on it. Enter a prompt describing what to mock up, and the agent generates example images for you to review. Generated examples appear in the panel so you can compare them against the style's direction and refine the guidance or dimensions.
Manage styles
From the Styles list, use the context menu on any style to duplicate or delete it. Duplicating is useful when you want to branch an existing look into a variant for a different product surface or brand.