to enable probabilistic matching.
| Audience | How you’ll use this article |
|---|---|
| Data teams | Enable probabilistic matching, choose confidence levels, and review resolved outputs for an identity graph. |
| Platform admins | Control which confidence levels are available for audience creation and downstream activation, and ensure required infrastructure is in place. |
Overview
Probabilistic matching extends deterministic identity resolution by linking records based on similarity, not just exact matches.
Deterministic matching connects records when identifiers (such as email or user_id) are exactly the same.
Probabilistic matching adds:
- Data normalization
- Fuzzy comparison using similarity scoring
- Confidence tiers you can use to balance accuracy and reach
Probabilistic matching layers on top of deterministic rules. It does not replace them.
How probabilistic matching works
Probabilistic matching answers the question: “Given everything known about these two records, how likely is it that they represent the same person?”
At a high level, it works in three steps:
-
Normalize data
Values are cleaned and standardized so similar data can be compared reliably.
-
Score similarity
For each pair of candidate records, mapped identifiers are compared and given a similarity score per field.
-
Assign a confidence level
Field-level similarities are combined into a single confidence score for the record pair. That score is then grouped into confidence levels (Exact, Strict, Loose), which control which matches are included in outputs and available for downstream use.
When to use probabilistic matching
Use probabilistic matching when deterministic (exact) matching leaves gaps or duplicate profiles.
| Scenario | Example | Why it helps |
|---|---|---|
| Typos and misspellings | John Doe vs. Jhon Doe | Catches close-but-not-exact values caused by typos or inconsistent data entry. |
| Multiple accounts for the same person | johndoe@gmail.com vs. john.doe@company.com | Links accounts when emails differ but other supported identifiers point to the same person. |
| Format variations | (415) 555-1234 vs. 4155551234 | Standardizes supported identifiers so small differences don’t break matches. |
| Sparse or user-entered records | Lead forms, event RSVPs, loyalty sign-ups | Uses partial or inconsistent PII to infer likely matches when exact identifiers are missing. |
| Offline-to-online stitching | In-store purchases → online logins | Connects offline data (name + postal code) with online profiles when there’s no shared ID. |
| Multiple identifiers per person | Name + phone + postal code | Increases confidence by combining multiple identifiers into a stronger signal. |
When identifiers are already clean and consistent and the primary key is stable (such as user_id), deterministic matching alone may be sufficient. Probabilistic matching is most valuable when reconciling messy, human-entered, or offline data.
Supported identifiers
Probabilistic matching uses person-level identifiers that you map on your identity graph models. These identifiers are compared fuzzily in addition to any deterministic rules you’ve configured.
The following identifiers are supported today:
Person details
first_namelast_namefull_namedate_of_birthbirth_yeargender
Contact details
emailphone
Address details
street_addressunit_numbercitystatepostal_codecountry
Other
credit_card_last4
Only fields you explicitly map as identifiers on a model participate in probabilistic matching. Deterministic identifiers such as user_id and anonymous_id continue to use exact-match rules only and are not fuzzily compared.
Enable probabilistic matching
Probabilistic matching can be enabled:
- During identity graph creation (in the Configure graph settings / Finalize step), or
- From the Configuration tab of an existing graph
Before you begin
Probabilistic matching requires an external storage bucket to process data outside your warehouse. Hightouch uses this bucket to temporarily store your input records and intermediate data while running matching, then writes the results back to your warehouse. All data remains in your cloud environment and under your control. Some data persists in the bucket between runs so Hightouch doesn't have to start from scratch each time.
Set up storage before enabling probabilistic matching:
- Set up storage on AWS (S3)
- Set up storage on Google Cloud (GCS)
- Set up storage on Azure (Blob Storage)
Option 1: Enable during graph creation
- Go to Identity Resolution.
- Click Add identity graph.
- Follow Create an identity graph through:
- Select source
- Select models
- Configure models
- Golden Record
- Configure identifier rules
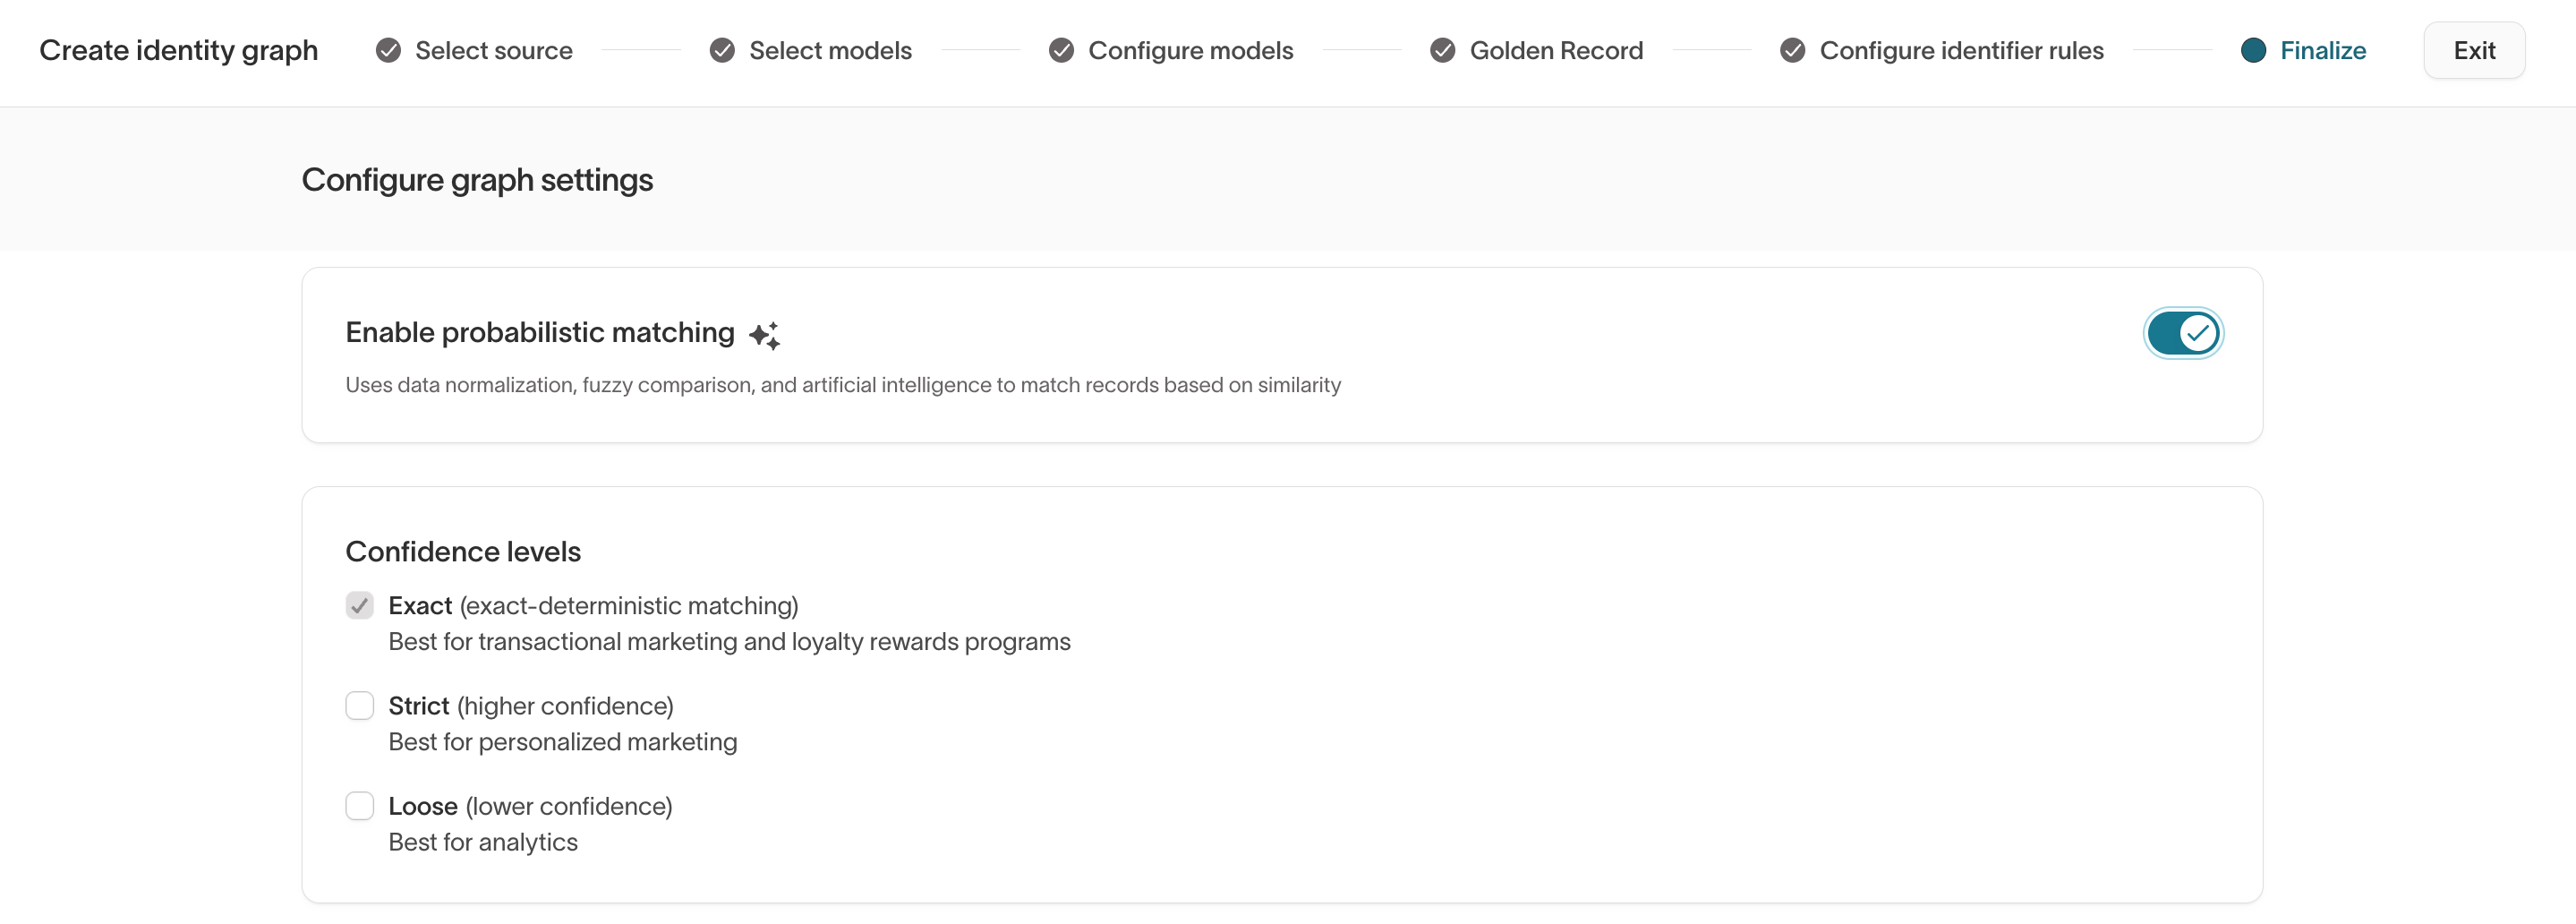
- In the
Finalizestep:- Under Enable probabilistic matching ✨, toggle probabilistic matching on.
- In Confidence levels, select the tiers to enable (Exact, Strict, Loose).
- Click Finish, then run the graph.
Option 2: Enable on an existing graph
- Go to Identity Resolution.
- Open your existing identity graph.
- Click the Configuration tab.
- Under Enable probabilistic matching ✨, toggle probabilistic matching on.
- In Confidence levels, select one or more tiers (Exact, Strict, Loose).
- Click Run to reprocess the graph.

Confidence levels
When probabilistic matching is enabled, one or more confidence levels can be selected.
Available tiers:
- Exact: Includes matches that meet deterministic (exact-match) rules.
- Strict: Includes higher-confidence similarity matches.
- Loose: Includes lower-confidence similarity matches.
Each selected confidence level:
- Applies a different similarity threshold when linking records
- Filters the resolved outputs for that confidence band
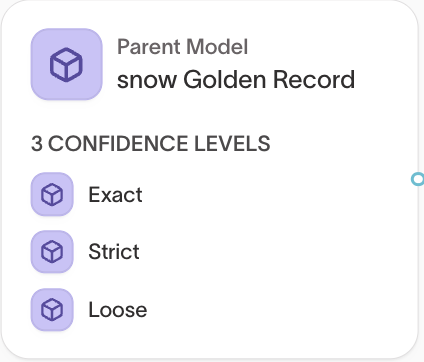
- Appears as a distinct parent model option for audience creation (for example,
Exact – Golden Record,Strict – Golden Record,Loose – Golden Record)
Confidence level options shown in the parent model selector are filtered views of the same underlying Golden Record model, not separate models you need to create or manage.
Start with Exact and Strict. Add Loose only if broader reach is required and a higher risk of false positives is acceptable.
Confidence levels are visible and manageable in multiple places:
- Identity graph Configuration tab (when enabling probabilistic matching)
- Customer Studio → Schema → Golden Record model → Confidence levels tab
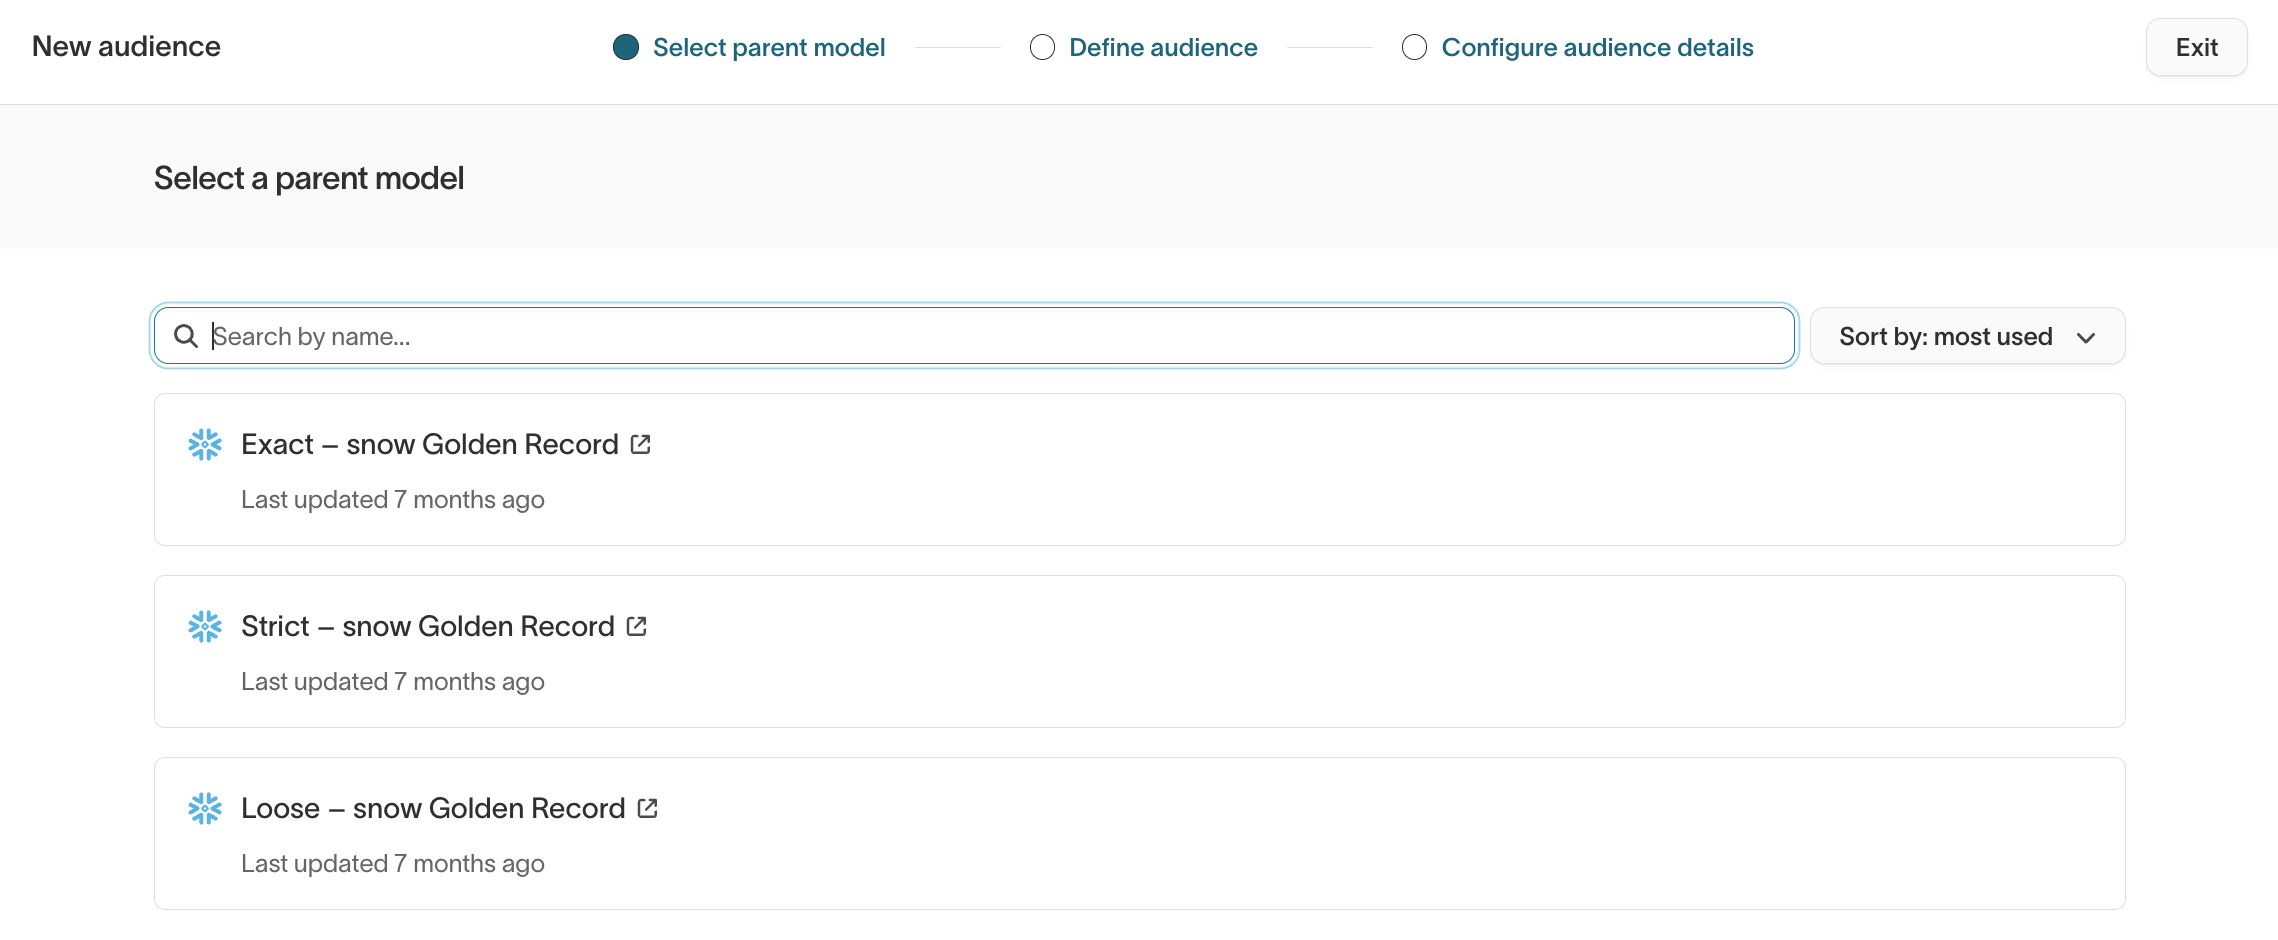
- Audience builder → Select a parent model, where each confidence level appears as a parent model option
Example use cases
| Tier | Example use case |
|---|---|
| Exact | Transactional messaging, receipts, loyalty programs, and compliance-sensitive workflows |
| Strict | Lifecycle and personalization campaigns |
| Loose | Paid media, upper-funnel analytics, experimentation, and reach expansion |
Run and validate
After enabling probabilistic matching and saving the configuration:
-
Open the identity graph and click Run.
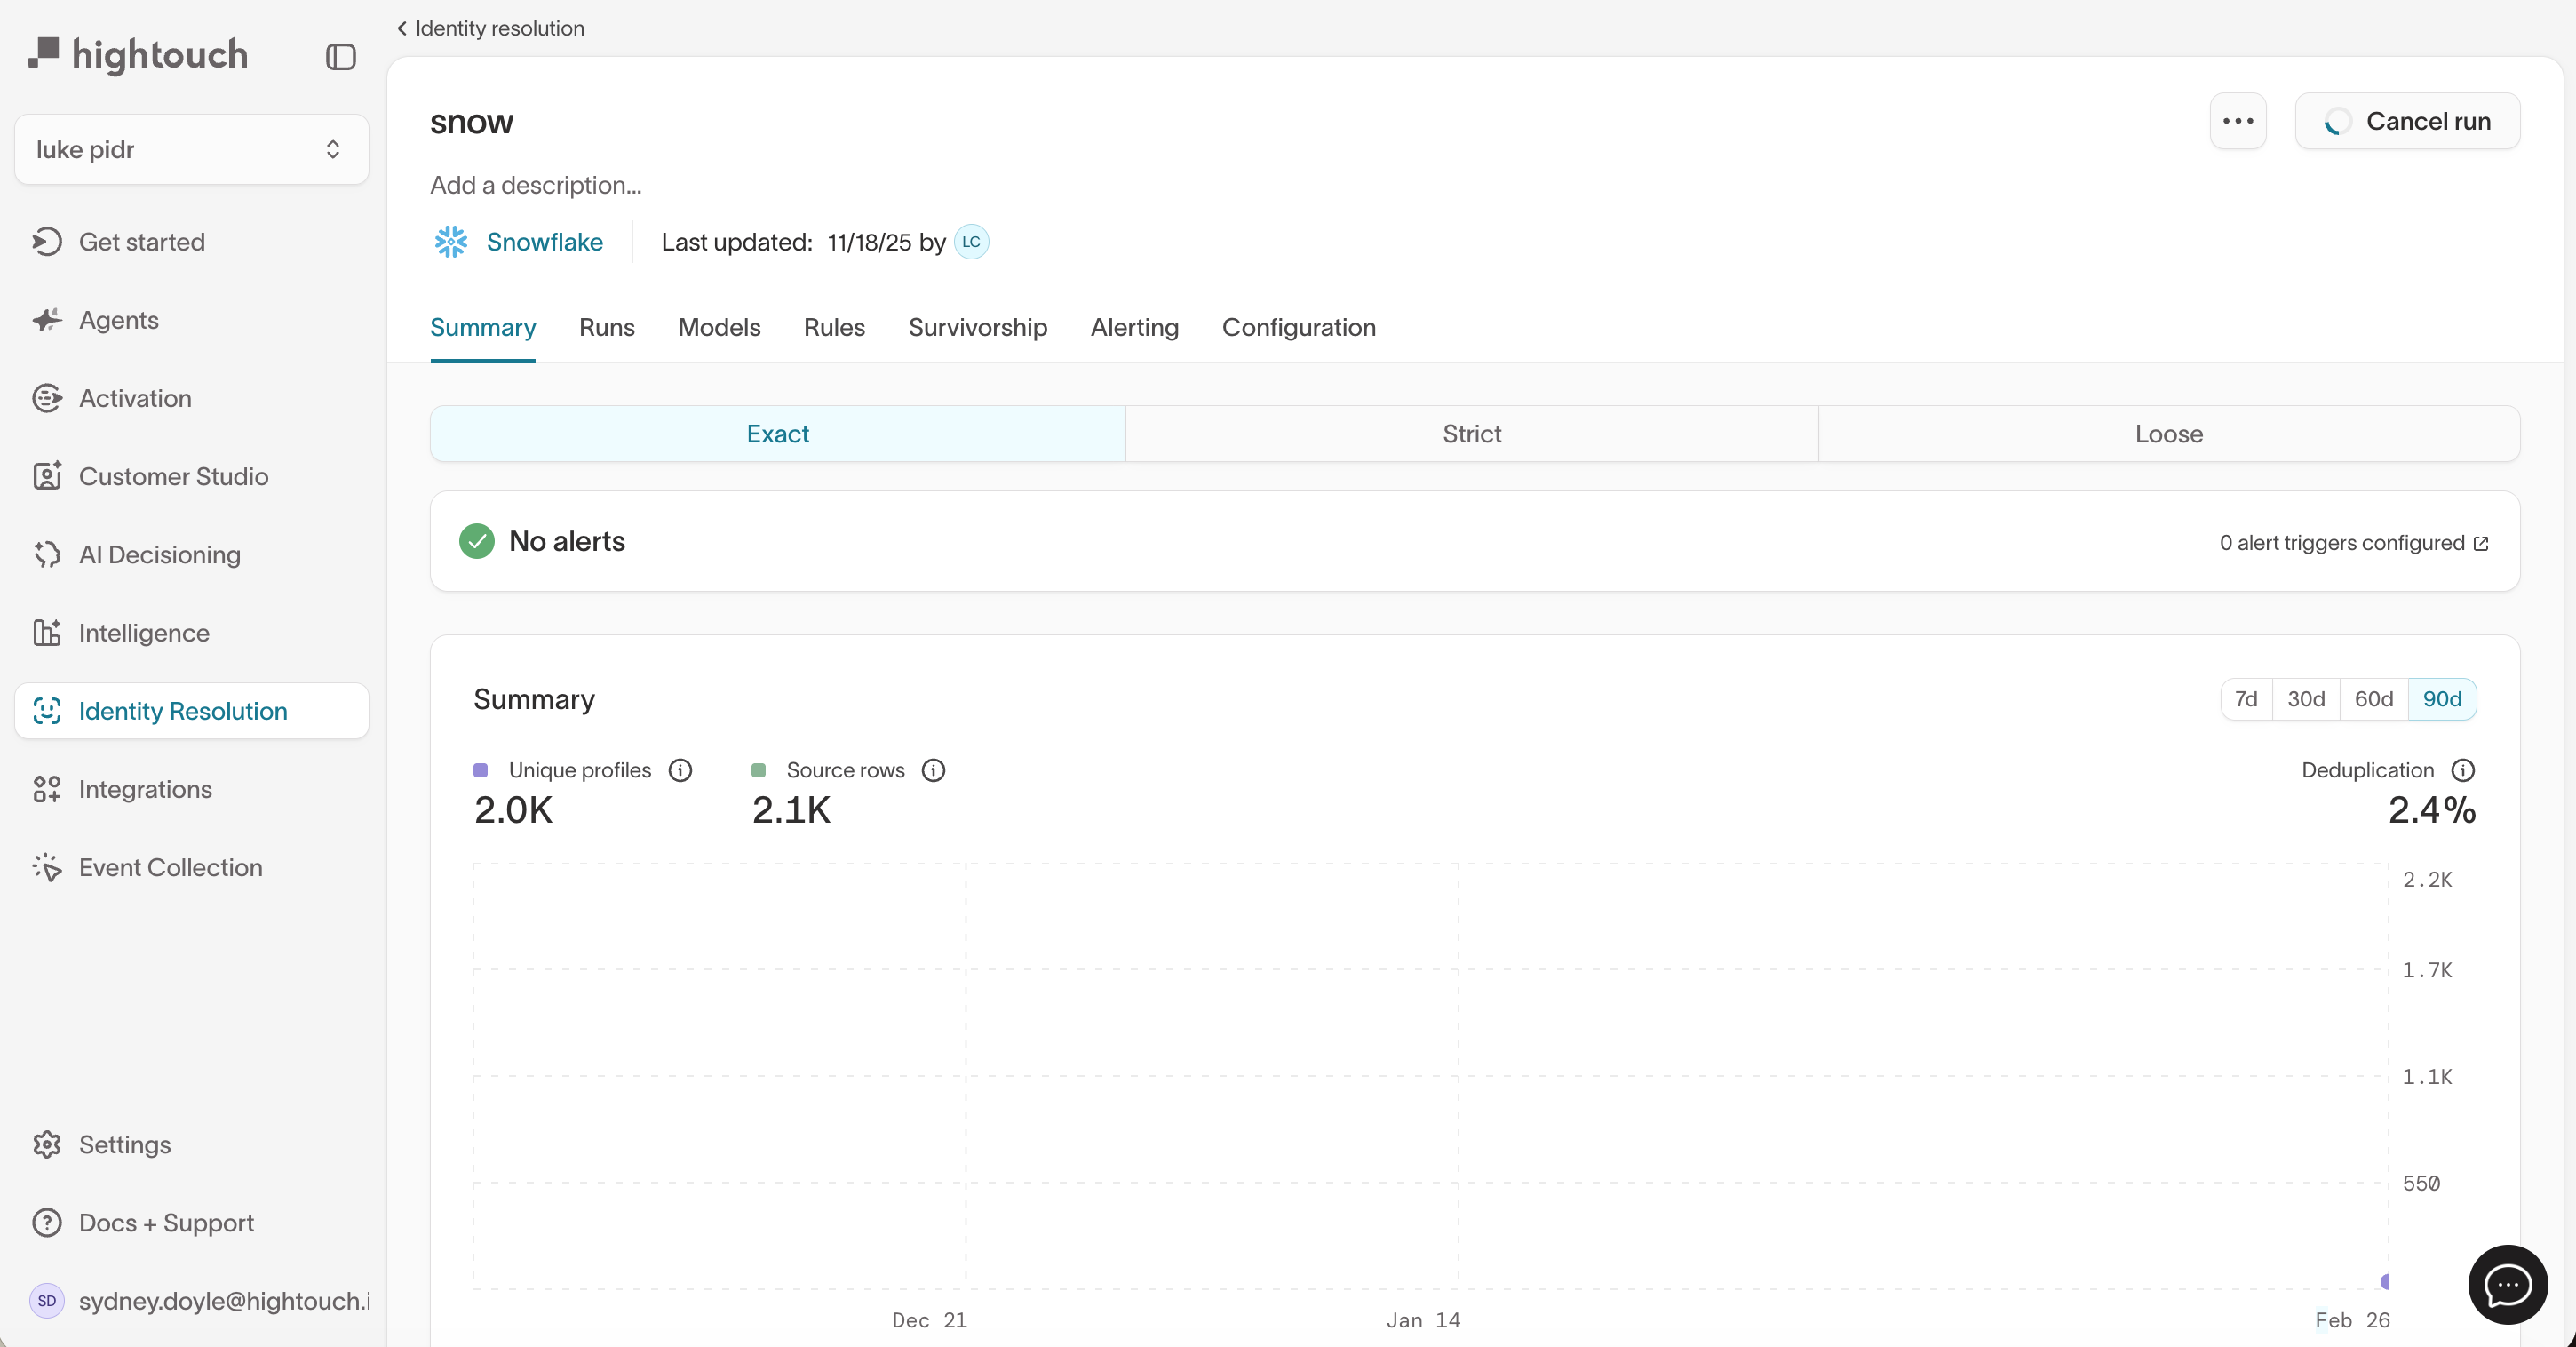
-
In the Summary tab, use the Exact / Strict / Loose tabs to review how results change across tiers.
-
Use the Profiles view to inspect individual identities:
- Confirm that higher-confidence tiers (Exact, Strict) look correct
- Pay special attention to Loose profiles for signs of over-merging
-
If needed, adjust:
- Confidence levels that are enabled
- Which identifiers participate in probabilistic matching
- Any workspace-level settings that affect probabilistic matching
Then rerun the graph and review changes.
See Review and validate matches for detailed QA workflows.
If you see over-merging (for example, profiles that contain many unrelated emails, phones, or postal codes), consider removing noisy identifiers from probabilistic matching or limiting downstream use to higher-confidence tiers.