| Audience | Marketers, platform admins |
| Prerequisites |
|
Assets are the files the agent puts into generated ads: product photography, logos, lifestyle imagery, templates, and video clips. Upload your own, or use the ads synced from your connected ad platforms.
How Ad Studio uses your assets
When the agent generates an ad, it picks assets based on your prompt, the asset type, and your brand guidelines. Product ads also draw on your product catalog. You don't select files by hand.
The Assets page has two tabs:
- Uploaded — Files you added. You control these.
- Synced — Ads imported automatically from your connected ad platforms. These are read-only, and the agent uses them as reference when generating new creative rather than placing them in ads.
Assets aren't the same thing as brand guidelines. Guidelines tell the agent what good looks like. Assets are the files it can actually use.
Create an asset type
Asset types group related files and tell the agent how to use them. Create a separate type for each purpose: product photography, logos, templates, and lifestyle imagery all need different handling, so keep them apart.
To create one, go to Ad Studio > Assets and select Add asset type.
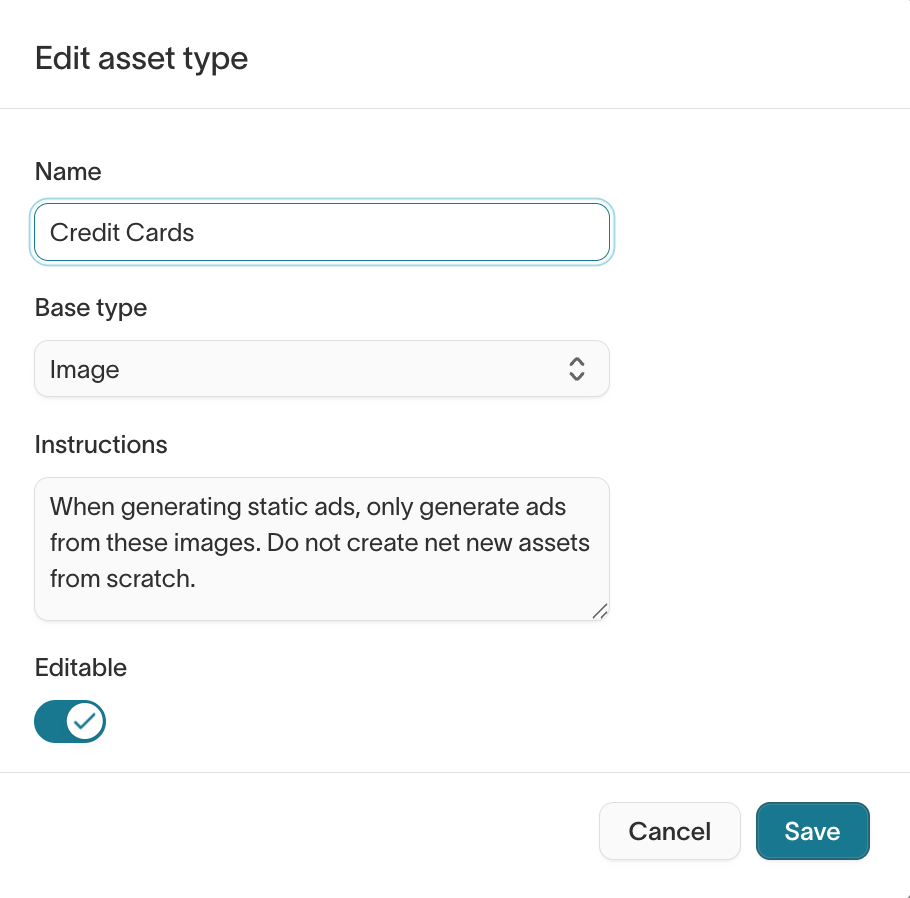
When you create an asset type, you decide:
- What to call it, and whether it holds images, video, or components.
- How the agent should use the files in it.
- Whether the agent can edit them.
- Whether every request includes them.
- Whether one brand owns them. Assign a brand profile to keep the files out of your other brands' ads, or leave it unset so every brand can use them.
Tell the agent how to use the files
Write instructions the way you'd brief a freelancer who hasn't seen your ads before. For example:
- "Use these only as background photography."
- "Never crop product photography."
- "Keep logos in their original colors."
Instructions apply to every file in the type, so they're the cheapest way to enforce a rule you'd otherwise repeat in every prompt.
Decide which files the agent can edit
Turn Editable off for files that must appear exactly as supplied:
- Product photography
- Brand logos
- Licensed imagery
- Approved marketing collateral
Turn it on for files the agent is meant to adapt:
- Design templates
- Background imagery
- Illustrations
- Reusable creative elements
If you're unsure, leave it off. Loosening the restriction later is easy; noticing that an asset was quietly regenerated is not.
Decide which files load into every request
Turn on Always load into context for the few files the agent should see every time, such as your primary logos and brand lockups.
Leave it off for large collections like product photography, campaign imagery, or lifestyle shots. Sending every file with every request crowds out the ones that matter for the ad you're making.
Upload assets
- Go to Ad Studio > Assets.
- Select the asset type you want to add to.
- Select Upload, or drag files onto the page.
You can upload one file or many at once. To remove a file, select it and select Delete. Deleting a file stops the agent using it in new ads, and leaves existing ads untouched.
Upload a range of material: product shots, lifestyle imagery, logos in several formats, icons, and background textures. A varied library gives the agent more to work with and produces more distinct concepts.
Upload Figma templates
To use your Figma ad templates, export them as SVG and upload them as Component assets. In Figma's export settings, leave Outline text unchecked. That keeps the text layers editable, so the agent can replace copy in the template instead of redrawing it.
Reference assets in a prompt
The agent chooses assets on its own, but you can name one to override that. Refer to a file exactly or loosely, such as "the blue sweater," and say whether to use it as-is or as a starting point.
During iteration you can swap assets in the chat, such as "use the lifestyle shot instead of the product image," or select a specific file in the visual editor.
See Reuse assets from your workspace for the wording that works.