| Audience | Marketers, creative teams |
| Prerequisites |
|
Ads are the creative output of Ad Studio. Start a chat, choose a starting point, and prompt the agent to generate concepts you can refine and launch.
How ads work in Ad Studio
Every ad follows the same six steps:
- Start or open a chat for the campaign you're working on.
- Choose a starting point (optional) — a brief, a product, an existing ad, a competitor ad, or a trend. You can skip this and just describe what you want.
- Prompt the agent to describe what you want.
- Review the generated concepts and pick the ones worth keeping.
- Refine them in the chat or the visual editor.
- Launch to an ad platform, or open the ad in Figma.
This page covers the first four steps — starting a chat and generating concepts. Refining, launching, and handing off to Figma each have their own page. For prompt patterns and copy-paste templates, see the Prompting guide.
Start a chat
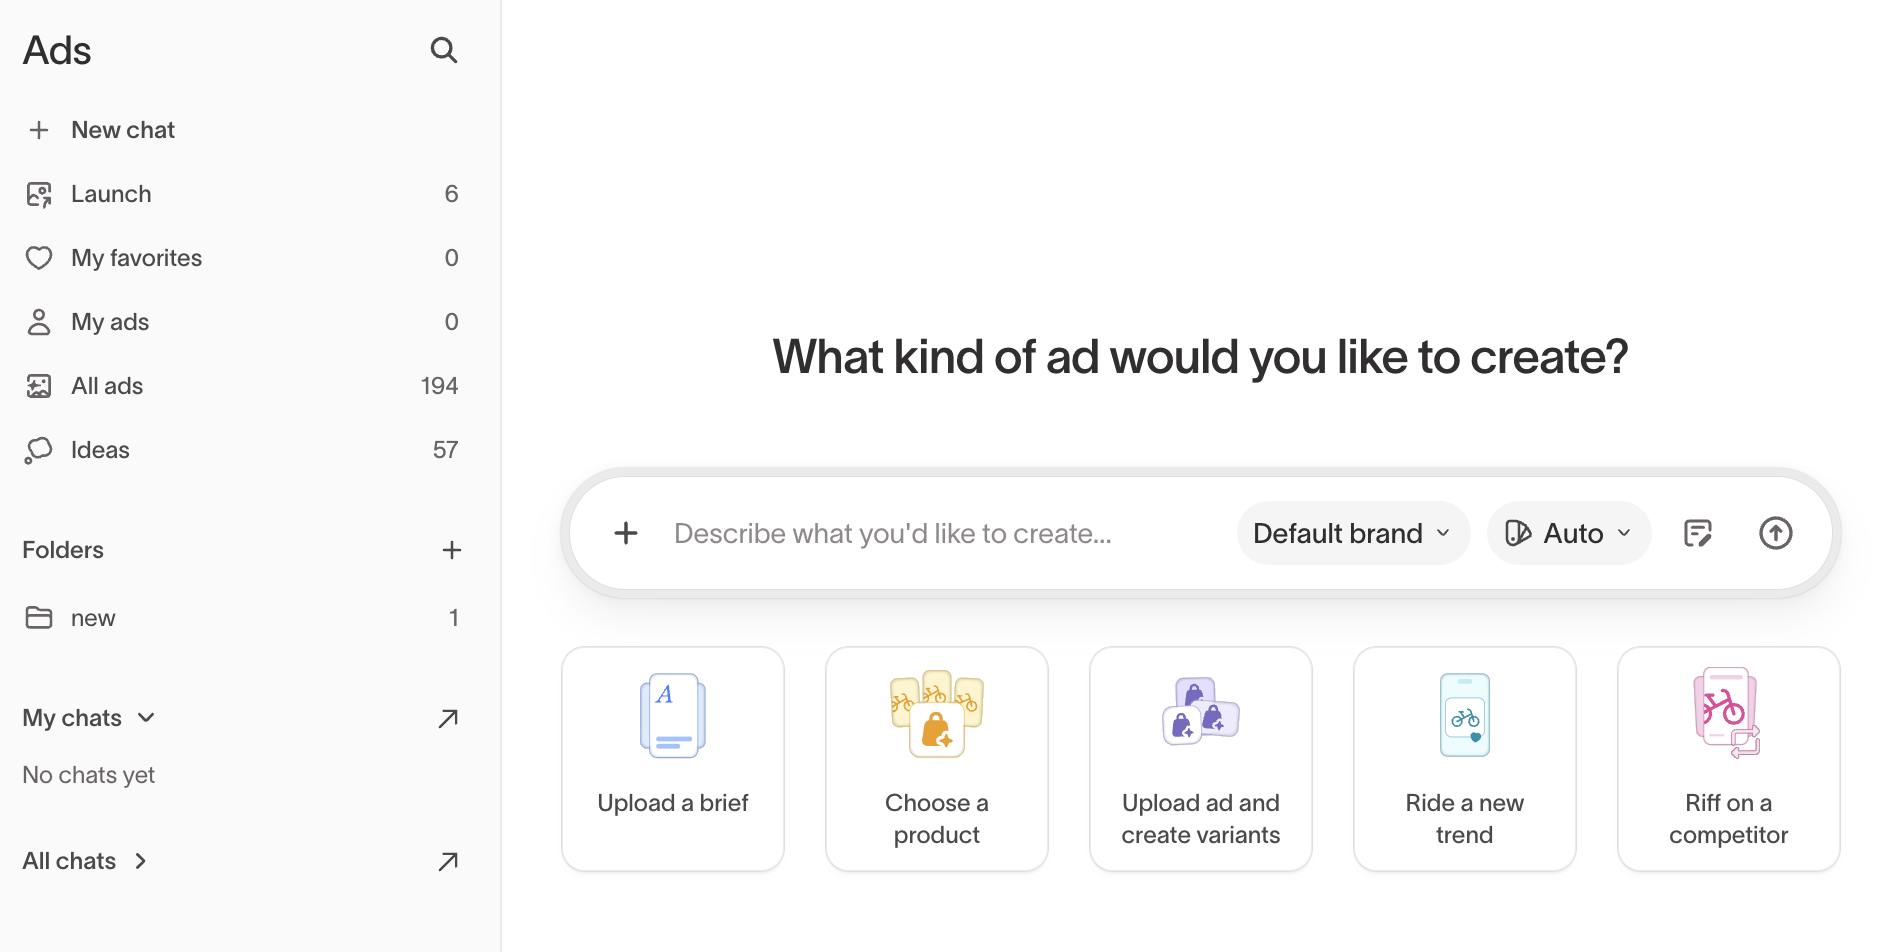
Each chat is where you create ads for a campaign or creative initiative. Select New chat in the sidebar, describe what you want, and the agent generates concepts in that chat. The chat keeps its conversation history and the ads generated in it together.
To give the agent reference material for a single request, attach files directly in the chat. For material that should inform every ad you make — brand guidelines, logos, fonts, and reusable assets — add it as durable context in Context Hub and Assets instead of re-attaching it each time.
Your ads aren't locked inside one chat. Folders and the sidebar collections let you find and group any ad regardless of which chat made it.
Create ads
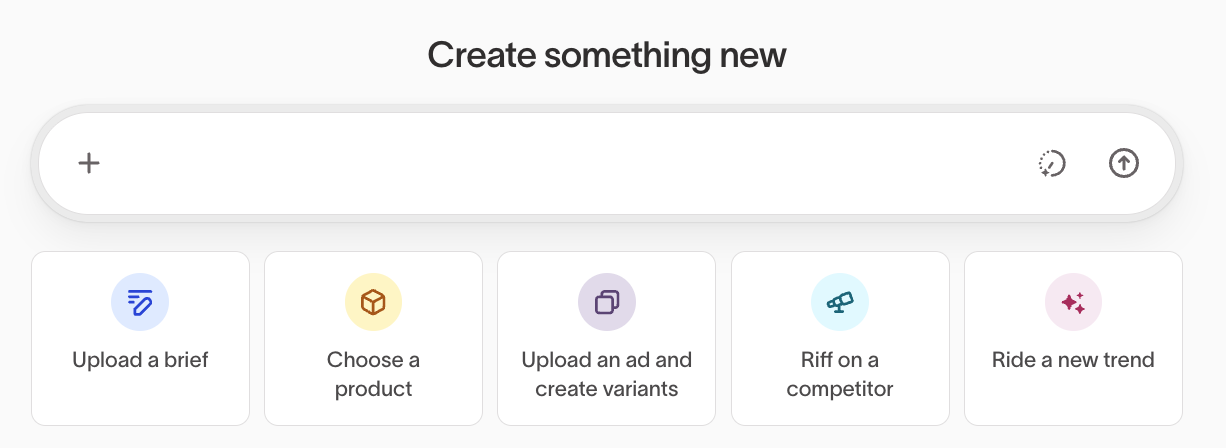
Every ad starts in a chat. Set your brand and style, then describe what you want or pick a starting point to work from.
Select a brand and style
Set two controls in the chat before you generate, and change them on any round:
- Brand — Which brand profile the agent draws from: its business context, guidelines, logos, and fonts. You never have to describe your brand in a prompt, and your default brand is selected to start.
- Style — The visual direction. Leave it on Auto to let the agent decide, pick a saved style to lock a defined look, or choose No style. Styles are filtered to the selected brand, so switching brands resets the style to Auto.
Your uploaded assets, synced ads, and product catalog are also available for the agent to draw on when you reference them.
Choose a starting point
Describe what you want in the text input, and Ad Studio combines your prompt with your brand, guidelines, assets, and selected style to generate concepts.
For a more guided start, select one of the five creation modes. Use this table to pick one:
| Start with | When |
|---|---|
| Upload a brief | You already have a campaign brief, one-pager, or written requirements. |
| Choose a product | You want ads built from real product images, descriptions, and pricing. |
| Create variants | You have an ad that performs well and want alternatives to test against it. |
| Riff on a competitor | You've seen a competitor ad and want your own version of the idea. |
| Ride a new trend | A cultural moment is happening now and you need creative quickly. |
Upload a brief
Use this when you already have a campaign brief or creative brief. It's the most open-ended starting point and the most common way to create ads.
- Go to Ad Studio > Ads and select New chat.
- Select Upload a brief.
- Upload the document, or describe the campaign in the text input.
- Add any extra instructions, such as how many ads you want or which part of the brief matters most.
- Review the generated ads.
Ad Studio pulls the audience, message, and selling points from the brief and combines them with your brand context and uploaded assets.
Name your target audience, key differentiators, and the tone you want. Specific inputs produce more relevant creatives on the first pass.
Choose a product
Use this when you want ads built around a specific product. Ad Studio pulls product images, descriptions, and pricing from your product catalog.
- Go to Ad Studio > Ads and select New chat.
- Select Choose a product.
- Search or browse your catalog and select one or more products.
- Review the generated ads.
This mode needs a configured product catalog. See Product catalog for setup.
Upload an ad and create variants
Use this when you have an ad worth testing against — usually your top performer. Ad Studio holds the core idea and varies the parts you name.
- Go to Ad Studio > Ads and select New chat.
- Select Upload ad and create variants.
- Upload an ad, or select one from your library.
- Name what should vary: headline, imagery, format, CTA, or a combination.
- Review the generated variants.
Riff on a competitor
Upload a competitor ad to generate new concepts inspired by its layout, messaging, or visual direction. Ad Studio applies your own brand context instead of copying the original creative.
- Go to Ad Studio > Ads and select New chat.
- Select Riff on a competitor.
- Upload or describe the competitor ad.
- Review the generated ads.
You can also browse competitor ads in the Competitors tab of Insights and start from there.
Ride a new trend
Use this when a cultural moment, trending topic, or timely event is happening and speed matters.
- Go to Ad Studio > Ads and select New chat.
- Select Ride a new trend.
- Describe the trend or moment.
- Review the generated ads.
Start from an idea
Ad Studio generates a weekly feed of ad ideas drawn from your performance data, competitors, and cultural signals. Open Ideas in the sidebar to browse the feed, or select Generate ideas now to run it on demand. New ideas are checked against the last 30 days, so the same concept doesn't come back twice.
Each idea has a name, a short rationale, the evidence behind it, and source tags that show where it came from, such as Competitors or Customer voice. Every idea ships with editable mockups, so you see the concept instead of only reading it.
When an idea is worth pursuing, select Use idea. Ad Studio opens a new chat, writes a brief from the idea, and generates the ads for you to refine. Select Discard to remove one that isn't relevant.
Create more formats
Generate additional sizes
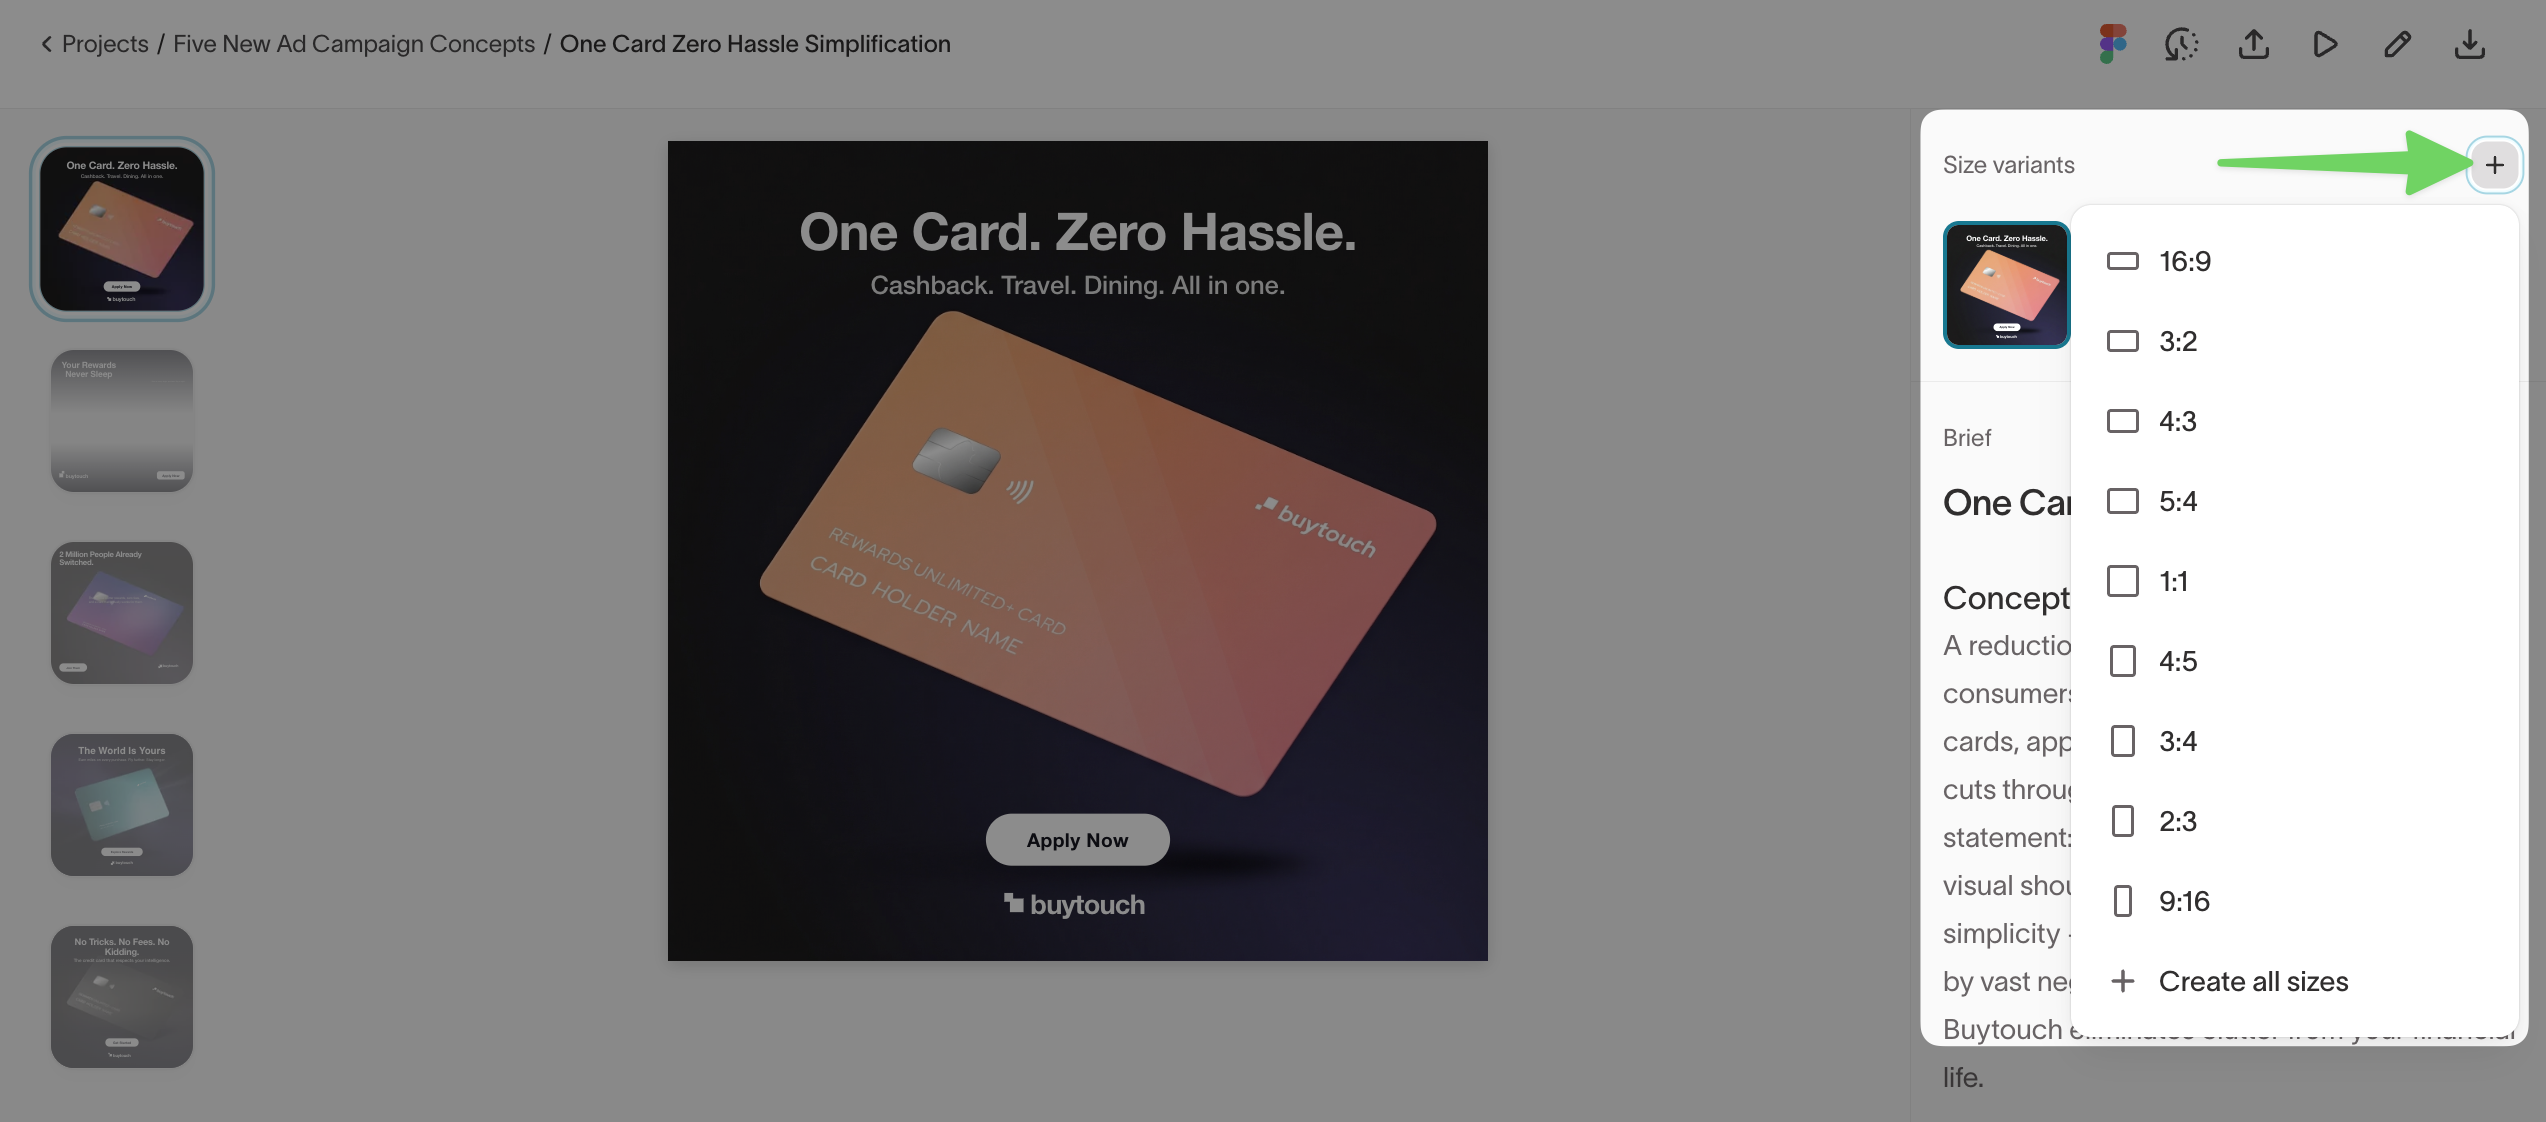
Select + in the Size variants panel to add aspect ratios. The defaults are 16:9, 3:2, 4:3, 5:4, 1:1, 4:5, 3:4, 2:3, and 9:16, and your list also includes any custom channels and sizes configured for your workspace. Select Create all sizes to generate every format at once.
Size variants appear beside the primary creative so you can review them together.
Animate a static ad
Select one or more static ads and prompt the agent to animate them. Your typography, logo, and layout stay as designed, so the agent only solves for movement.
For example: "Animate these ads, make them cinematic," or "Turn this into a motion ad with moving text and a product reveal."
Create motion ads from scratch
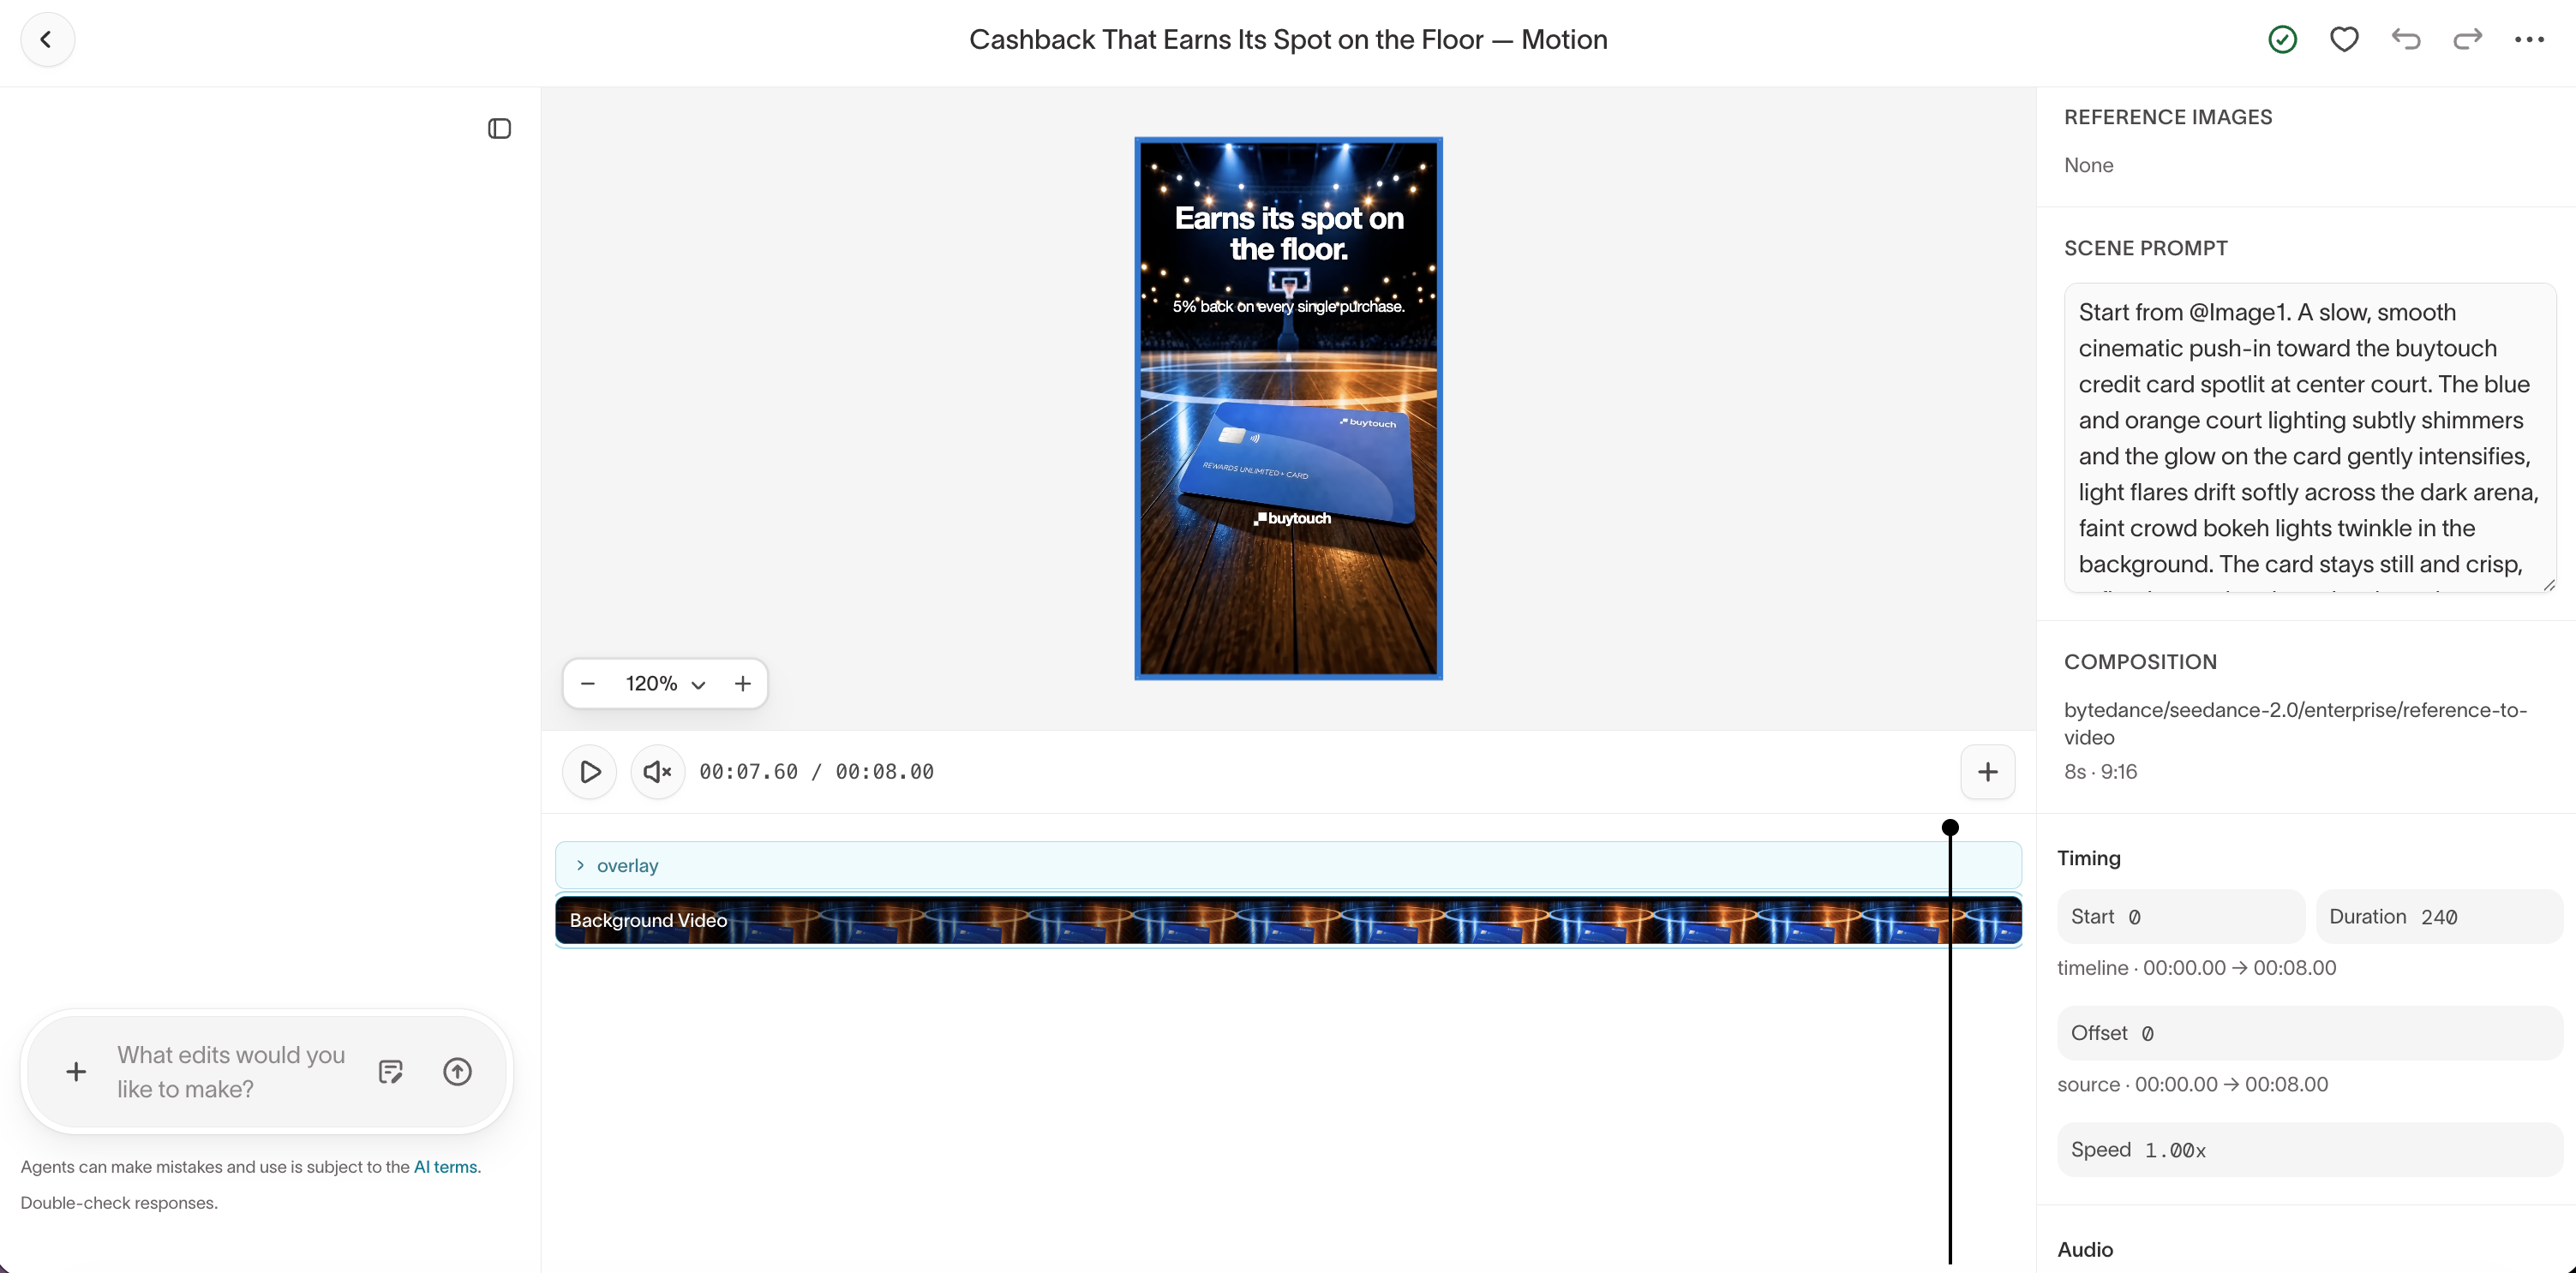
Prompt the agent for motion video directly from a brief, the same way you would for statics. For example: "Create 5 new motion video ads based on these concepts."
Motion ads support 1:1, 9:16, 16:9, 4:3, 3:4, and 21:9. Ask the agent for other sizes in the chat.
Sync your ad accounts in Context Hub's Connections. The agent uses video ads from your connected platforms as reference when generating new ones, and synced ads appear under Assets in the Synced tab.
Detailed prompting matters more for video than for statics. See Create motion ads for templates.
Turn a long video into multiple ads
Attach a long video, such as a brand film, product demo, or customer story, and prompt the agent to cut it into standalone short ads. Ask for cuts on natural scene breaks and an end card on each clip, so every ad carries one message instead of reading as an excerpt.
The agent creates a separate editable ad for each clip, so you review, resize, and launch them individually. See Turn a long video into multiple ads for the prompt.
Organize your ads
Your ads live across every chat you create, so Ad Studio gives you a few ways to find and group them from the sidebar:
- All ads — Every ad in the workspace, across all chats.
- My ads — Ads from the chats you created.
- My favorites — Ads you've favorited with the heart icon in the toolbar, gathered in one place.
- Folders — Group related ads no matter which chat produced them. A folder can hold ads from multiple chats, and its own Launch tab lets you launch all of a folder's ads together.